TASCAM HS-20
55
7 – Timeline mode
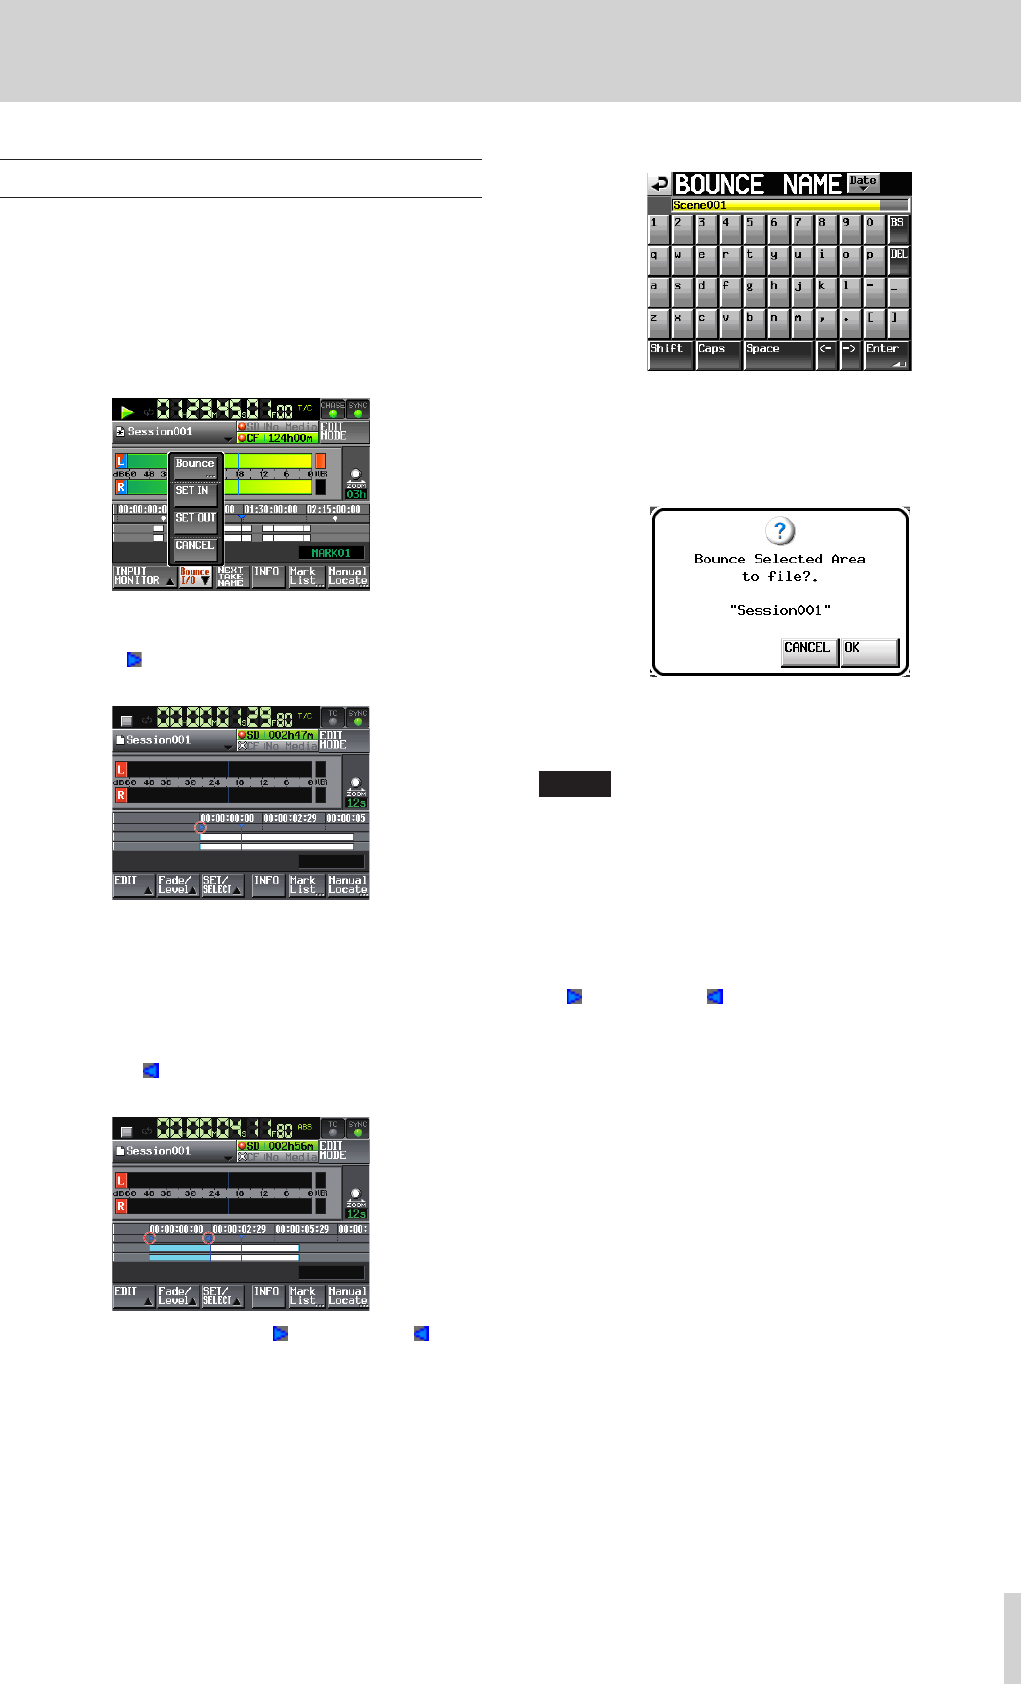
Bouncing
You can output part of a region or an interval that crosses
multiple regions as a single take.
Setting the bounce starting point
1. Touch the HOME key to open the Home Screen.
2. Use the m and , keys, for example, to locate the
timeline cursor to the bounce starting point (time).
3. Touch the Bounce I/O button to open a pull-up menu.
4. Touch the SET IN button on the pull-up menu to set the
bounce starting point (IN point).
The IN mark (
) appears at the current position in the mark
display area.
Setting the bounce ending point
5. Use the m and , keys, for example, to locate the
timeline cursor at the bounce ending position (time).
6. Touch the Bounce I/O button to open a pull-up menu.
7. Touch the SET OUT button on the pull-up menu to set the
bounce ending point (OUT point).
The OUT mark (
) appears at the current position in the
mark display area.
The range between the IN mark (
) and OUT mark (
) will
be edited, and is shown in light blue.
Bouncing the interval
8. Touch the Bounce I/O button to open a pull-up menu.
9. Touch the BOUNCE button on the pull-up menu to open the
BOUNCE NAME screen where you can input the bounce file
name.
Input the file name. Follow the procedures in “Editing the
name of a folder in the root directory” on page 33.
10. Touch the Enter button. When a confirmation message
pop-up appears, touch the OK button or press the DATA
dial.
While the file is being created, a progress status pop-up
appears.
When file creation completes, the pop-up disappears.
NOTE
You can cancel a bounce by pressing the CANCEL button
while the progress pop-up window is open.
Clearing the bounce starting and ending points
11. Touch the Bounce I/O button to open the pull-up menu.
12. Touch the CLEAR button on the pull-up menu. When a
confirmation pop-up window appears, touch the OK button
or press the DATA dial.
The current IN and OUT points are deleted, and the IN mark (
) and OUT mark (
) disappear from the mark area.


