46
TASCAM HS-20
7 – Timeline mode
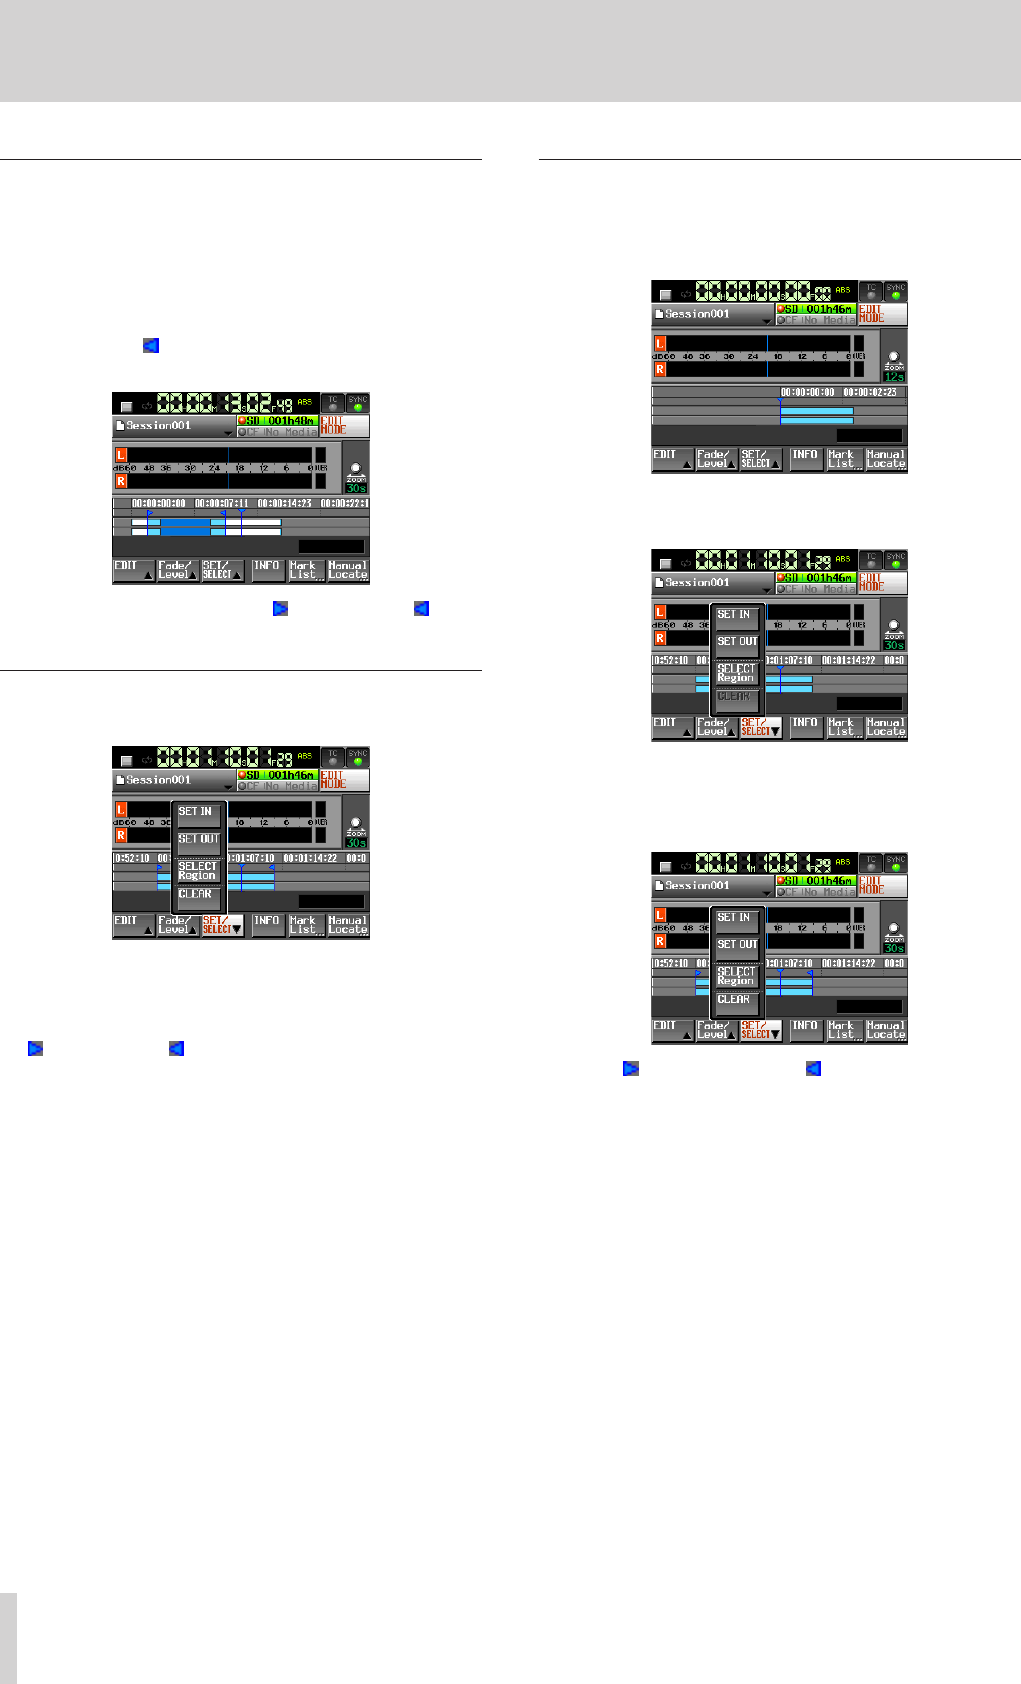
Setting the editing end point
6 Use the m and , keys, for example, to locate the
timeline cursor at the position (time) where you want to end
editing.
7. Touch the SET/SELECT button to open the pull-up menu.
8. Touch the SET OUT button on the pull-up menu to set the
editing end point (OUT point).
The OUT mark (
) appears at the current position in the
mark display area.
The range between the IN mark (
) and OUT mark (
) will
be edited, and is shown in light blue.
Clearing the editing start/end points
1. Touch the SET/SELECT button to open the pull-up menu.
2. Touch the CLEAR button on the pull-up menu. When a
confirmation pop-up window is displayed, touch the OK
button or press the DATA dial.
The current IN and OUT points are deleted, and the IN mark (
) and OUT mark (
) disappear from the mark area.
Selecting a complete region for editing
1. Press the HOME key on the front of the unit to open the
Home screen.
2. Touch the EDIT MODE button to enter edit mode.
3. Move the timeline cursor to the region to be edited.
4. Touch the SET/SELECT button to open the pull-up menu.
5. Touch the SELECT Region button on the pull-up menu to
select the entire region at the timeline cursor. The beginning
of the region is set to the edit start (IN) point and the end of
the region is set to the edit end (OUT) point.
The IN (
) mark and OUT mark (
) are shown at the
beginning and end of the region in the mark area. The range
between the marks will be edited and is shown in light blue.


