


Operation: DN9344E
54
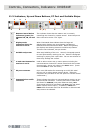
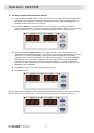
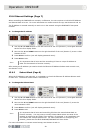
15.6. Ethernet Settings (Page 7)
When controlling the DN9340E unit remotely via Ethernet, the unit requires an individual IP Address
and Subnet Mask to be set. For more information on remote control set ups, see Sections 9 and 10.
The IP Address is entered manually on each unit in the network using the DN9344E’s front panel
controls.
To change the IP address
1 Use the UP and DOWN buttons on the left-hand half of the unit (Section 1) to navigate between
each of the four display fields.
2 Now use the UP and DOWN buttons on the right-hand half of the unit (Section 2) to set a value
between 0-255.
3 Press SETUP to confirm (unit will display password menu).
4 Press SETUP to exit.
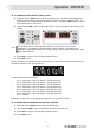
Note
It is important that all units and the controlling PC have a unique IP Address in
order for the network to function correctly.
After setting the IP address you need to check the Ethernet IP Address Subnet mask on each unit,
see Section 15.6.2.
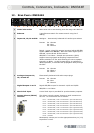
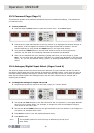
15.6.2 Subnet Mask (Page 8)
When the IP Address is set manually, it is necessary to check the Ethernet IP Address Subnet mask
on each unit. The default subnet mask is 255.255.0.0.
To change the Subnet Mask
1 Use the UP and DOWN buttons on the left-hand half of the unit (Section 1) to navigate between
each of the four display fields.
2 Now use the UP and DOWN buttons on the right-hand half of the unit (Section 2) to set the
value between 0-255.
3 Press SETUP to confirm (unit will display password menu).
4 Press SETUP to exit.
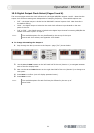
Note
It is important that all units and controlling PCs have the same Subnet Mask to
function correctly. You may want to modify Subnet Masks where one area of the
network is required to be ‘hidden’ from another, for example, in an installation with
one network but multiple auditoriums. For more information on configuring your
network, please see the HELIX DN9340E/DN9344E RCS User Guide.
For more information on remote control setups, see Sections 9 and 10.