


Quick Reference
3
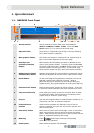
1. QUICK REFERENCE
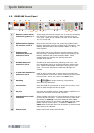
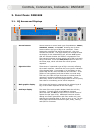
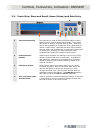
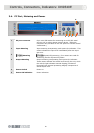
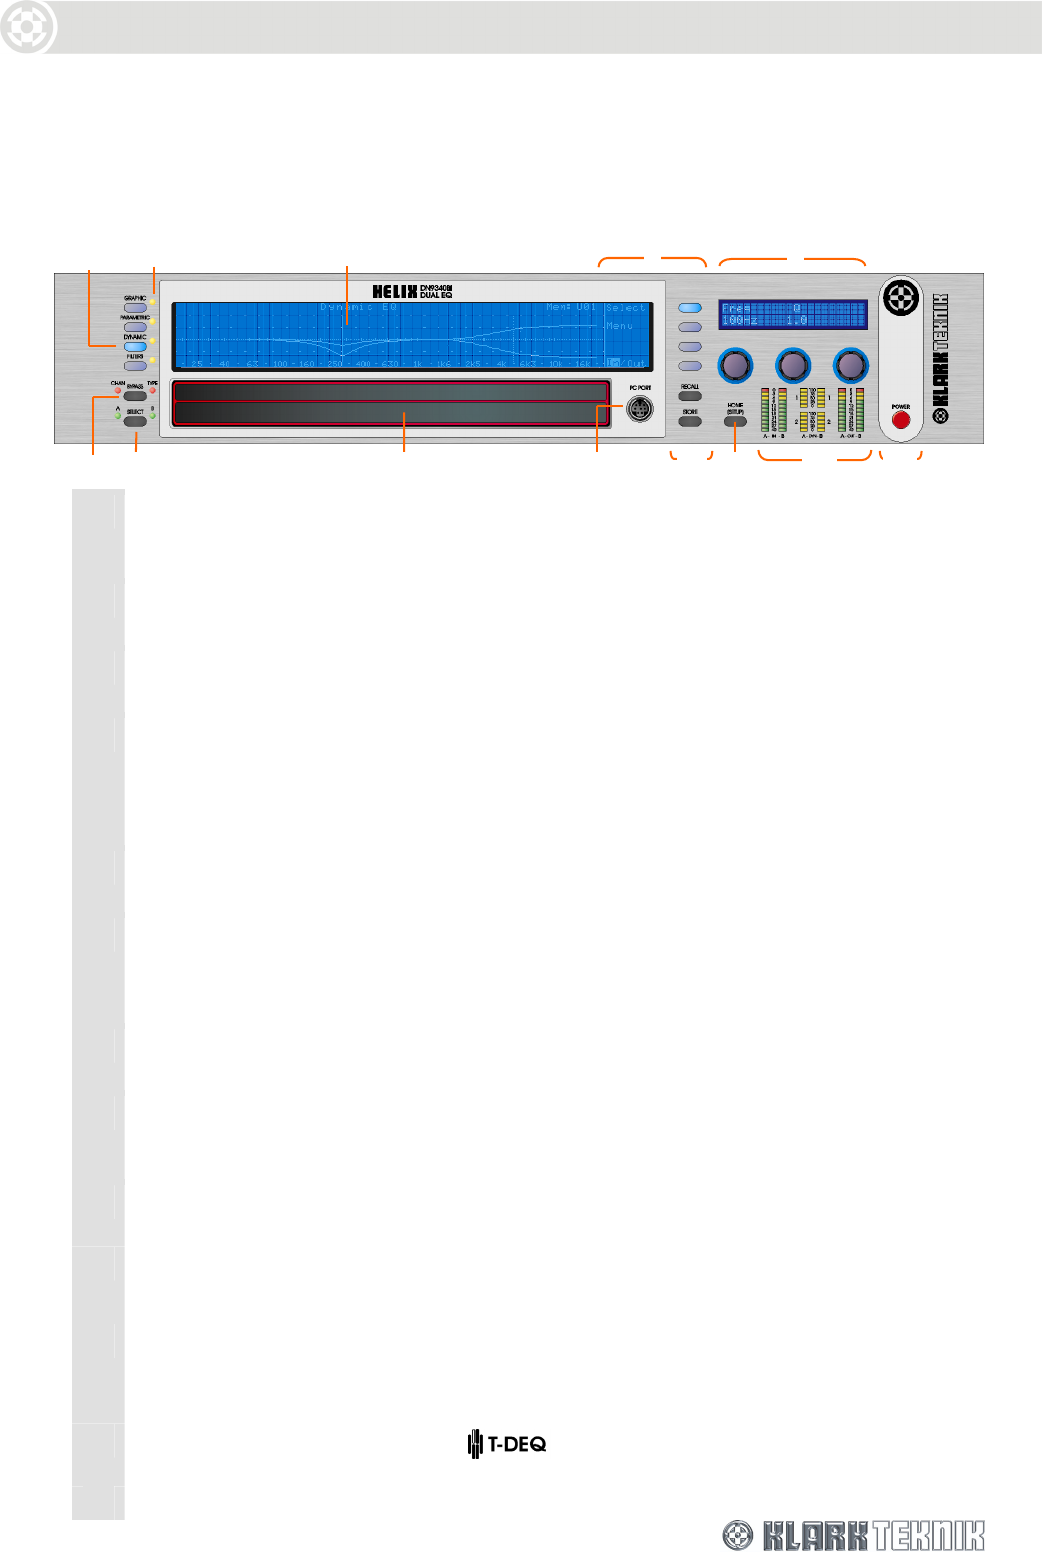
1.1. DN9340E Front Panel
1 Access buttons Access buttons to control each type of equalisation –
GRAPHIC, PARAMETRIC, DYNAMIC, FILTERS. Press the HOME
(SETUP) button (11) to return to the home page.
2 EQ active LEDs These show if a particular type of EQ is currently affecting
the overall frequency response.
3 Main graphic display This shows the frequency response of the selected type of
EQ, or the overall response on the home page.
4 Soft keys and
secondary function
display
Select options and secondary functions as labelled on the
right of main graphic display. Typically, these include Select
to choose a particular filter, and Menu to step round a circular
choice of options for that type of EQ. On the home page
these buttons access the gain, delay and naming functions.
5 Alphanumeric display
and data entry knobs
Displays menu pages for viewing/defining parameter values.
Values are adjusted via the left, centre, right control knobs.
6
BYPASS button
On the home page this bypasses the complete unit for the
selected channel (both channels if linked). When a
particular EQ type is selected (by the buttons above the
bypass switch), the bypass operates on that type of EQ only.
7
Channel SELECT button
Press to select either channel A or B for control. If the unit
is linked for stereo operation then both indicators will be lit.
8 Two part touch strip Press either part briefly to select a particular filter or fader.
In Graphic EQ mode, press and hold to increase the level
(upper strip) or reduce it (lower strip).
9 PC port Use with the supplied cable to install software updates or to
control the unit from an external computer.
10
STORE and RECALL
buttons
Used to store complete unit settings to one of the 64
memory locations (32 from unit and 32 from the PC) and
then to recall them.
11
HOME (SETUP) button
Press once to return to the home page. Once on the home
page, press and hold for one second to access the Setup
menu. Step through the Setup menu (and exit after the last
item) by repeatedly pressing this button.
12 Metering
Input,
and Output metering incorporating
multi-point clip indication.
13 Power panel Power switch and power ON indication.
7 8
4
2
1
3
5
12
13
6
9 10
11