


Installation
Runco X-200i Series Installation/Operation Manual 35
PRE
L
IMINAR
Y
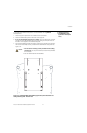
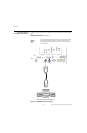
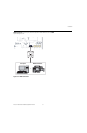
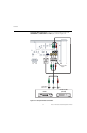
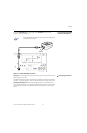
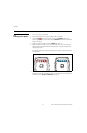
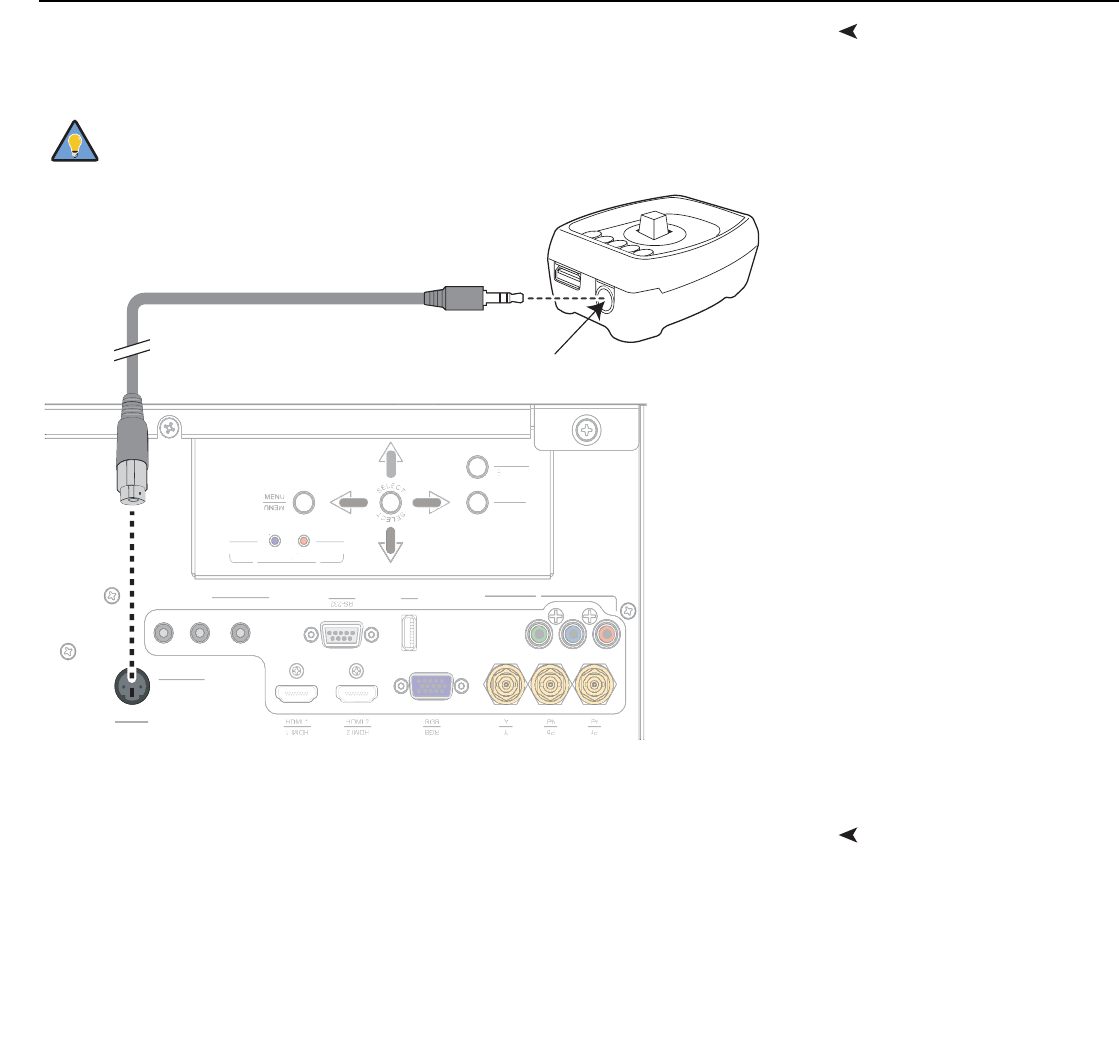
Connecting the Active 3D
Emitter to the Projector
Connect the 3D SYNC IN port on the emitter to the 3D SYNC connector on the
projector, as shown in
Figure 3-17.
Figure 3-17. Active 3D Emitter Connection
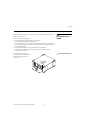
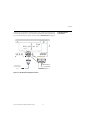
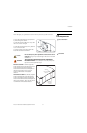
Connecting to AC PowerProjector: The X-200i ships with various types of AC power cords. Choose the one that
is appropriate to your locale.
Plug the female end of the power cord into the AC receptacle on the rear of the projector
(AC 100V ~ 240V); see
Figure 2-2. Then, connect the other end to your AC power source.
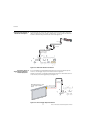
AutoScope Lens Motor: With AutoScope-equipped projectors, an additional power
cord is provided for the lens motor. Plug the female end of the AC power cord into the AC
input on the rear of the lens motor assembly. Connect the other end to your AC power
source.
Secure the emitter in the desired location using double-sided tape or
a similar adhesive material.
Tip
3D SYNC
3D SYNC
RS-232 USB
USB
COMPONENT 1
COMPONENT 1
12V TRIGGER
III
12V TRIGGER
WIRED REMOTE
WIRED REMOTE
POWER
SOURCE
SOURC
POWER
ISSUE
ISSUE
POWER
POWER
LED STATUS
LED STATUS
RS
-2
32
US
B
USB
CO
MP
O
NENT
1
CO
MP
O
NENT
1
12V TRI
GG
E
R
III
12V TRI
GG
E
R
W
IRED REM
O
TE
W
IRED REM
O
T
E
P
OWER
SOUR
C
E
SOURC
POWE
R
ISSU
E
ISSU
E
PO
WER
P
OWER
LED ST
A
T
T
TUS
A
A
LED ST
A
T
T
TUS
AA
3D
SYNC IN