Software Upgrading and Installation Installation of a New System - Page 15
Installation Procedure
The following details the procedures for installation of a new system using the
Configuration Wizard found on the Administration CD. Alternatively, if you are
upgrading the software on an existing IPNC, see page 9.
CAUTION: When upgrading an IPNC to level 3.2, the IPNC must be returned to
it's factory default settings. Hence it is strongly recommended that,
when upgrading a previously configured system (see Installing
Software Upgrade on page 9), a hard copy of the system's
operational configuration settings is made.
Perform the following instructions for installation of a new system:
1. Insert the Admin Software CD (which should self start unless this feature has
been disabled on the PC). Read the Welcome screen and use the Next
button to proceed.
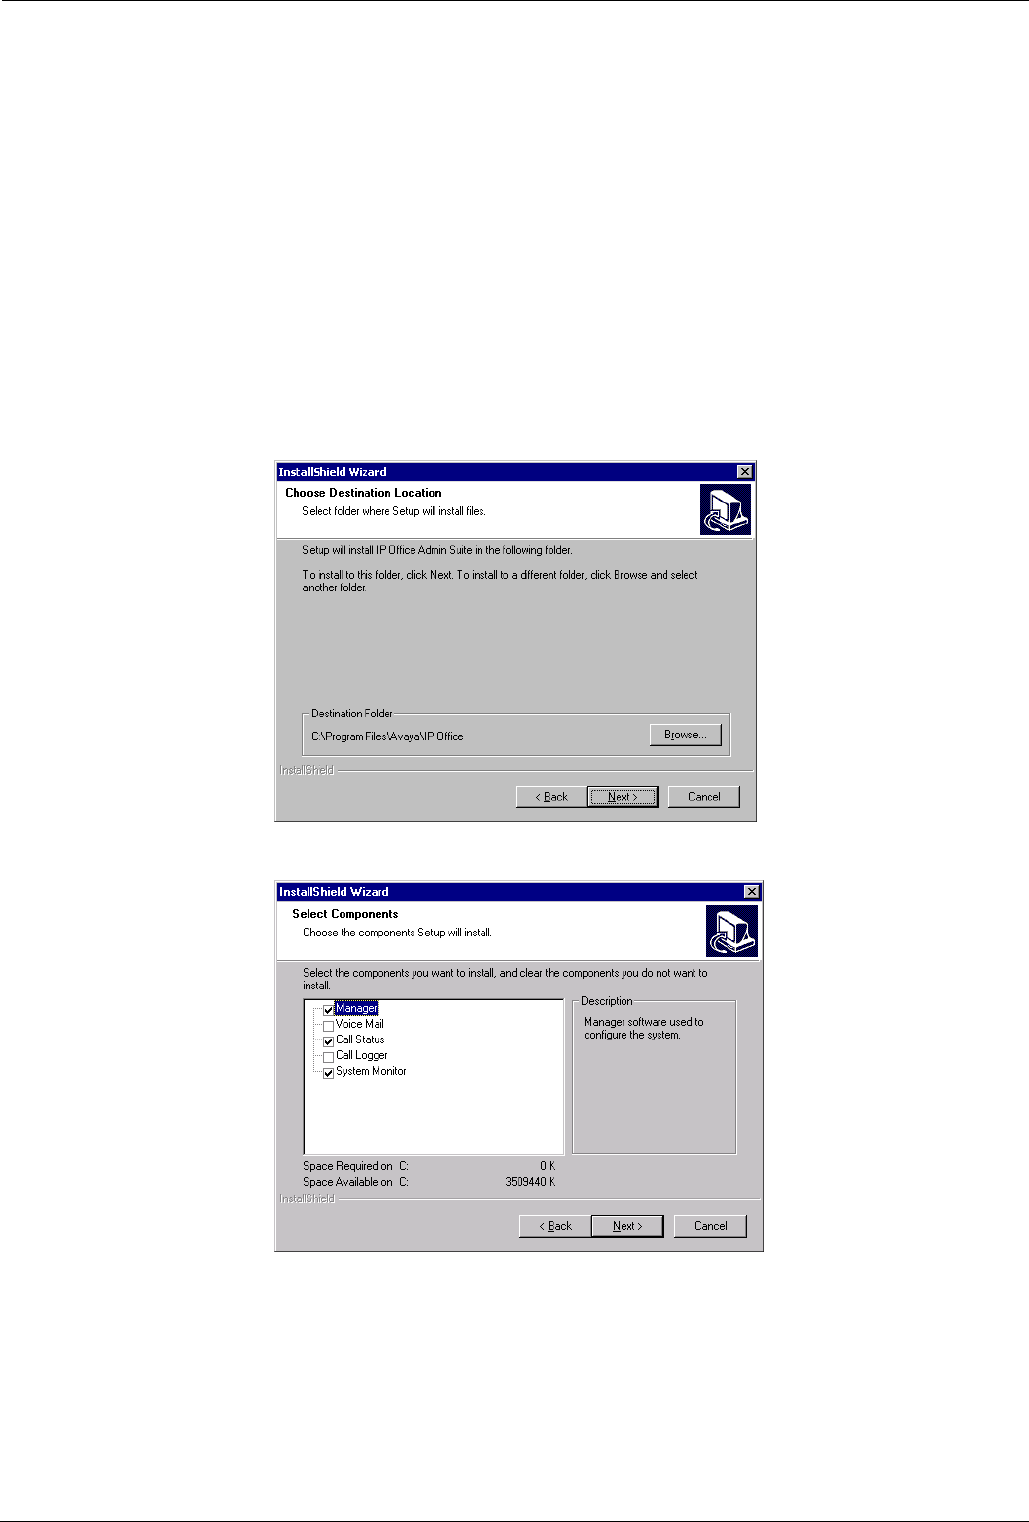
2. The Choose Destination Location menu is displayed. Either accept the
default location, by clicking on Next, or click on Browse, enter your own
location and then click on Next.
3. At the Select Components menu, tick either Manager, Call Status and/or
System Monitor boxes only.
Click Next. The Select Program Folder menu is displayed. Either, click Next
to accept the default, or change the Program Folder and then Click Next.
4. The Setup Status menu runs and when completed click Finish to exit the
Installation Wizard.
INDeX IPNC Cassette Administration Manual Software Upgrading and Installation - Page 15
38DHB0002UKDD – Issue 7 (22/11/02) Installation of a New System
