55
ENJOYING EXTERNAL AV SOURCES
If you connect an external recorder to the CinemaStation, you can record AV sources played back on the CinemaStation
or external AV equipment. For details on the connection methods, refer to “Connecting External AV Components” (pages
14 to 17). Also, you can operate those equipment with the CinemaStation remote control by setting the remote control
codes (page 72).
Make sure you read the manuals for your equipment to operate them.
If you connect the OPTICAL OUT (DIGITAL AUDIO)
jack on the CinemaStation to the optical digital input jack
on an external recorder such as a CD recorder or MD
recorder using optical cables (page 17), you can record
audio sources from the CinemaStation.
• Radio stations are not output from the OPTICAL OUT jack. To
record AM/FM broadcasts, use a commercially available audio
cable to connect the VCR OUT jack on the CinemaStation to
the analog input jack on your recorder.
• Be sure to perform a test recording before an actual recording.
• Sound field effects on the CinemaStation cannot be recorded
with external recorders.
• Turning off the external recorder connected to the
CinemaStation may distort playback sounds or reduce the
volume. In this case, turn on external recorder.
• The volume level, audio quality, and sound field effect settings
have no effect on the recorded sound during recording.
However, in the DVD/CD mode, the output sound for recording
may cut off if any of the operations below are performed.
– Output a test tone.
– Change a DSP program.
– Connect/disconnect the headphones.
• Depending on the recorder, some DTS software audio signals
may not record properly.
• The CinemaStation outputs a signal from the DIGITAL IN jack
only to the DIGITAL OUT jack. The signal input from the
DIGITAL IN jack is not output from the analog output jacks,
and the signal input from the analog input jacks is not output
from the DIGITAL OUT jacks.
• Audio recordings that you make cannot be used for any purpose
other than private enjoyment without the consent of the
copyright holder.
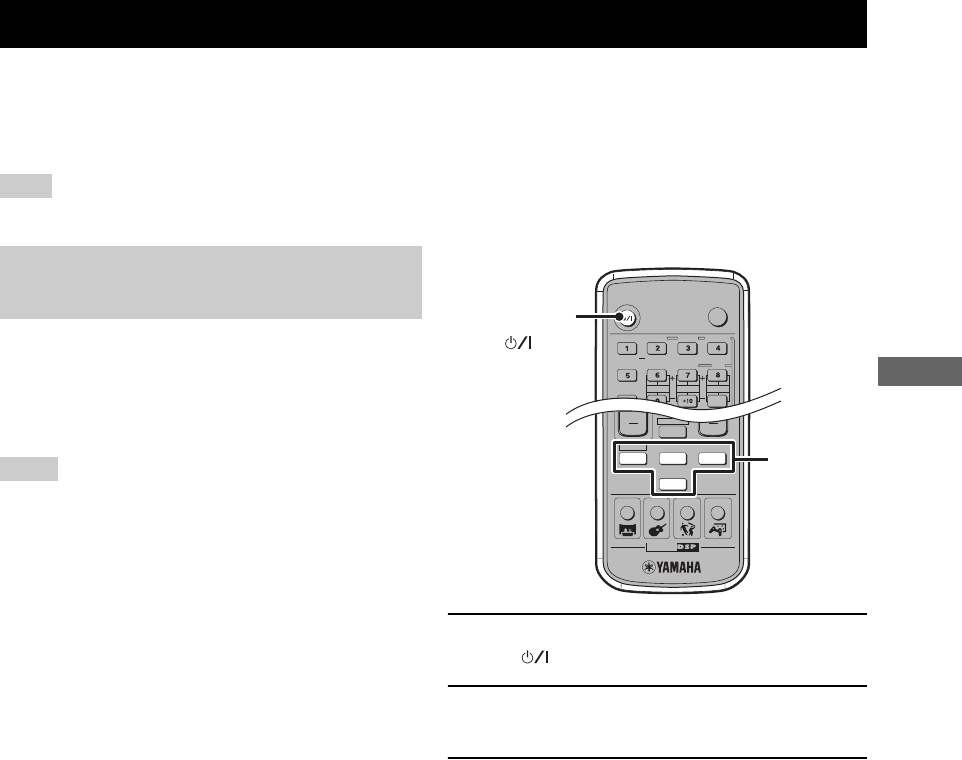
1 Turn on the recorder, then press STANDBY/
ON ( ) to turn on the CinemaStation.
2 Use the Input selection buttons to select the
input source, then start playback.
3 Start recording on the recorder.
■ About timer playback/recording
You can use a commercially available audio timer for
playback and recordings. Since available operations vary
depending on the product, read the manual for it.
y
• When the CinemaStation is in the standby mode, the timer
automatically recalls the CinemaStation’s memory contents
(e.g. input source, AM/FM frequency) for playback or
recording.
• If you want to perform timer recording without hearing sounds,
reduce the volume level before timer recording starts. The
volume level has no effect on the recorded sound.
Recording AV Sources With External AV Components
Note
Recording audio sources with
CinemaStation
Notes
TV
POWER
AUDIO
SELECT
NIGHT
SW
CENTER
SURR
SHIFT
STEREOMATRIX 6.1
A-B
REPEAT
ANGLE
SUBTITLE
STANDBY/ON
CINEMA
AMP
DVD/CD
VCR
VIDEO
TUNER
MOVIE MUSIC SPORTS GAME
SURROUND
Input
selection
buttons
STANDBY/ON
()


