


119
Setup Menu
Preferences
This menu allows you to configure the listening mode settings including audio effects and playback options.
a. Volume Display
You can switch the volume indication between an
absolute value and a relative value.
Absolute (absolute value):
Displayed in a range from 0
to 100.
Relative (relative value) (Default):
Displayed in a
range of –
∞
dB, –81.5 dB, –80 dB......18.0 dB. An
absolute volume value of 82 is equivalent to a relative
volume value of 0 dB.
b. Muting Level
You can adjust the volume level of muted sounds.
Specify at 10 dB intervals in a range from –
∞
dB and –
50 dB to –10 dB. The default is “–
∞
.”
This option can be set for Main B and Zone 2 as well as
for Main A.
c. Maximum Volume
You can set the maximum output volume level to
prevent sounds from becoming too loud. When
displaying in absolute values, specify at 0.5 intervals in
a range from 50.0 to 99.5. When displaying in relative
values, specify at 0.5 dB intervals in a range from –32
dB to +17.5 dB. If you do not want to set any specific
value, leave this item “Off,” the default setting.
This option can be set for Main B and Zone 2 as well as
for Main A.
d. Power On Volume
You can set a constant volume level of sounds output
when the DTR-10.5 is powered on. When displaying in
absolute values, specify at 0.5 intervals in a range from
0 to 100. When displaying in relative values, specify at
0.5 dB intervals in a range from –
∞
dB and –81.5 dB to
+18 dB (Max). If you want to maintain a selected
volume level setting when putting the apparatus into
standby status, select “Last.”
This option can be set for Main B and Zone 2 as well as
for Main A.
a. Headphone Level
When the volume level differs between speakers and
headphones, you can, in advance, fine tune the
headphones volume. Adjust at 0.5 dB intervals in a
range from –12 dB to +12 dB.
a. Component Video
Specify whether or not to display the On Screen Display
(OSD) on the TV screen connected to the component
video terminal. This option can be set for both Main A
and Main B. This item is only available if both of input
and output devices are connected via the component
video terminals.
OSD On (Default):
OSD is displayed.
OSD Off:
OSD is not displayed.
b. Immediate Display
Specify whether or not to display the description of
operations on the screen while you are operating the
DTR-10.5 (when the component video signal is output,
nothing is displayed if set to On). This option can be set
for Main B and Zone 2 as well as for Main A.
On (Default):
Displayed.
Off:
Not displayed.
c. Display Position
Specify the position where the Immediate Display
should be displayed. You can set in a range of ten
positions from Top to Bottom of the screen. By default,
it is displayed at the Bottom of the screen. This option
can be set for Main B and Zone 2 as well as for Main A.
d. Scan Mode
Specify whether or not to output the video signal with
interlace mode.
Interlaced:
Outputs with interlace mode.
NonInterlaced:
Does not output with interlace mode.
e. Net-Tune OSD Display
This item appears when the ETHERNET terminal board
[B] (for Net-Audio) is inserted.
Specify whether or not to display a description of
operations on the screen when using Net-Tune (when
the component video signal is output, nothing is
displayed if set to On). This option can be set for Main
B and Zone 2 as well as for Main A.
On (Default):
Displayed.
Off:
Not displayed.
This sub-menu allows you to adjust the position of the
OSD Setup Menu as it is displayed on your screen.
Depending on the monitor used, there may be cases
where the OSD Setup Menu is not displayed in the
center and parts of the menus are cut off. To adjust the
position of the OSD Setup Menu, simply press the
cursor buttons to inch the menu to the position you
desire. This option can be set for Main B and Zone 2 as
well as for Main A.
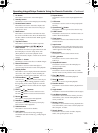
Volume Setup Sub-menu
Headphone Level Setup Sub-menu
OSD Setup Sub-menu
OSD Position Sub-menu