


0
Getting Started Connections Settings Playback Remote ControlMulti-zone Information Troubleshooting SpecificationsSettings
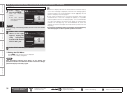
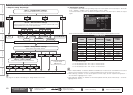
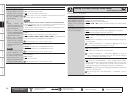
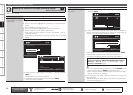
Main remote control unit
operation buttons
:Displaying the menu
Cancel the menu
:Moves the cursor
(Up/Down/Left/Right)
:Confirm the setting :Return to previous menu
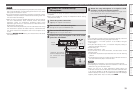
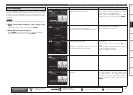
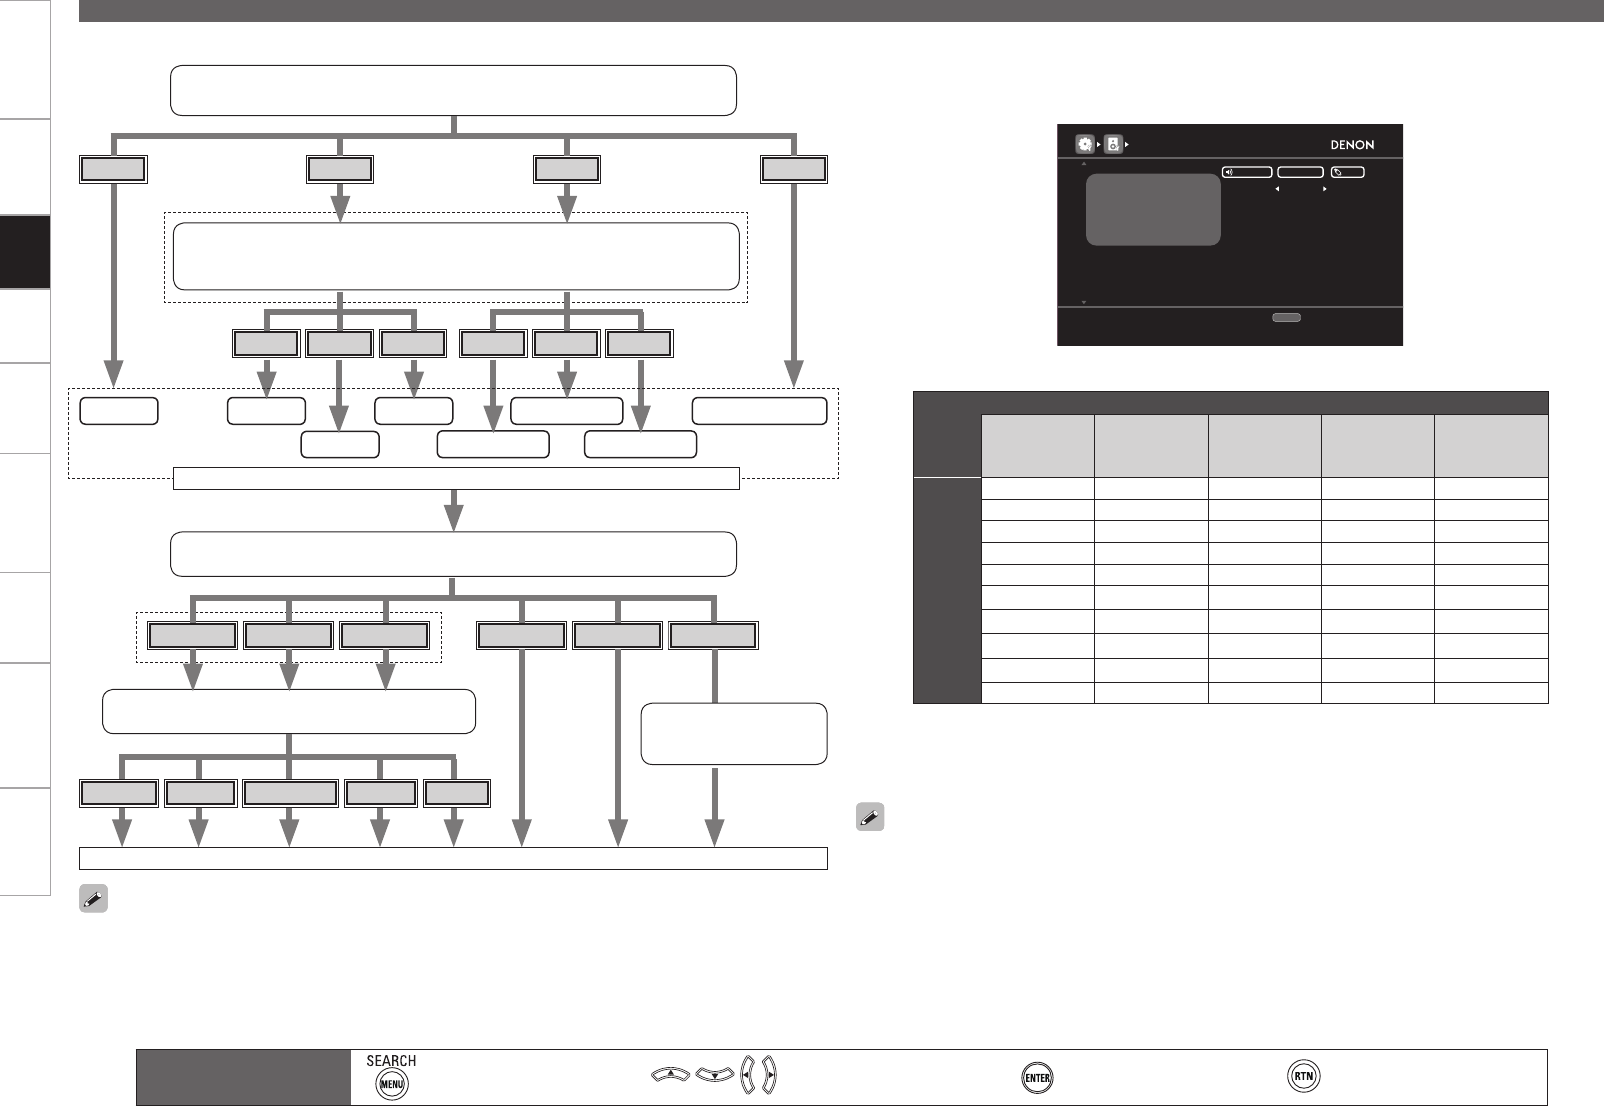
Making Detailed Settings (Manual Setup)
Steps for setting “Amp Assign”
Item 1 : “Configuration” settings
Select MAIN ZONE channel configuration.
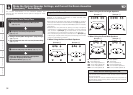
5.1ch
7.1ch
9.1ch
11.1ch
Item 2 : “Extra Channel” settings
Select the channels to be used from among surround back speakers (SB), front
height speakers (FH), front wide speakers (FW).
SB
FH
FW
SB/FH
SB/FW
FH/FW
5.1ch
5.1ch+SB
5.1ch+FW
5.1ch+SB+FW
5.1ch+SB+FH+FW
5.1ch+FH
5.1ch+SB+FH
5.1ch+FH+FW
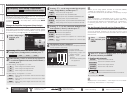
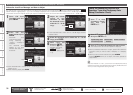
Item 3 : “Assign Mode” settings
Select power amp usage method.
NORMAL
+Z2
+Z2+Z3
ALL Z2
ALL Z2+Z3
FREE
Item 4 : “Front” settings
Select front speaker connection method.
NORMAL
Bi-AMP
Bi-WIRING
2CH BW
2CH BA
n
Determine the maximum number of channels used by the AVR-4810CI.
Perform the settings for each speaker using “Speaker Configuration” (vpage 41).
Set channels assigned
to power amps
(vpage 40).
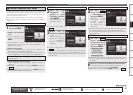
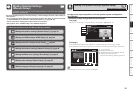
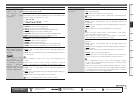
“Free Assign” settings
It is possible to freely select the signal being output from each speaker terminal (except for “Bi-Wir./Bi-
Amp”, “ZONE2”, “ZONE3”) when “Assign Mode” is set to “FREE”.
In the screen below, press ui to select the speaker terminal, then press o p to select the output
signal.
AMP ASSIGN [2/2]
FRONT
SB/H/W
CENTER
H/W
SURR.
SW/BA
ZONE2
ZONE3
Config
Extra ch
Assign Mode
11.1ch
SB/FH/(FW)
FREE
TERMINAL SIGNAL PRE
RETURN
Return
FRONT
S.BACK
CENTER
HEIGHT
SURR.
---
---
---
F
SB
C
H
S
W
SW
Z2
Z3
Select the signal output from the FRONT terminals
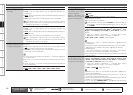
Refer to the chart below for the signals that can be output to each speaker terminal.
Speaker terminal
FRONT CENTER SURROUND
S.BACK /
F.HEIGHT /
F.WIDE
F.HEIGHT /
F.WIDE
Signal
FRONT
CENTER
FRONT FRONT FRONT
CENTER
S.BACK *1
CENTER CENTER CENTER
SURROUND
ZONE2
SURROUND SURROUND SURROUND
S.BACK *1
ZONE3
S.BACK *1 S.BACK *1 S.BACK *1
F.HEIGHT *2
– – –
F.HEIGHT *2 F.HEIGHT *2 F.HEIGHT *2
F.WIDE*3 F.WIDE*3 F.WIDE*3 F.WIDE*3
ZONE2 ZONE2 ZONE2 ZONE2
ZONE3 ZONE3 ZONE3 ZONE3
Z2/Z3(MONO) Z2/Z3(MONO) Z2/Z3(MONO) Z2/Z3(MONO)
– – – – – – – – – – – –
– – – : No channel output
*1 : Can be selected when “SB” is set in “Extra Channel”.
*2 : Can be selected when “FH” is set in “Extra Channel”.
*3 : Can be selected when “FW” is set in “Extra Channel”.
When “Z2/Z3 (MONO)” is selected, ZONE2 and ZONE3 use monaural audio. The ZONE2 mono audio is
output from the speaker terminal’s L ch and the ZONE3 mono audio is output from the R ch.
When selecting “S.BACK” for the center speaker terminal output, set the “Speaker Configuration” –
“Surround Back” (vpage 41) to “1spkr”.
When selecting “ZONE2” or “ZONE3” for the center speaker terminal, set the “Zone Setup” – “Channel”
(vpage 52) to “Mono”.
n
•
•
•
See page 41 for details of the settings in “Assign Mode” and “Front”.