


SET
UP
31
En
DIGITAL INPUT SELECT
In order to be able to use your digital equipment properly you need to assign digital inputs for each of the digital
components you connected. Match the DIGITAL IN buttons 1-5 with the digital jacks 1-5 in accordance with
what component is hooked up to each digital jack. Check the digital terminal numbers on the back of the
amplifier to make certain what component is in which jack (if necessary, see p.10 for more on digital
connections). Note that you can only assign a function (like DVD/LD) once after that it will disappear from the
choices from which you can assign buttons. The last button, the AC-3 RF button, is specifically for a DVD/LD or
LD player with an 2 RF output. If you connected one of these components match this button to the
component. If continuing from the previous page go to step 1. If starting fresh, complete steps 1-3 in “Setting
Up for Surround Sound“ (p.30) first.
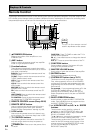
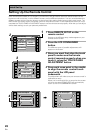
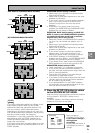
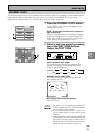
1
Press the DIGITAL INPUT SELECT
button.
2
Press the DIGITAL IN button you
want to assign.
3
At the bottom of the LCD screen the
functions available will appear.
Press the button of the function you
want to assign to the selected
DIGITAL IN button.
This procedure assigns a digital function to the
DIGITAL IN. If you asssign a function (for example
DVD/LD) that has already been assigned to another
button the new button will get the function and the
old one will automatically turn to OFF. This is because
one function cannot be assigned twice.
If a digital jack has nothing connected to it set the
corresponding button to OFF.
4
Repeat step 2 & 3 until all the digital
in buttons correspond to the
components you connected.
5
If you hooked up a component to
the AC-3 RF channel use steps 2 & 3
to assign a function to it.
6
Press the SETUP OK button to
return the SYSTEM SETUP mode.
Hold the remote control pointed towards the amplifier
until you see the “RECEIVED” display on the
amplifier.
If "ERROR" flashes in the display, perform the setup
operations from the first step again.
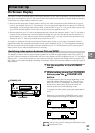
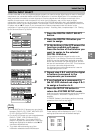
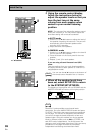
dB
SIGNAL
SELECT
ANALOG
SP
A
VOLUME
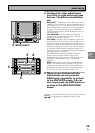
These settings will be displayed on your TV. (The
settings pictured here are the default settings.)
Digital-In Select
[DVD/LD]
[ CD ]
[ MD ]
[TV/SAT ]
[ VCR 1 ]
[DVD/LD]
Digital-1
Digital-2
Digital-3
Digital-4
Digital-5
AC-3 RF L
2
1
• For the DIGITAL IN 1-5 buttons you can choose
between DVD/LD, CD, TV/SAT, MD/TAPE 1/CD-
R, VCR 1/DVR and VCR 2 functions.
• For the AC-3 RF button you can choose between
DVD/LD, TV/SAT, VCR 1/DVR and VCR 2
functions. Remember, if you have a DVD/LD
player or LD player you should hook it up to the
analog and digital jacks in addition to the 2 RF
connection described here.
• To go back without entering any of the
information selected use the BACK button.
3
5
6
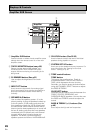
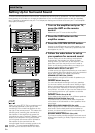
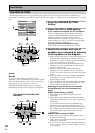
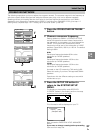
System Setup
SPEAKER
SETTING
CROSSOVER
NETWORK
BASS PEAK LEVEL
MANAGER
DYNAMIC RANGE
CONTROL
DIGITAL INPUT
SELECT
CHANNEL DELAY
CHANNEL LEVEL
BACK
VCR1
LINE
OFF
memo
VCR1
Initial Set Up