


Advanced setup
11
93
En
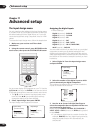
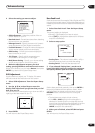
4 Select the setting you want to adjust.
• OSD Adjustment – Adjust the position of the on-
screen display on your TV.
• Bass Peak Level – Prevent bass tones from distorting
the sound from your speakers.
• D-Range Control – Specify the amount of dynamic
range adjustment to Dolby Digital soundtracks.
• Function Rename – Change the names that appear
on the receiver display and on-screen display.
• OSD Overlay – Switch the on-screen display (for
basic functions) on or off.
• 12V Trigger – Specify which components are
switched on or off using the 12 volt trigger.
• Multi-Room Setting – Specify your volume setting
and IR receiver type for a multi-room setup.
5 Make the adjustments necessary for each
setting, pressing ENTER to confirm after each screen.
When you’re finished, you can select Return, then press
ENTER to go back to the System Setup menu.
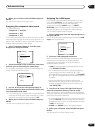
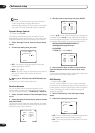
OSD Adjustment
Use this feature to adjust your TV display if it seems
difficult to see all the instructions on the screen.
1 Select ‘OSD Adjustment’ from the Expert Setup
menu.
2 Use the /// hard keys to move the
display field around until you get one that you feel
best suits your TV.
You can move the screen displays up or down and left or
right to get the best match for your TV.
3 Press ENTER.
You will return to the Expert Setup menu.
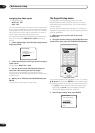
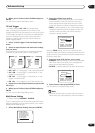
Bass Peak Level
Some audio sources (for example, Dolby Digital and DTS)
include ultra-low bass tones. Set the bass attenuator as
needed to prevent the ultra-low bass from distorting the
sound.
1 Select ‘Bass Peak Level’ from the Expert Setup
menu.
The current setting is displayed.
• When [- - -] is displayed, no bass is output.
• When [OFF] is displayed the attenuator is off (bass
output is not affected).
2 Select a setup option.
• Setting Start – The volume is set to MIN (----dB), a
test tone plays back and you make the setting.
• Setting Cancel – Switches the attenuator off.
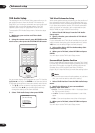
3 If you selected ‘Setting Start’, use the /
(cursor left/right) hard keys to adjust the test tones
and specify the bass peak level then press ENTER.
Set the bass peak level gradually, then press ENTER at
the point just before the tone starts to distort. When
you’re finished, the display on the receiver will show
RESUME and the volume will return to its original
position.
• The test tones are output at loud volumes.
• If the YES or PLUS setting on the subwoofer is
selected (in Speaker Systems on page 58), the test
tone will only play back from the subwoofer. If not, the
test tone will play back from all speakers set to
LARGE (except for the subwoofer).
4 When you're finished, select RETURN and press
ENTER.
You will return to the Expert Setup menu.
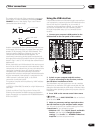
3.Expert Setup
[1. OSD Adjustment ]
[2. Bass Peak Level ]
[3. D-Range Control ]
[4. Function Rename ]
[5. OSD Overlay ]
[6. 12V Trigger ]
[7. Multi-Room Setting ]
[Return]
3.1. OSD Adjustment
[Return]
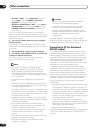
3.2. Bass Peak Level
Manager
[Setting Start]
[Setting Cancel]
[Return]
Present Level [OFF]
3.2. Bass Peak Level
Manager
[Setting OK]
Bass Peak Level
[–10]
[Setting Cancel]