


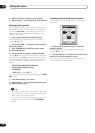

The Surround Setup menu
07
60
En
a decrease in the amount of bass due low frequency
cancellations. In this case, try changing the position
or direction of speakers. If you can’t get good results,
listen to the bass response with it set to PLUS and
YES or the front speakers set to LARGE and SMALL
alternatively and let your ears judge which sounds
best. If you’re having problems, the easiest option is
to route all the bass sounds to the subwoofer by
selecting SMALL for the front speakers.
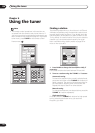
Channel Level
Using the channel level settings, you can adjust the
overall balance of your speaker system, an important
factor when setting up a home theater system. If you’re
unsure of the best channel level settings, simply select
Auto from the setup options below.
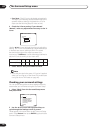
1 Select ‘Channel Level’ then press ENTER.
2 Select a setup option and press ENTER to start
the test tones.
• Manual – Move the test tone manually from speaker
to speaker and adjust individual channel levels.
• Semi Auto – Adjust channel levels as the test tone
moves from speaker to speaker automatically.
• Auto – The levels are set automatically by the
receiver as it outputs the test tones. (For this setup
you must have the mic connected.)
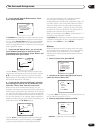
3 If you selected ‘Manual’ or ‘Semi Auto’, adjust
the level of each channel using the / (cursor left/
right) hard keys.
If you selected Manual, use / (cursor up/down) to
switch speakers. The Semi Auto setup will output test
tones in the order shown on-screen:
Adjust the level of each speaker as the test tone is
emitted.
Note
• If you are using a Sound Pressure Level (SPL) meter,
take the readings from your main listening position
and adjust the level of each speaker to 75 dB SPL (C-
weighting/slow reading).
• The subwoofer test tone is output at low volumes. You
may need to adjust the level after testing with an
actual soundtrack.
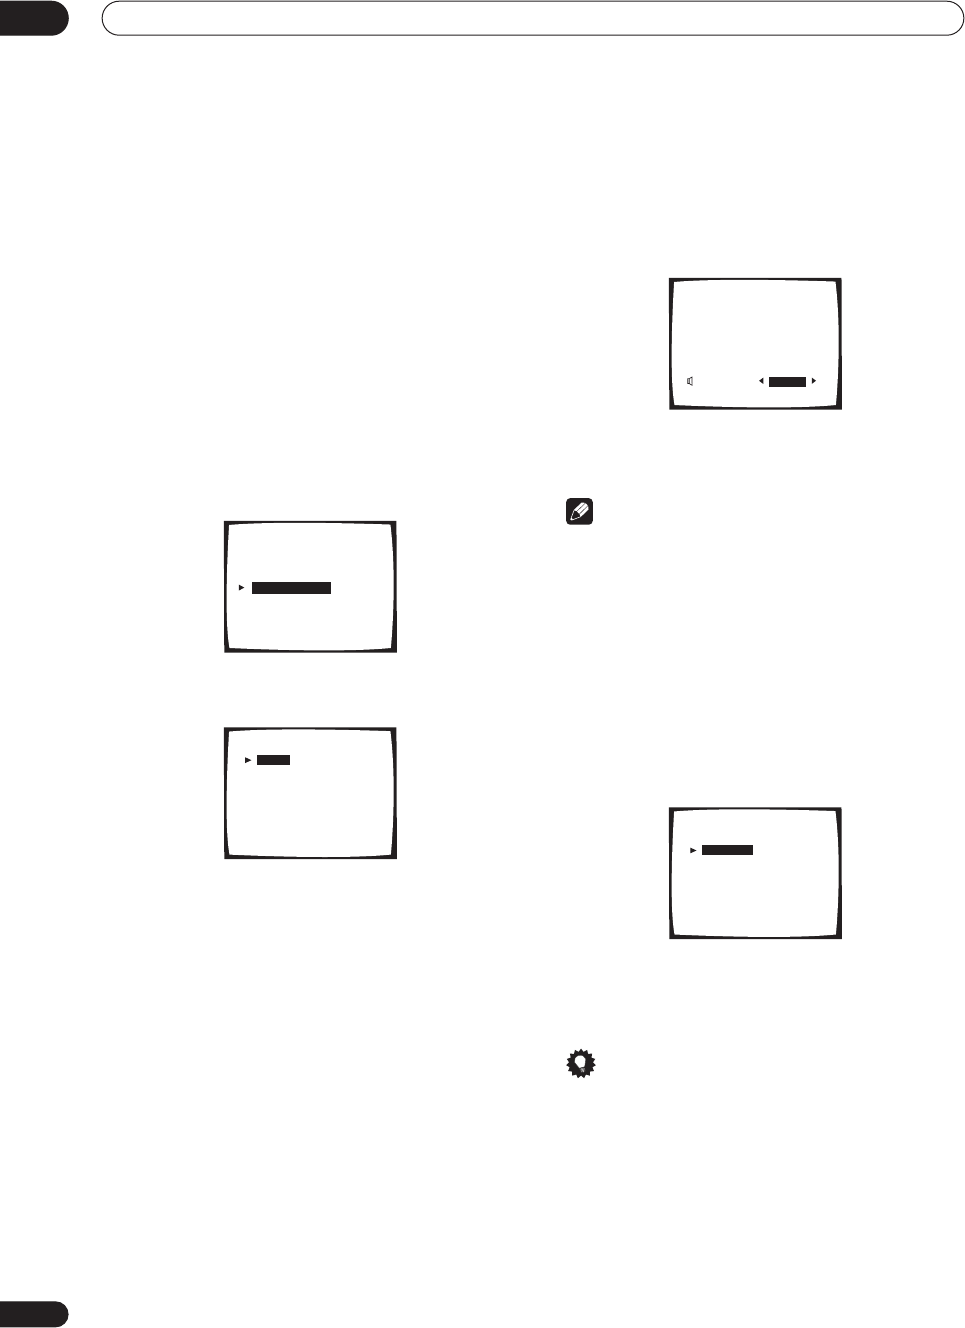
4 If you selected ‘Manual’ or ‘Auto’, select ‘Return’
then press ENTER to finish. With ‘Semi Auto’, simply
press ENTER.
With the Auto setup, !! Complete !! is displayed on-
screen after the channel levels are set.
To check the settings, select Check and press ENTER
instead of selecting Return above. When you’re finished
select Return then press ENTER.
Tip
• You can change the channel levels at any time by
using CHANNEL +/– on the front panel or from the
remote control receiver menu (see Basic remote
control displays on page 33 for more on this). You can
set separate levels for each listening mode
(Standard/Home THX, Advanced Cinema/Advanced
Concert and Stereo) as well as for SB CH ON.
However, these settings will be cleared if you use the
Surround Setup or Auto Surround Sound Setup to set
the channel levels at a later date.
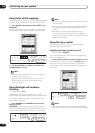
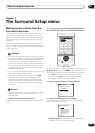
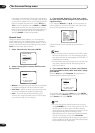
2.Surround Setup
[ Check ]
[ 1.Speaker Systems ]
[ 2.Channel Level ]
[ 3.Speaker Distance ]
[ 4.Acoustic Cal EQ ]
[ 5.X-Curve ]
[Return]
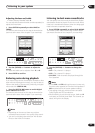
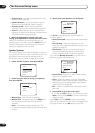
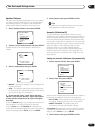
2.2. Channel Level
[Manual]
[Semi Auto]
[Auto]
Normal Surround
[Return]
Your Speaker Systems
” Normal Surround ”
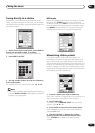
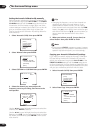
+1. 5
dB
+1. 5
dB
+2. 0
dB
-3. 5
dB
-1. 5
dB
+3. 0
dB
+2. 0
dB
+10. 0
dB
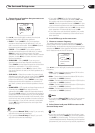
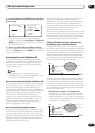
2.2. Channel Level
Semi Auto
LEFT [ ]
CENTER [ ]
RIGHT [ ]
SURROUND R [ ]
SURR BACK R [ ]
SURR BACK L [ ]
SURROUND L [ ]
SUB WOOFER [ ]
Return = Push Enter
2.2. Channel Level
[Manual]
[Semi Auto]
[Auto]
Normal Surround
[Return]
Your Speaker Systems
” Normal Surround ”