


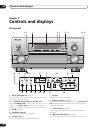
Controls and displays
03
31
En
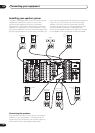
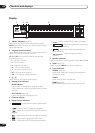
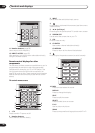
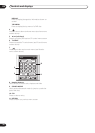
9 Input indicators
Shows the currently selected source component. The
MULTI CH INPUT indicator lights when a component
connected to the MULTI CH INPUT is selected. Nothing
lights if an unassigned i.LINK-equipped component or
USB connection is selected.
10 LISTENING MODE SELECTOR dial (page 43)
Turn and push to select a listening mode.
11 MASTER VOLUME dial
Adjusts the volume.
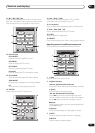
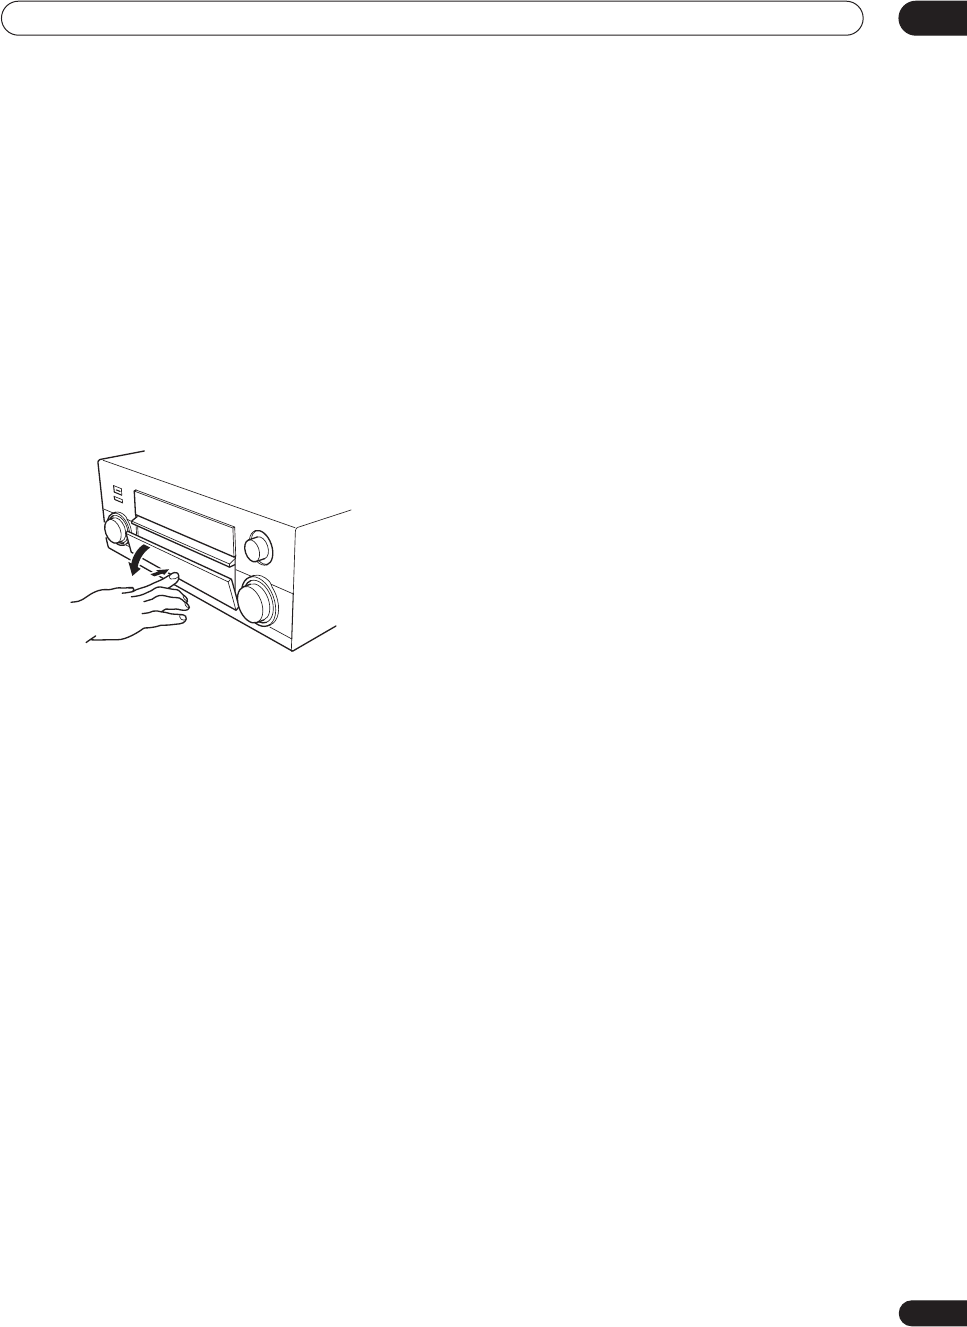
12 Front panel controls
To access the front panel controls, push gently on the
lower third portion of the panel with your finger.
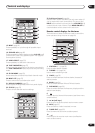
13 ACOUSTIC CAL. (page 48)
Press to switch Acoustic Calibration EQ on or off.
14 MIDNIGHT (page 52)
Press to switch MIDNIGHT mode on/off.
15 TONE
Press to switch between TONE ON and TONE BYPASS,
which bypasses the tone controls.
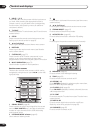
16 OPTION (–/+)
Press OPTION repeatedly to select an option menu item,
then use –/+ to adjust the settings.
17 DIGITAL NR (page 53)
Press to switch DIGITAL NR on/off.
18 TUNER controls (page 55)
Use the front panel tuner controls for recalling station
presets.
19 SB CH MODE (page 50)
Use to select the surround/virtual back channel mode.
20 MULTI ROOM & SOURCE controls
If you’ve made multi-room connections (see Multi-room
setup on page 83) use these controls to control the sub
room from the main room (see Using the sub room
controls on page 84).
21 PHONES jack (page 46)
Use to connect headphones (no sound will be heard
through the speakers).
22 SP SYSTEM A/B (page 82)
Press repeatedly to select speaker system A,B, A/B or off
(in that order). (See Using speaker system B on page 80
for exceptions to this).
23 SIGNAL SELECT (page 48)
Press to select the type of input signal for the current
source (DVD, DVR/VCR, etc.), and also to select the
number of input channels for the USB and analog
multichannel inputs.
24 VIDEO SELECT (page 76)
Press repeatedly to select the video source.
25 TAPE 2 MONITOR (page 75)
Press to monitor recordings on the device connected to
the TAPE 2 MONITOR inputs/outputs as they are being
made.
26 STREAM DIRECT (page 47)
Press to switch on/off Stream Direct.
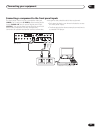
27 SETUP MIC jack
Use to connect the supplied microphone.
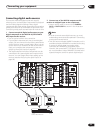
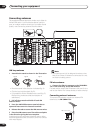
28 VIDEO INPUT jacks (page 25)
• DIGITAL IN – Connect a game console, portable DVD
player, video camera (etc.), that has an optical digital
connection.
• S-VIDEO – Connect a video camera (etc.), that has an
S-video out.
• VIDEO / AUDIO (L/R) – Connect a video camera, etc.
that has standard RCA video/audio outputs.