


-4-
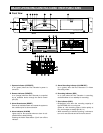
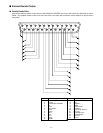
13. Eject hole
For sliding out the disc tray manually (by inserting a
wire) if it is not ejected automatically when pressing
the OPEN/CLOSE button (35).
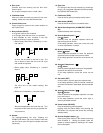
21. Find button (FIND)
Press to directly specify and play back a frame*
2
.
22. Index button (INDEX)
Press to search the disc for a recorded frame.
23. Alarm Recording button (ALARM REC STAND-
BY)
Enables/disables alarm recording.
24. Reverse Record button ( )
Left button
Press to move the playback operation back one
step to the previous record*
1
.
In the setup operation, moves the cursor to the left
or select a parameter in reverse.
25. Reverse Frame button ( )
Down button
Press in paused playback to move the playback
operation back one step to the previous frame.
In the setup operation, moves the cursor down one
line.
26. Advance Frame button ( )
Up button
Press in paused playback to advance the playback
operation one step to the next frame.
In the setup operation, moves the cursor up one
line.
27. Set button (SET)
In frame search, press to apply the entered value.
In the setup operation, press to execute a selection
and enter the submenu associated with the selected
item.
28. Advance Record button ( )
Right button
Press to advance the playback operation one step
to the next record.
In the setup operation, moves the cursor right or
select a parameter forward.
29. Pause button (yPAUSE)
Press to temporarily pause playback.
Holding down the Pause button and pressing the
REC button (31) will place the device into recording
standby status.
30. Reverse Playback button (AA)
Press to play back frames in the reverse order they
were recorded in. Holding the button down will
speed up reverse playback, releasing it will restore
the normal speed.
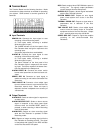
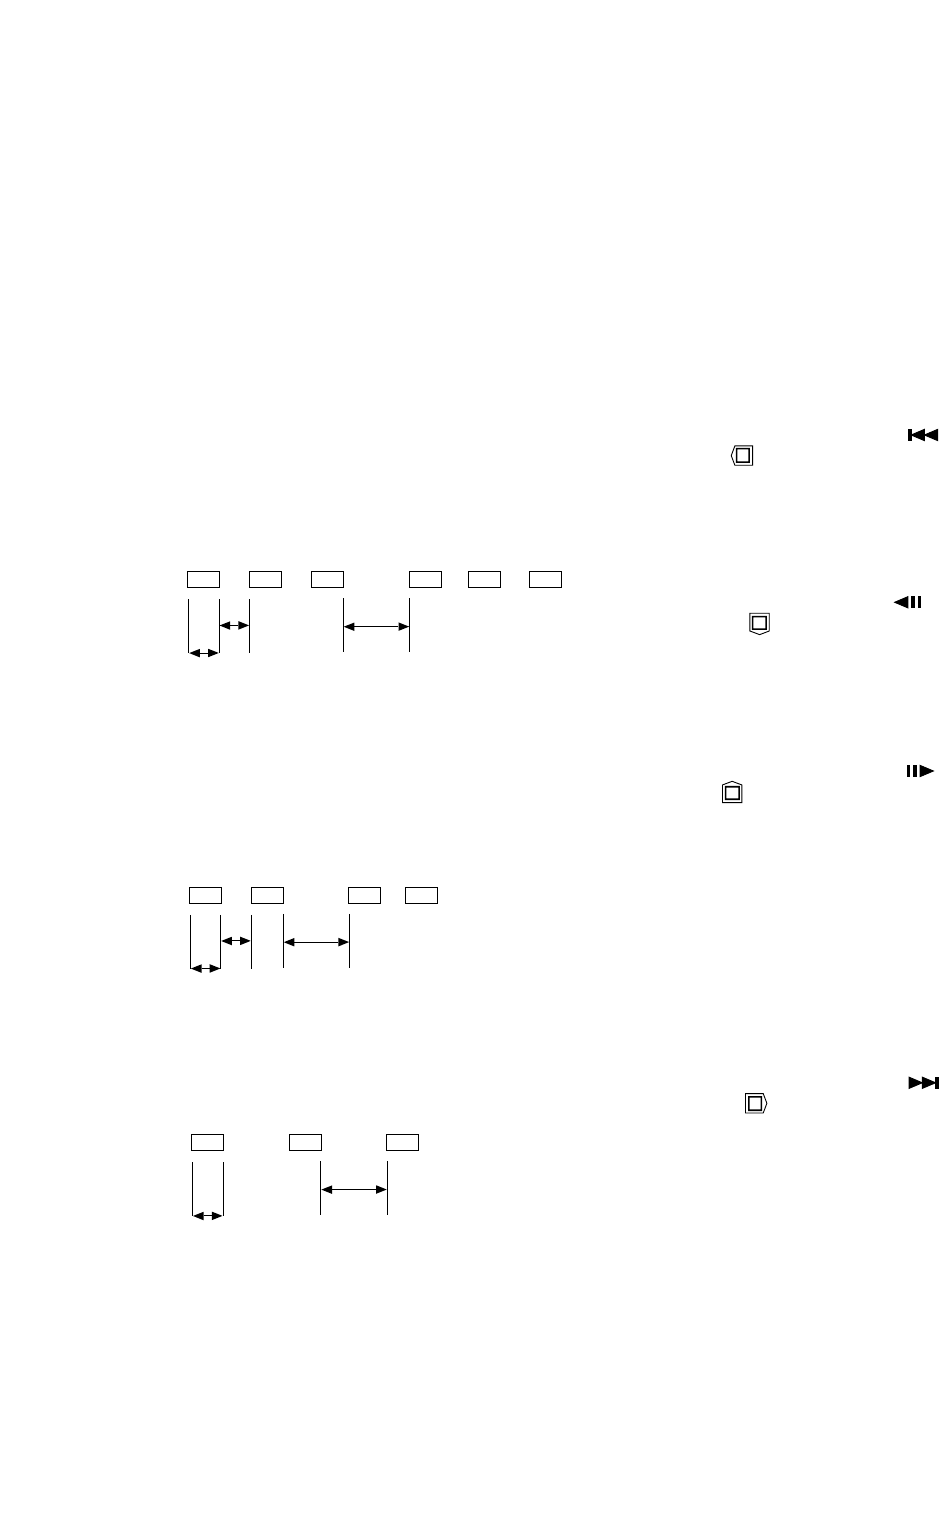
0.2s
1.0s
0.2s
An error has occurred on the disc in use. The
disc is about to reach the end of its life cycle
and should be replaced.
• Blinks rapidly twice, followed by a 1-second
interval.
0.2s
1.0s
0.2s
The unit’s lens or disc needs cleaning. See
page 46.
• Blinks once, followed by a 1-second interval.
0.2s
1.0s
Abnormal temperature rise inside the unit. Turn
the power off and refer servicing to qualified ser-
vice personnel.
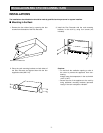
12. Shutter
For loading/unloading the disc. Pressing the
OPEN/CLOSE button (35) on the Control Panel with
the Disc Cover open will open the shutter and slide
out the tray.
8. Disc cover
Prevents dust from entering into the disc drive.
Press to open.
Do not open except to load or unload a disc.
9. Ventilation holes
Allow air to enter the device to prevent it from over-
heating. Make sure not to block these holes.
10. Control Panel cover
Press to open for access to the control buttons on
the Control Panel.
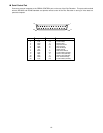
11. Busy indicator (BUSY)
Is on (green) when a disc is loaded.
Is on (orange) when the disc drive is in operation.
It also indicates an error condition in the disc
recorder by blinking in green as follows:
• Blinks rapidly three times, followed by a 1-sec-
ond interval.
<
<
<