


-33-
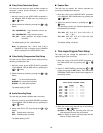
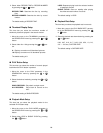
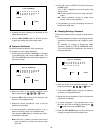
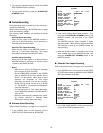
SET_UP PASSWORD
A B C D E F G H I J K L M
N O P Q R S T U V W X Y Z
1 2 3 4 5 6 7 8 9 0
CLEAR
ENTER
(
☞
SET)
6. Move the cursor to ENTER in the table, then press
the SET button.
“OK” or “NG” is displayed in the lower center of the
monitor screen.
OK: Correct password, access to setup menu per-
mitted.
NG: Wrong password, access to setup menu
denied. Enter correct password.
7. If the password is correct, the display will return to
the previous MAIN menu.
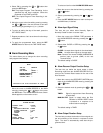
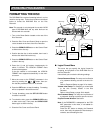
● Changing/Deleting a Password
Follow the procedure below to change or delete a pass-
word.
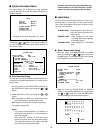
1. Perform password verification, then display the edit-
ing table for the password to be changed or delet-
ed.
For example, to change or delete the Setup
Password, display the SETUP PASSWORD table.
The current password is displayed in the center at
the end of the table.
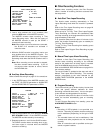
SET_UP PASSWORD
A B C D E F G H I J K L M
N O P Q R S T U V W X Y Z
1 2 3 4 5 6 7 8 9 0
CLEAR
1231 (
☞
SET)
2. Move the cursor on the desired character in the
table by pressing the , , or button.
3. Then press the SET button to pick up the character,
and place it in the password area.
4. Repeat the above procedures 2 and 3 until the new
password is completed.
5. To delete characters in the password area, move
the cursor to CLEAR in the table by pressing the
or button, then press the SET button.
6. Press the SET UP/ESC button for about 2 seconds
to apply the setting and exit the setup menu.
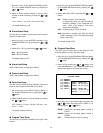
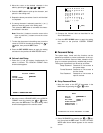
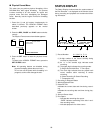
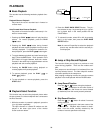
DISC PASSWORD
A B C D E F G H I J K L M
N O P Q R S T U V W X Y Z
1 2 3 4 5 6 7 8 9 0
CLEAR
(
☞
SET)
3. Compose the Disc Password as described for the
Setup Password above.
4. Press the SET UP/ESC button for about 2 seconds
to apply the setting and exit the setup menu.
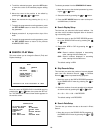
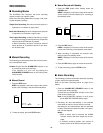
● Password Verification
Follow the procedures below to verify a password.
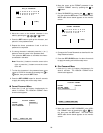
For example, to verify a Setup Password:
1. Confirm that the parameter PASSWORD is selected
in the MAIN menu, then press the SET button. The
SET UP PASSWORD table shown below appears on
the monitor screen.
2. Move the cursor on the desired character in the
table by pressing the , , or button.
3. Press the SET button to pick up the character, and
place it it in the password area.
4. Repeat the above procedures 2 and 3 until the
password is completed.
5. If a wrong character is selected, press the (+) or (–)
button to move the cursor in the password area.
Then press the SET button to overwrite the charac-
ter selected in the table.
Note: Press the (+) button to move the cursor to the
right, or press the (–) button to move the cursor
to the left.