


44
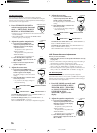
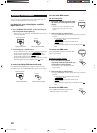
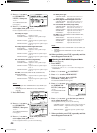
5. Press % / fi to move
to “SURROUND
LEVEL,” then press
@ / #.
The SURROUND LEVEL
menu appears.
6. Press % / fi to move to the item you want to
set or adjust, then press @ / #.
On these adjustment menus, you can do the following:
For Dolby Pro Logic:
“TEST TONE”: Output a test tone.
“CENTER LEVEL”: Adjust the center speaker output
level. *
“REAR L LEVEL”: Adjust the left rear speaker output
level. **
“REAR R LEVEL”: Adjust the right rear speaker output
level. **
For Dolby Digital and DTS Digital Surround:
“TEST TONE”: Output a test tone.
“CENTER LEVEL”: Adjust the center speaker output
level. *
“REAR L LEVEL”: Adjust the left rear speaker output
level. **
“REAR R LEVEL”: Adjust the right rear speaker output
level. **
For JVC Theater Surround (Large/small):
“TEST TONE”: Output a test tone.
“CENTER LEVEL”: Adjust the center speaker output
level. *
“REAR L LEVEL”: Adjust the left rear speaker output
level. **
“REAR R LEVEL”: Adjust the right rear speaker output
level. **
For DAP
(LIVE CLUB, DANCE CLUB, CONCERT HALL,
CONCERT ARENA):
“REAR L LEVEL”: Adjust the left rear speaker output
level. **
“REAR R LEVEL”: Adjust the right rear speaker output
level. **
Notes:
*
Not displayed when “CENTER SPK” is set to “NONE” (see
page 24).
**
Not displayed when “REAR SPK” is set to “NONE” (see
page 24).
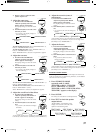
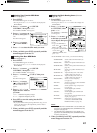
7. Press EXIT once.
8. Press % / fi to move
to “SURROUND
EFFECT,” then press
@ / #.
The SURROUND EFFECT
menu appears.
9. Press % / fi to move to the item you want to
set or adjust, then press @ / #.
On these adjustment menus, you can do the following:
For Dolby Pro Logic:
“CENTER TONE”: Select the center tone level. *
“REAR TONE”: Select the rear tone level. **
For Dolby Digital and DTS Digital Surround:
“CENTER TONE”: Select the center tone level. *
“REAR TONE”: Select the rear tone level. **
For JVC Theater Surround (Large/small):
“CENTER TONE”: Select the center tone level. *
“REAR TONE”: Select the rear tone level. **
“EFFECT LEVEL”: Adjust the surround effect level.
“ROOM SIZE”: Adjust the room size effect.
“LIVENESS”: Adjust the liveness level.
For DAP
(LIVE CLUB, DANCE CLUB, CONCERT HALL,
CONCERT ARENA):
“REAR TONE”: Select the rear tone level. **
“EFFECT LEVEL”: Adjust the surround effect level.
“ROOM SIZE”: Adjust the room size effect.
“LIVENESS”: Adjust the liveness level.
Notes:
*
Not displayed when “CENTER SPK” is set to “NONE” (see
page 24).
**
Not displayed when “REAR SPK” is set to “NONE” (see
page 24).
10.When you finish, press EXIT repeatedly until the
menu disappears from the TV.
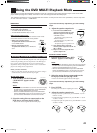
Adjusting the DVD MULTI Playback Mode
(Also see page 41)
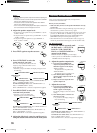
1. Press MENU.
The MAIN MENU appears on the TV.
• Pressing one of the % / fi / @ / # buttons also displays the
MAIN MENU.
2. Press % / fi to move to “SOURCE.”
3. Press @ / # to select “DVD MULTI.”
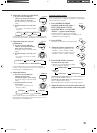
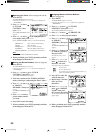
4. Press % / fi to move
to “SOUND
CONTROL,” then press @ / #.
The SOUND CONTROL menu appears.
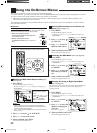
5. Press % / fi to move
to “SURROUND
LEVEL,” then press
@ / #.
The SURROUND LEVEL
menu appears.
6. Press % / fi to move to the item you want to
set or adjust, then press @ / #.
On this adjustment menu, you can do the following:
“CENTER LEVEL”:Adjust the center speaker output level.
“REAR L LEVEL”: Adjust the left rear speaker output
level.
“REAR R LEVEL”: Adjust the right rear speaker output
level.
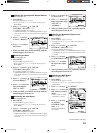
7. When you finish, press EXIT repeatedly until the
menu disappears from the TV.
EN42_53.RX-9000V[J]/f 00.2.15, 3:22 PM44