


Recording
06
96
En
5
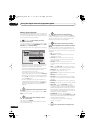
(LCD page 3)
If you’re recording from the
A.TV tuner, select the audio channel to record.
See
Changing A.TV audio channels
on page 94 for more
on this.
• When recording in VR mode, if a broadcast is
bilingual, both audio channels are recorded, allowing
you to switch the audio channel on playback. The only
exception to this is when the picture quality is set to
LPCM
, in which case you do need to select the audio
channel before recording.
6
(LCD page 3)
If you’re recording from the
D.TV tuner, select the audio language to record.
• You may also be able to set which subtitle language
to record; use the button
(LCD page 3)
to select.
• Note that audio and subtitle languages cannot be
changed during the recording of a digital broadcast.
7
(LCD page 1)
Start recording.
If you want to set a recording end time, press the
ì
REC
button repeatedly. The recording time increases in 30
minute increments, up to a maximum of six hours. The
time the recording will end is shown on-screen and in the
front panel display. When the recording ends, the
recorder automatically switches into standby if no other
operation is being performed.
• To cancel the set recording time, press
ì
REC
.
• If you want to pause recording at any time
1
, press
(Pause). Press again to restart the recording (If
recording to the HDD, DVD-RAM or in VR mode, a
new chapter is started after recording restarts).
8 Press to stop recording.
• If you set the recording time in the previous step, you
can still stop the recording anytime by pressing
STOP REC
.
• Recording will stop automatically when there is no
more space on the HDD/DVD, or after 12 hours of
HDD recording (whichever is sooner).
Tip
• During recording you can turn on/off the SCART loop
through function. During recording, press the
INPUT
button
(LCD page 2)
to switch to
SCART THRU
(loop
through on) or
SCART NORM
(loop through off).
Loop through is automatically reset to off after
recording has finished. Note that you can’t switch
loop through on if recording from the
AV1 (RGB)-TV
connector.
Pause Live TV
The Pause Live TV feature lets you effectively pause a TV
programme you’re watching. When you’re ready to
resume watching, just press the
(Play) button
(LCD
page 1)
.
Setting up for Pause Live TV
You can use the Pause Live TV feature with an AV Link-
compatible TV connected using a SCART cable (see
TV
tuner setup for Pause Live TV
below), or using this
recorder’s internal tuner (see
Using the recorder’s
internal tuner for Pause Live TV
on page 97).
TV tuner setup for Pause Live TV
To use this feature with an external TV tuner, the recorder
must be connected to your TV using a SCART cable, and
the
AV. Link
setting
(page 160) should be set to
This
Recorder Only
.
2
See also
Pause Live TV
on page 160 for
more on this.
In order to use Pause Live TV, make the following
connections and settings.
• Pause Live TV will not work as expected when
watching TV via an external component such as a
VCR or digital tuner. It only works with the channel
selected on the TV.
Important
• Pause Live TV only works with the built-in A.TV
(analog) tuner. It does not work with the D.TV tuner or
the external input. Make sure the
Auto Channel
Setting
is set to
Download from TV
(see
Auto
Channel Setting
on page 154).
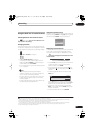
1 Connect this recorder to your TV with a SCART
cable.
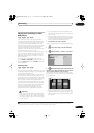
2 Press HOME MENU.
Note
1 Except during Chase Play.
REC
ì
STOP
REC
2• Not all TVs support this feature. Check the instructions that came with your TV if you are unsure.
• This feature will not work unless your TV is compatible with AV Link. See the operating instructions that came with your TV if you’re unsure
about your TV’s compatibility with this feature.
HDD
02SDVRLX70D_EN.book 96 ページ 2007年7月18日 水曜日 午前10時9分