


Playing and recording from a DV camcorder
08
114
En
Chapter 8
Playing and recording from a DV
camcorder
You can play back and record video from a DV camcorder
connected to the
DV IN
jack on the front panel of this
recorder.
Important
• If you connect a second recorder using a DV cable,
you cannot control the second unit from this one.
• You can’t control this recorder remotely from a
component connected to the
DV IN
jack.
Playing from a DV camcorder
1 Make sure your DV camcorder is connected to the
front panel DV IN jack.
2 From the Initial Setup menu, check that the DV
audio input is setup as you would like.
See
DV Input
on page 155 for more on this.
• Check also that the
Audio In
settings for
External
Audio
and
Bilingual Recording
are as you want
them (see
Audio In
on page 155).
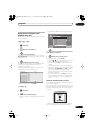
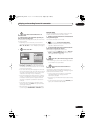
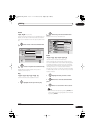
3 Select ‘DV’, then ‘DV Video Playback’ from
the Home Menu.
4 Start playback on the camcorder.
Images from the camcorder should appear on your TV.
• To record the incoming video, press
HDD/DVD
(LCD
page 1)
to select the HDD or a DVD for recording,
then press
ì
REC
(LCD page 1)
. Press
STOP REC
(LCD page 1)
to finish recording.
If there is no signal from the device connected to the
DV jack, or the signal is copy-protected, recording
will pause. It will automatically restart once there is a
recordable signal.
• The recorder will only start recording from the
DV IN
jack if there is a valid signal. Recording will pause if
the signal is interrupted during recording.
• If your source is copy-protected using Copy Guard,
you will not be able to record it. See
Restrictions on
video recording
on page 92 for more details.
Recording from a DV camcorder
• The source signal must be DVC-SD format.
• You can’t record date and time information from DV
cassette.
• During DV recording, if a part of the tape is blank, or
has copy-protected material on it, this recorder will
pause recording. Recording will restart automatically
when there is a recordable signal. However, if there is
more than two minutes of blank tape, this recorder
will stop recording and the camcorder should stop
(depending on the camcorder).
Copying from a DV source
Using the recorder’s remote, you can control both the
camcorder and this recorder.
Important
• Some camcorders cannot be controlled using this
recorder’s remote.
• For best results when recording from a DV camcorder
to this recorder, we recommend cueing the
camcorder to the place you want to start recording
from and setting the camcorder to play-pause.
1 Make sure your DV camcorder is connected to the
front panel DV IN jack.
Also, set the camcorder to VTR mode.
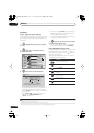
2
(LCD page 1)
Set the recording quality.
• See
Setting the picture quality/recording time
on
page 95 for detailed information.
3 From the Initial Setup menu, check that the DV
audio input is setup as you would like.
See
DV Input
on page 155 for more on this.
• Check also that the
Audio In
settings for
External
Audio
and
Bilingual Recording
are as you want
them (see
Audio In
on page 155).
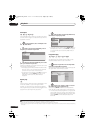
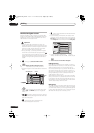
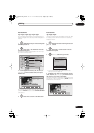
4 Select ‘DV’, then ‘Copy from a DV Source’
from the Home Menu.
• DV recording only works when the DV camcorder is
in VTR mode with a tape loaded.
HOME
MENU
SETUP
REC
MODE
HOME
MENU
SETUP
02SDVRLX70D_EN.book 114 ページ 2007年7月18日 水曜日 午前10時9分