30
The MVP871 has built in Digital Audio to Analog Audio
Decoding Circuitry for the various Digital Audio Formats
used on todays CD and DVD Discs. These included SACD,
DVD-Audio, Dolby Digital, DTS Digital, MP3, WMA,
HDCD and DivX. The Audio Channel Setup selects the
number of Channels, Loudspeaker Configuration and
Delay Time Settings of the Analog Audio Signal leaving
the MVP871.
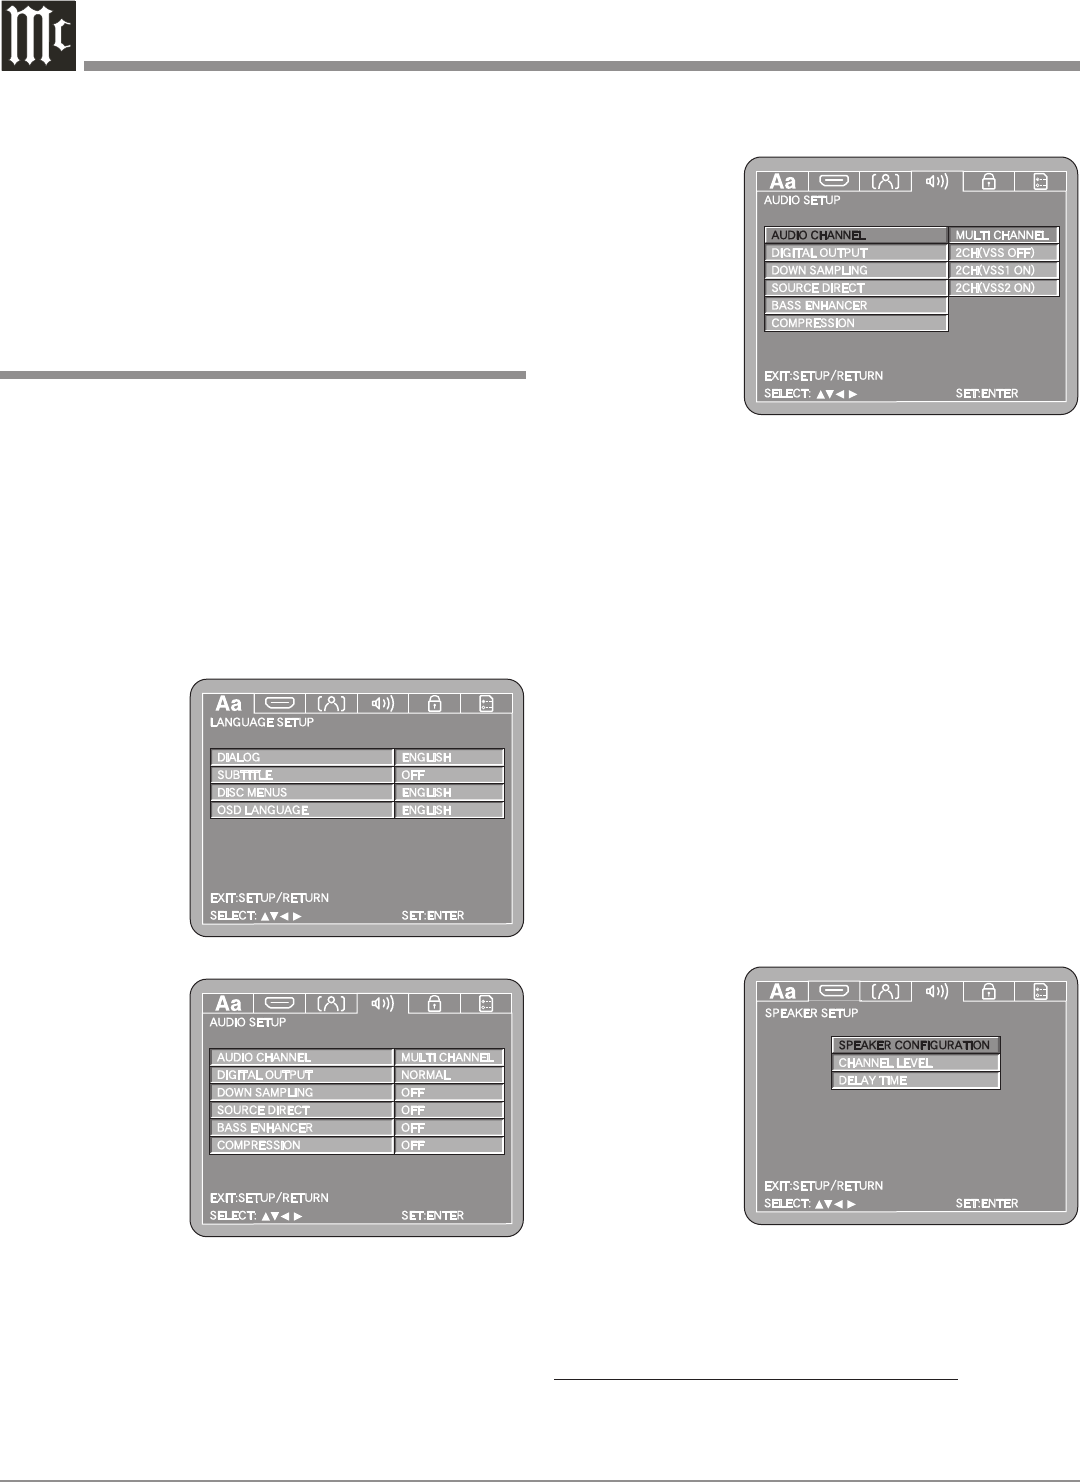
Audio Channel
1. Press the SETUP Push-button on the supplied Re-
mote Control to access the On-Screen Language
Setup Menu.
Then press the
Right direc-
tional Push-but-
ton to select the
Audio Setup
Tab. Refer to
figures 5 (on
page 20), 36
and 37.
Notes: If there is a Disc playing in the MVP871, press
the STOP Push-button twice before pressing the
SETUP Push-button. When the HDMI “MULTI
(LPCM)” Mode has been selected, this AUDIO
CHANNEL Setup is not active.
2. Use the Down directional Push-button followed by
the Right directional Push-button on the Remote
Control to
select Audio
Setup. Refer to
figure 38.
MULTI CHAN-
NEL is the default
menu selection and
has adjustments for
Speaker Configura-
tion, Channel Level
and Delay Time
used after decoding
Multichannel Digital Audio Signals into 5.1 Analog Audio
Channels.
The 2CH VSS OFF setting passes thru a two channel
digital audio signal or two channel digital audio signal
down mixed from a multichannel disc with no additional
audio signal processing.
The 2CH VSS1 ON and the 2CH VSS2 ON settings
pass thru a two channel digital audio signal or two chan-
nel digital audio signal down mixed from a multichannel
disc with the addition Synthesized Surround Sound Signal
Processing.
To perform the MultiChannel adjustments press the
Right directional Push-button followed by the SELECT
Push-button, then proceed to step 4.
To change from the default setting of MultiChannel to
one of the 2CH modes perform step 3.
3. Use the Up or Down directional Push-buttons to
select the desired 2CH followed by the SELECT Push-
button, then proceed to step 7 on page 33.
4. The Speaker
Setup Menu
will now
appear On-
Screen. Refer
to figure 39.
Notes: If the
“Source
Direct”
Audio
Setup
Menu
Option is set to 50kHz or 100kHz the Speaker
Configuration is not active. The title of the icon
button-bar will change color from yellow (the cur-
sor color) to blue indicating the selected item.
LOUDSPEAKER SIZE CONFIGURATION:
In the steps below the size of the Loudspeakers will be
entered into setup. The LARGE Setting refers to the
Audio Setup
Figure 37
Figure 38
Figure 39
Figure 36
4. Return to the Video Setup Menu by pressing the Left
followed by the Up directional Push-buttons.
5. Next continue to the AUDIO SETUP Settings. If no
other changes are to be made in Setup Mode at this
time, exit by pressing the RTRN (Return) Push-button.
Note: The SETUP Push-button may also be pressed to
exit the setup mode.


