42
CD-R/RW MASTER RECORDER CR500 (Recording)
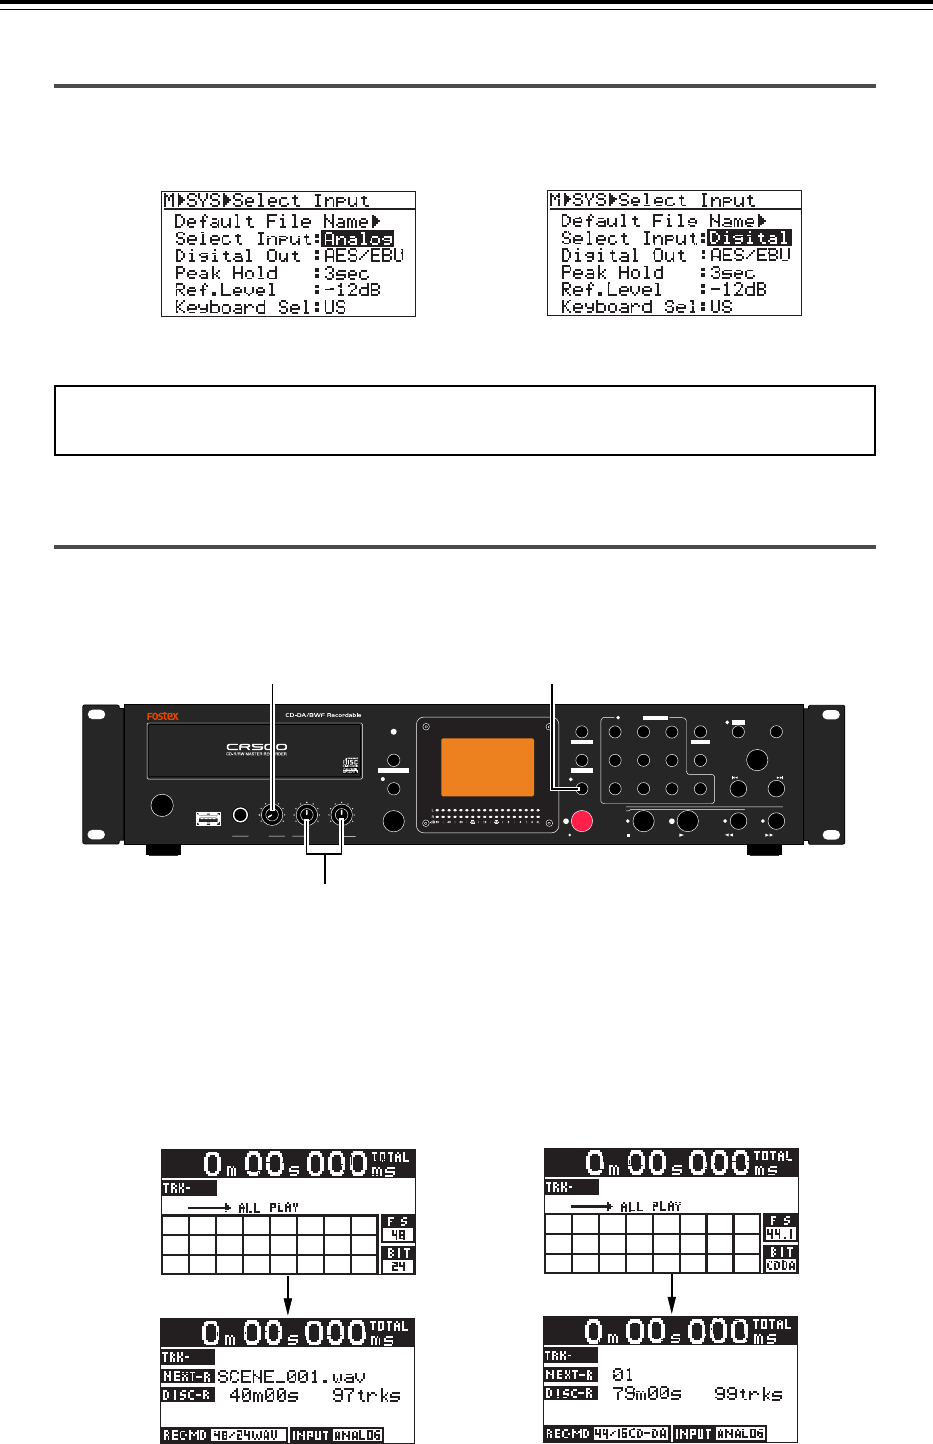
Selecting the input
If you record an analog audio source,
select "Analog".
If you record a digital audio source,
select "Digital".
<Note>:
You must set the "Select Input" menu item appropriately. Otherwise, the con-
nected audio source is not fed to the recorder.
Adjusting recording levels (for analog input only)
EXIT/NO
SHIFT
PUSH
MENU/ENTER/YES
SKIP/CURSOR
STOP/HOME
RECORD PLAY
REWIND
F FWD
PQRS
REC END
ABS 0
0
symbol TUV WXYZ
8
2
5
CONTRAST
FILE SEL
space ABC DEF
EDIT TIME
CLEAR
1
4
7
MEMORY SET
MEMORY
GHI JKL MNO
9
3
6
DISPLAY
LOCATE
+10
DIR SEL
REC RDY
ACCESS
PLAY MODE
PROGRAM SET
REPEAT
OPEN/CLOSE
RL
MAX
MIN
MAX
MIN
MAX
MIN
PHONES
INPUT LEVEL
(KYBD ONLY)
USB
POWER
[REC RDY] key
[INPUT LEVEL] control
[PHONES] control
• To adjust the input levels, press the [REC RDY] key to enter the record ready mode
([REC RDY] indicator flashes).
The display changes to the input monitor screen, which shows the format type, input
selection, etc. In the record ready mode, the L and R level meters show input levels and
you can now check and adjust the input levels.
The following shows input monitor screen examples for a BWF formatted disc and a CD-
DA formatted disc. In these examples, the analog input is selected.
Input monitor screen for a CD-DA formatted disc
Input monitor screen for a BWF formatted disc
According to the sound source, select the "Select Input" menu item of the "SYS SETUP"
menu in the MENU mode appropriately to "Analog" or "Digital". See page 76 for details
about the "Select Input" menu item.
You can adjust recording levels only when you record analog audio.
When you record digital audio, recording is always made at the same level as the digital
source level.
