4. Getting Started
6. Press control button (D) to leave the lens adjustment menu.
A2
D
A
A1
1
2
...... Installation ......
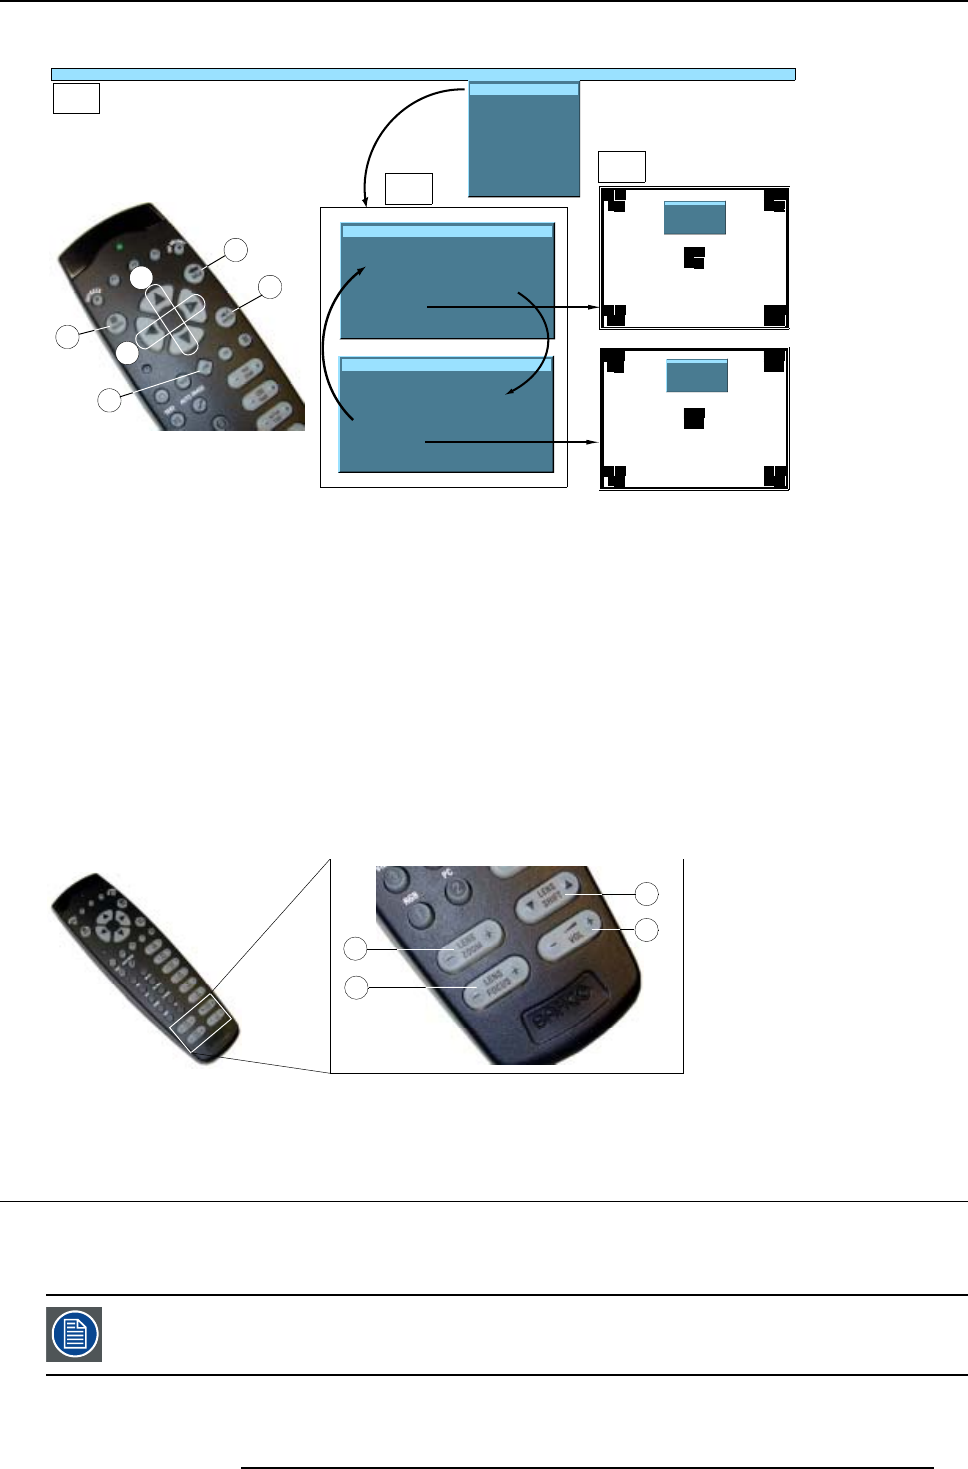
Lens adjustment
Projector address
......
Lens adjustment
Use
↑
and
↓
for zoom
Use
←
and
→
for focus
Press <enter> for SHIFT mode
Press <LOGO> or <LENS>
for test pattern
Lens adjustment
Use
↑
and
↓
for vertical shift
Use
←
and
→
for horizontal shift
Press <enter> for ZOOM/FOCUS
Press <LOGO> or <LENS>
for test pattern
B
C
3
Lens adjustment
Use
↑
and
↓
for zoom
Use
←
and
→
for focus
Press <enter> for SHIFT mode
Press <LOGO> or <LE NS>
for test pattern
Lens adjustment
Use
↑
and
↓
for vertical shift
Use
←
and
→
for horizontal shift
Press <enter> for ZOOM/FOC US
Press <LOGO> or <LENS>
for test pattern
Image 4-13
Lens adjustment via menu
4.10.3 Direct Lens Adjustment (RCU)
Lens adjustment button on the Remote Control
On the Remote Control three buttons with double action are provided, allowing direct alignment for lens ZOOM, FOCUS and VER-
TICAL SHIFT. For Horizontal Shift, some projectors use the V
OL button.
1. Press LENS ZOOM button [-] or [+] (A) for correct image size on the screen.
2. Press LENS FOCUS button [-] or [+] (C) for an overall focus of the
image.
3. Press LENS SHIFT button ↑ or ↓ (B) for correct vertical position of the image on the screen. (image 4-14)
4. Press VOL button [-] or [+] (D) for correct horizontal position of the image on the screen.
[-] button = left shift
[+] button = right shift
C
A
B
D
Image 4-14
Lens adjustment with RCU
4.11 Digital Zoom
What can be done ?
The Digital Zoom key on the RCU allows to zoom in or out on one particular part of the image.
Digital zoom cannot be performed on a logo.
R5976817 RLM H5 02/06/2006 45


