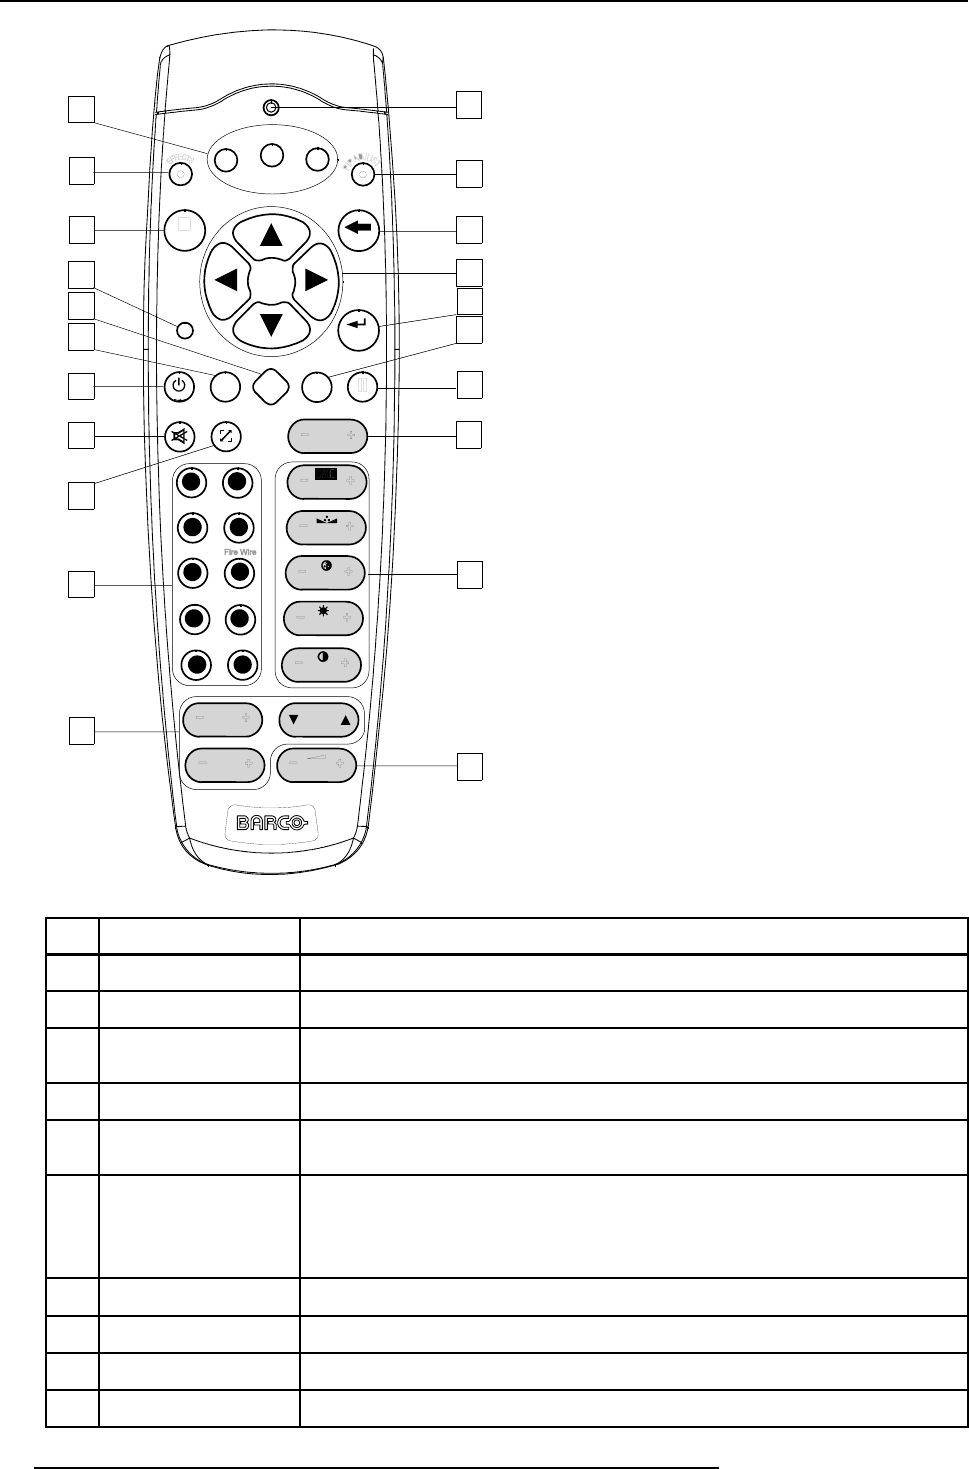
4. Getting Started
F1
F2
F3
MENU
BACK
ENTER
PAUSE
PIP
PHASE
TINT
COLOR
BRIGHTN
CONTR
VOL
9
0
7
8
5
6
3
4
1
2
LOGO
AUTO IMAGE
DIGI
ZOOM
SDI
SB-PC
DVI
VIDEO S-VIDEO
RGB
PC
LENS
ZOOM
LENS
SHIFT
LENS
FOCUS
TEXT
1
21
19
2
3
4
5
6
7
8
9
10
11
12
13
16
14
15
18
20
17
Image 4-1
No. Key name Description
1 Function keys
user programmable keys with funct
ions for direct access.
2 MENU Menu key, to enter or exit the Tool ba
r menu.
3 Address key
(recessed key), to enter the address of the projector (between 0 and 9). Press the recessed
address key with a pencil, followed by pressing one digit button between 0 and 9.
4
LOGO key allows to recall the stored Logo (not
in PiP mode)
5
PAUSE to stop projection for a short time, press ’PAUSE’. The image disappears but full power is
retained for immediate restarting.
6
STBY standby button, to start projecto
r when the power switch is switched on and to switch off the
projector without switching off the power switch.
Attention : Switching to Standby. When the projector is running and you want to
go to standby, press the standby key for 2 seconds.
7
TEXT to des-activate or activate the on screen dialog boxes and menus.
8
AUTOIMAGE Auto image, to center the image
ontheactiveDMDsurface.
9 Digit buttons direct input selection.
9b
SOURCE button this button allows to switch through the active (scanned) inputs
36 R5976817 RLM H5 02/06/2006


