


MD – Recording
47
GB
5 Start playing the desired source to
record.
6 Press ENTER at the desired point to
start recording.
To stop Time Machine Recording
Press x.
To record using the Group
Function
Press MD GROUP repeatedly until “GROUP
ON” appears after step 2. Press GROUP SKIP
repeatedly until “New Group” or the desired
group appears after step 4.
Notes
• You cannot record from a disc (DVD, CD, etc.) with
this system to an MD using this recording function.
• The MD deck starts storing audio data when the deck
stands by for recording in step 4 and you start playing
the source. If less than 6 seconds have passed when
you press ENTER, Time Machine Recording starts
with less than 6 seconds of audio data.
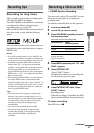
Tip
For details about LP2/LP4 recording, see “Recording
for long times” on page 43.
After recording
Use the Divide Function (page 59).
At any point during recording
— Track Mark
You can mark track numbers during manual
recording of any source.
Press REC/REC IT on the MD deck during
manual recording at the point you want to
add a track mark.
Presetting to automatically
mark track numbers before
recording
— Level-Synchro Recording
The Level Synchro Recording Function is
factory set to on, so the track numbers are
automatically marked. Track numbers are
automatically marked when the input signal is
continuously below a certain level for more than
two seconds and then exceeds that level. If
“L-SYNC” does not appear during recording,
turn on the Level Synchro Recording as follows.
1 Press FUNCTION repeatedly to switch
the function to MD.
2 Press MENU/NO.
3 Press . or > repeatedly until
“Setup?” appears, then press ENTER.
4 Press . or > repeatedly until
“T.Mark Off” (or “T.Mark LSync”)
appears, then press ENTER.
5 Press . or > repeatedly until
“T.Mark LSync” appears, then press
ENTER.
“L-SYNC” lights up.
Marking track numbers
continued