


44
GB
To record using the Group
Function
Press MD GROUP on the remote repeatedly
until “GROUP ON” appears after step 2. Press
GROUP SKIP on the remote repeatedly until
“New Group” or the desired group appears after
step 5.
To record only your favorite CD
tracks
You can record only your favorite CD tracks
using the Program Play. Between steps 2 and 3,
perform steps 1 to 5 of “Creating your own
program” (page 21).
Notes
• You cannot use this recording function with DVDs.
• The MD deck performs analog recording for VIDEO
CDs, Super Audio CDs (except the CD layer) and
discs with MP3 audio tracks. Also, when “T.Mark
Lsync” is selected for Level Synchro Recording
(page 47), more track marks may be marked than the
actual number of tracks.
• You cannot pause the recording.
• If the MD play mode is set to the Repeat Play or
Shuffle Play, the play mode switches to Normal Play
in step 5.
• Playback with PBC function of VIDEO CD is
automatically cancelled.
• The following items are either inoperative or cannot
be used during recording a CD or CD layer part of
Super Audio CD in CD-MD Synchro Recording:
– The Auto Cut Function
– The Track Mark Function
• The tracks are recorded with a recording level of
0.0 dB regardless of the recording level value set in
the Setup Menu.
Tips
• For details about LP2/LP4 recording, see “Recording
for long times” on page 43.
• Depending on the disc, CD-TEXT information may
also be recorded.
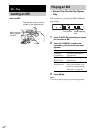
You can make an analog recording of a tape on
an MD. You can use TYPE I (normal) tape.
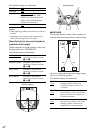
Use buttons on the MD deck for the operation.
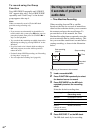
1 Load a recordable MD.
2 Load a tape you want to record.
3 Press MODE repeatedly until
“TAPEtMD SYNC” appears.
4 Press ENTER/START.
“Press START” flashes.
The MD deck stands by for recording and
the tape deck pauses for play.
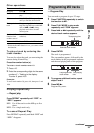
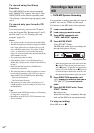
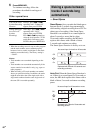
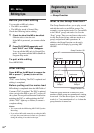
* When playing back both sides or the front side,
N appears. When playing back the reverse
side,
n appears. To play the side opposite the
display, move the TAPE lever to x, eject and
re-insert the tape with the sides reversed, and
then perform the procedure again from step 3.
5 Press DIRECTION repeatedly until
“g” appears to record on one side or
“h” (or “j”) to record on both
sides.
6 Press ENTER/START while “Press
START” flashes.
Recording starts.
When the recording is completed, the tape
deck and the MD deck stop automatically.
To stop recording
Move MD lever to x.
Recording a tape on an
MD
— TAPE-MD Synchro Recording
Tape playback side*