67
INSTALLATION SETTINGS
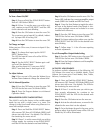
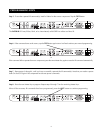
To Turn a Zone ON/OFF
Step 1. Press and hold the ZONE SELECT button.
Zone #1 LED blinks GREEN.
Step 2. If Zone 1 is not the zone you wish to acti-
vate, continue to tap ZONE SELECT until the LED
for the desired zone starts blinking.
Step 3. Press the ON button to turn the zone ON.
The zone turns on to Input #1 by default, indicat-
ed by Input LED #1 turning ON.
Step 4. Press the OFF button to turn the zone OFF.
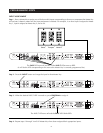
To Change an Input
When you turn ON a zone, it turns on to Input #1 (fac-
tory default).
Step 1. To change that input, tap the INPUT
SELECT button once.
The LED for Input #1 turns off and the LED for
Input #2 turns on.
Step 2. Tap the INPUT SELECT button again until
you reach the desired input.
After reaching Input #4, if you press INPUT
SELECT one more time, it starts again at #1.
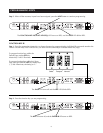
To Adjust Volume
Step 1. Once a zone is ON, press the Volume Up or
Volume Down buttons to change the volume level.
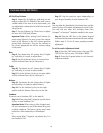
To Exit Manual Operation
Step 1. Press the OFF button to turn the zone OFF.
The LED for the last zone ON blinks GREEN.
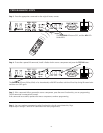
Step 2. Press the Program button to exit Manual
Operation Mode.
PREAMPLIFIER OUTPUT MODE SETTING
The A4.6Ci is set by the factory to the variable-output
mode for use with a single room in a zone. You
change it to the fixed mode when using Silencers in a
zone with multiple rooms.
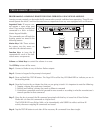
Step 1. Press and hold the ZONE SELECT button.
All zones are OFF. Zone #1 LED blinks GREEN (will
always start with Zone 1 by default). The LEDs for
the remaining five zones are off.
Step 2. If Zone 1 is not the zone which you wish to
change modes, for continue to tap ZONE SELECT
until the LED for the desired zone starts blinking.
Step 3. Press the ON button to turn the zone ON. The
Power LED indicates the current preamplifier output
mode (GREEN for Variable and RED for Fixed).
Step 4. Press the Next Button to toggle the select-
ed zone to the desired mode (fixed mode is cho-
sen when multiple rooms are included in a zone
installed with silencers).
Step 5. Press the OFF Button to turn the zone OFF.
The LED for the last zone ON blinks GREEN.
Step 6. To change settings for another zone, tap the
ZONE SELECT until the LED for the desired zone
starts blinking.
Step 7. Follow steps 3 - 6 for all zones requiring
acoustic adjustment.
To exit Preamplifier Output Mode Setting
Step 1. Press the OFF button to turn the zone OFF.
The LED for the last zone ON blinks GREEN.
Step 2. Press the Program button to exit Preamplifier
Output Mode Setting.
ACOUSTIC ADJUSTMENTS
To perform acoustic adjustment of the following: All
On Volume (for zones set to Variable Mode), Fixed
Volume (for zones set to Fixed Mode), Bass, Treble,
Balance, Loudness, Flat.
Step 1. Press and hold the ZONE SELECT button.
All zones are OFF. Zone #1 LED blinks GREEN (will
always start with zone 1 by default). The LEDs for
the remaining five zones are off.
Step 2. If Zone 1 is not the zone you wish to per-
form acoustic adjustments for, continue to tap
ZONE SELECT until the LED for the desired zone
starts blinking.
Step 3. Press the ON button to turn the zone on.
Step 4. Activate the selected source, so sound is dis-
tributed to the zone that is to be adjusted.
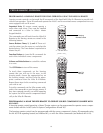
Step 5. Go to the Master Keypad in the zone you're
going to adjust. Note that the room will be ON and
Master Key #1 will be illuminated.


