


64
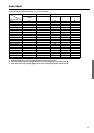
Setting
Battery
Clock
Time
Day
LCD
LCD Light
Button Light
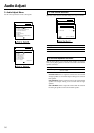
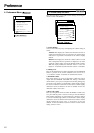
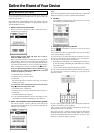
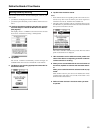
First setup panel
Adjusting
Tap the clock repeatedly.
Tap the time button and use the Left and Right
button.
Tap the day button and use the Left and Right
button.
Tap the LCD button and use the Left and Right
button.
Tap the LCD Light button and use the Left and
Right button.
Tap the Button Light button and use the Left and
Right button.
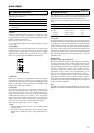
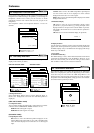
Third setup panel
This panel provides technical information about your remote controller.
To exit Setup Mode
Tap the SETUP label on the remote controller icon.
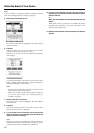
Second setup panel
Setting
Set, Level
Mode Menu
Touch
Button
Calibrate
Revert
Function
Shows the battery level.
Turns the clock display on or off and lets
you set 12 or 24h time display.
Sets the clock.
Sets the day.
Sets how long the touchscreen stays on.
Sets how long the backlight of the
touchscreen stays on.
Sets how long the backlight of the direct-
access and Left/Right buttons stays on.
Function
Turns the backlight always on or off when
activating the touchscreen.
Note: When you choose always off, you
can only activate the backlight using the
backlight button.
Hides or shows the Mode button. Hiding
the Mode button prevents unwanted
changes to stored commands.
Adjusts or turns off the touchscreen beep.
Adjusts or turns off the beep of Left/Right
and direct-access buttons.
Calibrates the touchscreen.
Reverts the remote controller to the factory
default configuration.
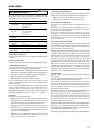
Adjusting
Always on: Tap the Level button and position
the indicator in the right half of the indication bar
using the Right button and tap the Set button.
Always off: Tap the Level button and position
the indicator in the left half of the indication bar
using the Left button and tap the Set button.
Tap the Mode Menu button.
Tap the Touch button repeatedly.
Tap Button repeatedly.
Tap the Calibrate button and follow the on-
screen instructions.
Tap the Revert button and follow the on-screen
instructions.
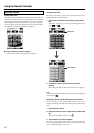
Adjust the Settings
Most of the remote controller’s features can be set to your own
needs.
1. Touch and hold the remote controller icon for a few
seconds.
The first setup panel appears. You can see the second and third
setup panel by using the scroll buttons.
2. Tap the button of the setting you want to adjust.
The button becomes black.
3. Use the Left and Right button to adjust the setting.
Note:
Tap the Left and Right buttons are repeating buttons; holding down
one of these buttons will increase or decrease a value repeatedly.
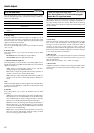
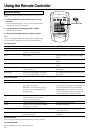
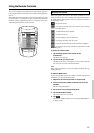
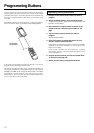
Using the Remote Controller
+
–
CH
VOL
MUTE
CONT
+
–
LIGHT
Touch and hold