


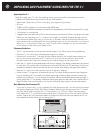


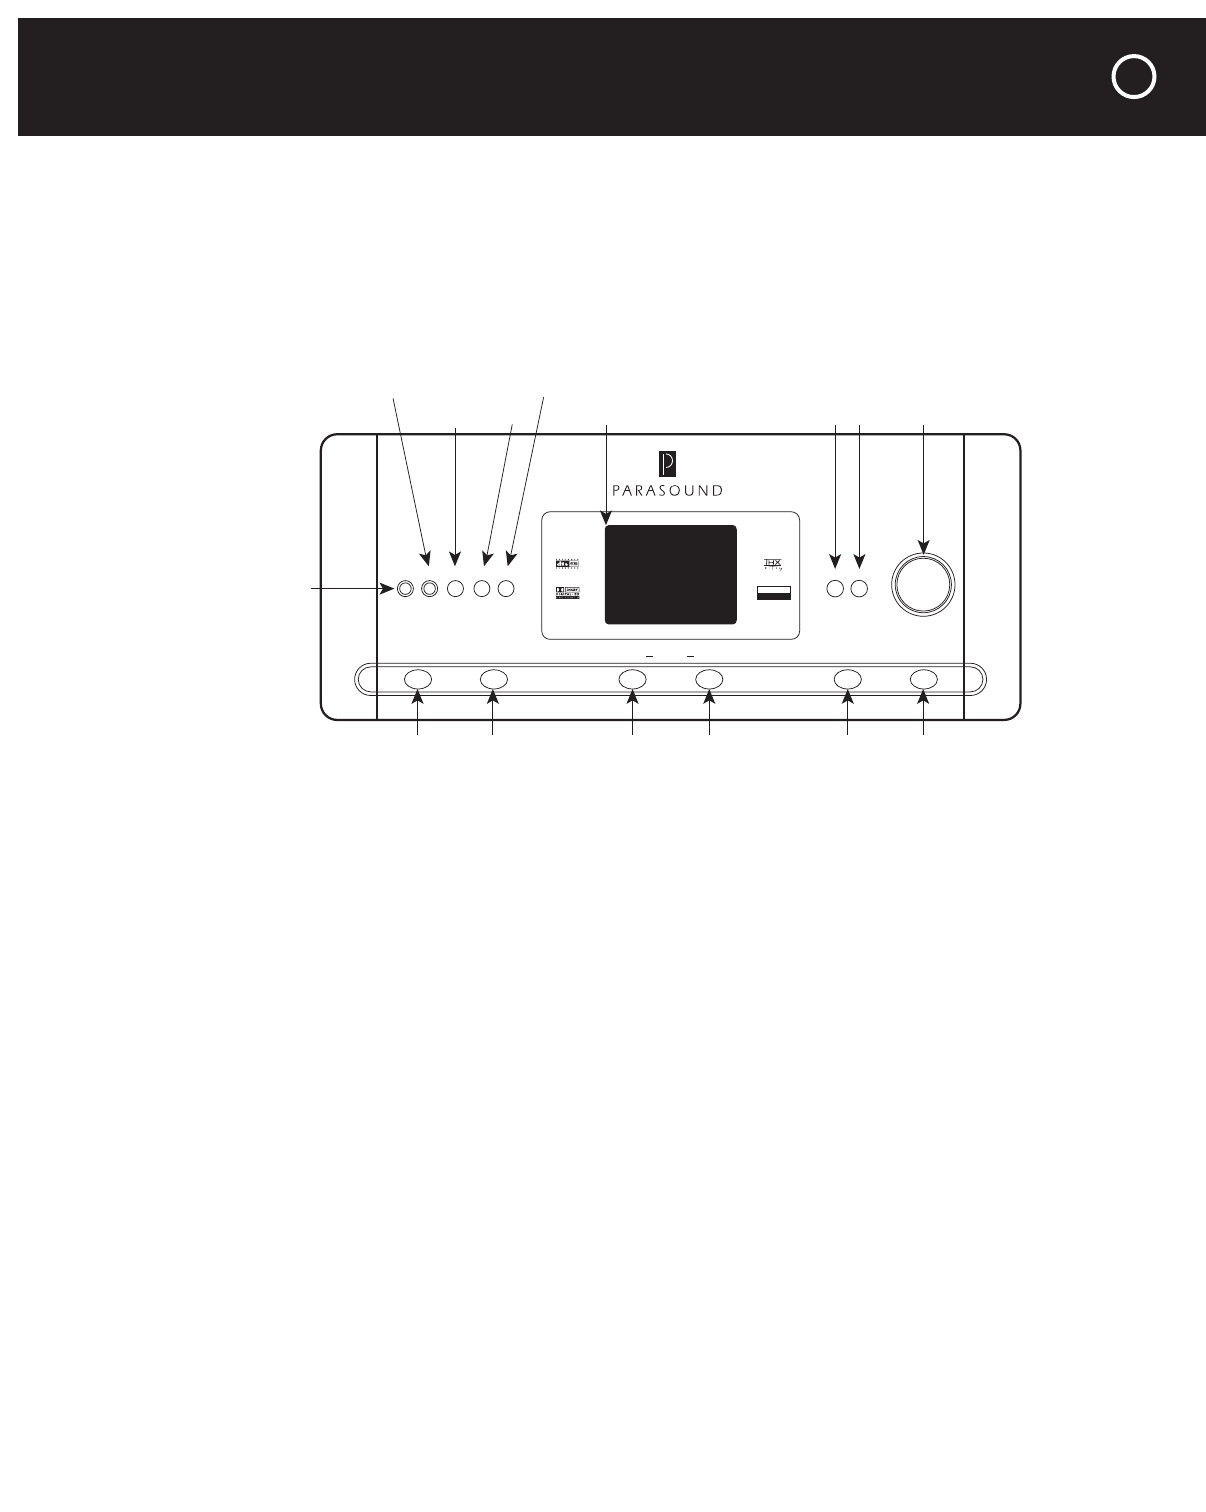
Despite its versatility the Parasound Halo C 1 Controller has only ten pushbuttons, a knob, and
a display on its front panel. That’s in part because we expect users will most often operate it
by remote control and in part because many front-panel controls do more than one thing. The
operations described in this chapter can be performed easily with the front panel or the Master
remote control. Other operations, which can be performed only (or far more conveniently) with
the Master remote are covered in the chapter after this one.
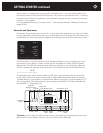
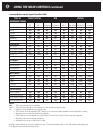
Here’s a map of the panel:
The Main Operations: On-Off, Volume, Source Selection
On-Off
When the C 1 is turned off, the On-Off button’s halo glows a soft blue and the Parasound logo
above the display glows a soft red. (If nothing is lit, either the C 1 is not plugged into a live outlet or
the power switch on the rear panel is turned off.) Turning the unit on makes the button’s halo and
the Parasound logo brighter, and turns on the display and the blue halos around the other buttons.
Turning the C 1 off with this button (or the remotes) leaves the C 1 inactive but able to respond
to a turn-on command from either remote control. To turn the C 1 completely off, for service or
when you will be away for long periods,
first turn the C 1 off with the front-panel ON-OFF
switch or remote control, then reach around behind the unit’s left side, reach over the power
cord, and flip down the rocker switch. This will prevent your hearing turn-off thumps through
your speakers and will ensure that the current volume and source settings are preserved when
you turn the C 1 on again.
The OFF and ON buttons on the small SideKick remote have the same effect as the front-panel
switch. On the Master remote, the action of the OFF and ON buttons depends on the remote’s
operating mode. When the remote’s MAIN menu is displayed, the OFF and ON buttons perform
custom-programmed macros designed to power your entire home theater system on and off.
(To reach this menu, press the MAIN button on the remote.) But when the remote’s C1/C2
menu is displayed, the OFF and ON buttons affect only the C 1. You’ll notice the remote menu
says C1/C2; this is because the same remote control is used for the Halo C 2 Controller.
Controller
C1
On-Off Zone Zone Display Main Source
Status Menu
Mute DimPhones Cal Mic
Surround
LULUC A S F I LMLM
THX SURROUND EX
7.5 CHANNEL
ENHANCED
SURROUND
Audio 1
AUDIO
Signal Analog
Input: Analog 7
Mode Stereo
VIDEO
Signal No signal
Input AUTO 2
-44dB
––––––––––––-––-|–--------––-|––----–
Knob
Headphone
Output
On-Off
Calibration
Microphone Input
Display Dim
MuteIR
Zone Display
Zone
Display
Main
Source Surround
Mode
Video Display Screen MenuStatus
USING THE MAIN CONTROLS
9