


As you’ve probably gathered from the many earlier references to this chapter, just about every
aspect of the C 1 Controller’s operation is customizable to suit your preferences and your home
theater system.
Don’t rush your setup; it might take a few hours or more. But this time will be amply rewarded
with years of incredible performance and ease of operation.
If your system has been set up for you by your dealer or installer, you may still wish to read this
chapter in case you want to make further changes yourself.
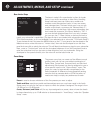
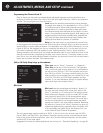
Navigating the Setup Menus
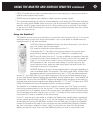
You can set up the C 1 just the way you want it, with either the front-panel and remote controls
or with a PC and downloadable HaloSetup software (page 36)
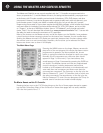
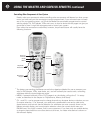
To get into Setup mode, press the MENU button on the front panel or on the Master remote.
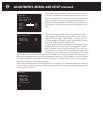
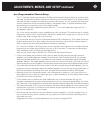
If the front-panel display screen is on and the C 1 is in status mode or in video preview mode
with “Superimpose” selected, it will show the main menu, with a triangular cursor pointing to
the setup menu that was selected most recently. If your primary viewing screen is also used
for on-screen display (OSD), it will show the same information as the C 1 front-panel display.
(To turn the front-panel display on and change display modes, press the DISPLAY MAIN button
on the front panel of the C 1. To select “Superimpose,” see Display Setup on page 34; for con-
necting an on-screen display, see also page 49.)
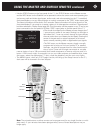
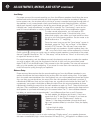
You can access specific setup menus by pressing the
front-panel MENU button to advance to the next item on
the list, or by pressing MENU on the Master remote, then
rocking the remote’s thumbpad up or down, until the
name of the setup you want appears on the second line
of the built-in display or is indicated by the cursor (᭤) on
the video screen. (Note: Programming is much easier
with the remote, which lets you scroll backward and for-
ward through the list rather than simply forward.)
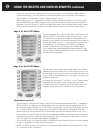
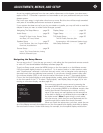
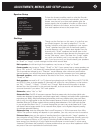
When you reach the setup menu you want, press the cen-
ter of the Master remote’s thumbpad (or turn the front-panel knob slightly clockwise) to display
the next level of menus. Under Audio setup, for example, the front-panel display would show:
Main Menu
᭤ Audio setup
Speaker setup
Source setup
Display setup
Trigger setup
THX Audio setup
Exit
Navigating The Setup Menus ..page 23
Audio Setup ............page 25
Dolby/DTS, Bass Limiter, Presets, Treble
And Bass, LFE Level, Reverb.
Speaker Setup ..........page 27
Level, Distance, Size, Aux (Programmable)
Channels, Autocalibration
Source Setup ............page 32
Inputs, Title, Preset Selection, Analog
Monitor, Balanced Inputs
Display Setup ............page 34
Trigger Setup ............page 35
THX Audio Setup ..........page 35
THX EX Enable, Boundary Gain
Compensation, ASA (Advanced Speaker Array)
Halo Setup Software ........page 36
ADJUSTMENTS, MENUS, AND SETUP
23