


right front, right surround, right back, left back, left surround, and subwoofer. When used for
manual level setting, it can be directed to whichever channel you’re adjusting. This feature is
only available in “Level setup” on the “Speaker setup” menu.
•
7. 1 : Switches to the C 1 Controller’s 7.1-channel analog unbalanced inputs, for use with multi-
channel DVD-Audio and SACD players, or any future components that do their own surround
decoding. Like the “Bypass” mode for the balanced inputs, this is a direct pass-through mode,
with no processing except the precision analog volume control, for maximum signal purity.
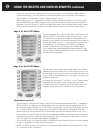
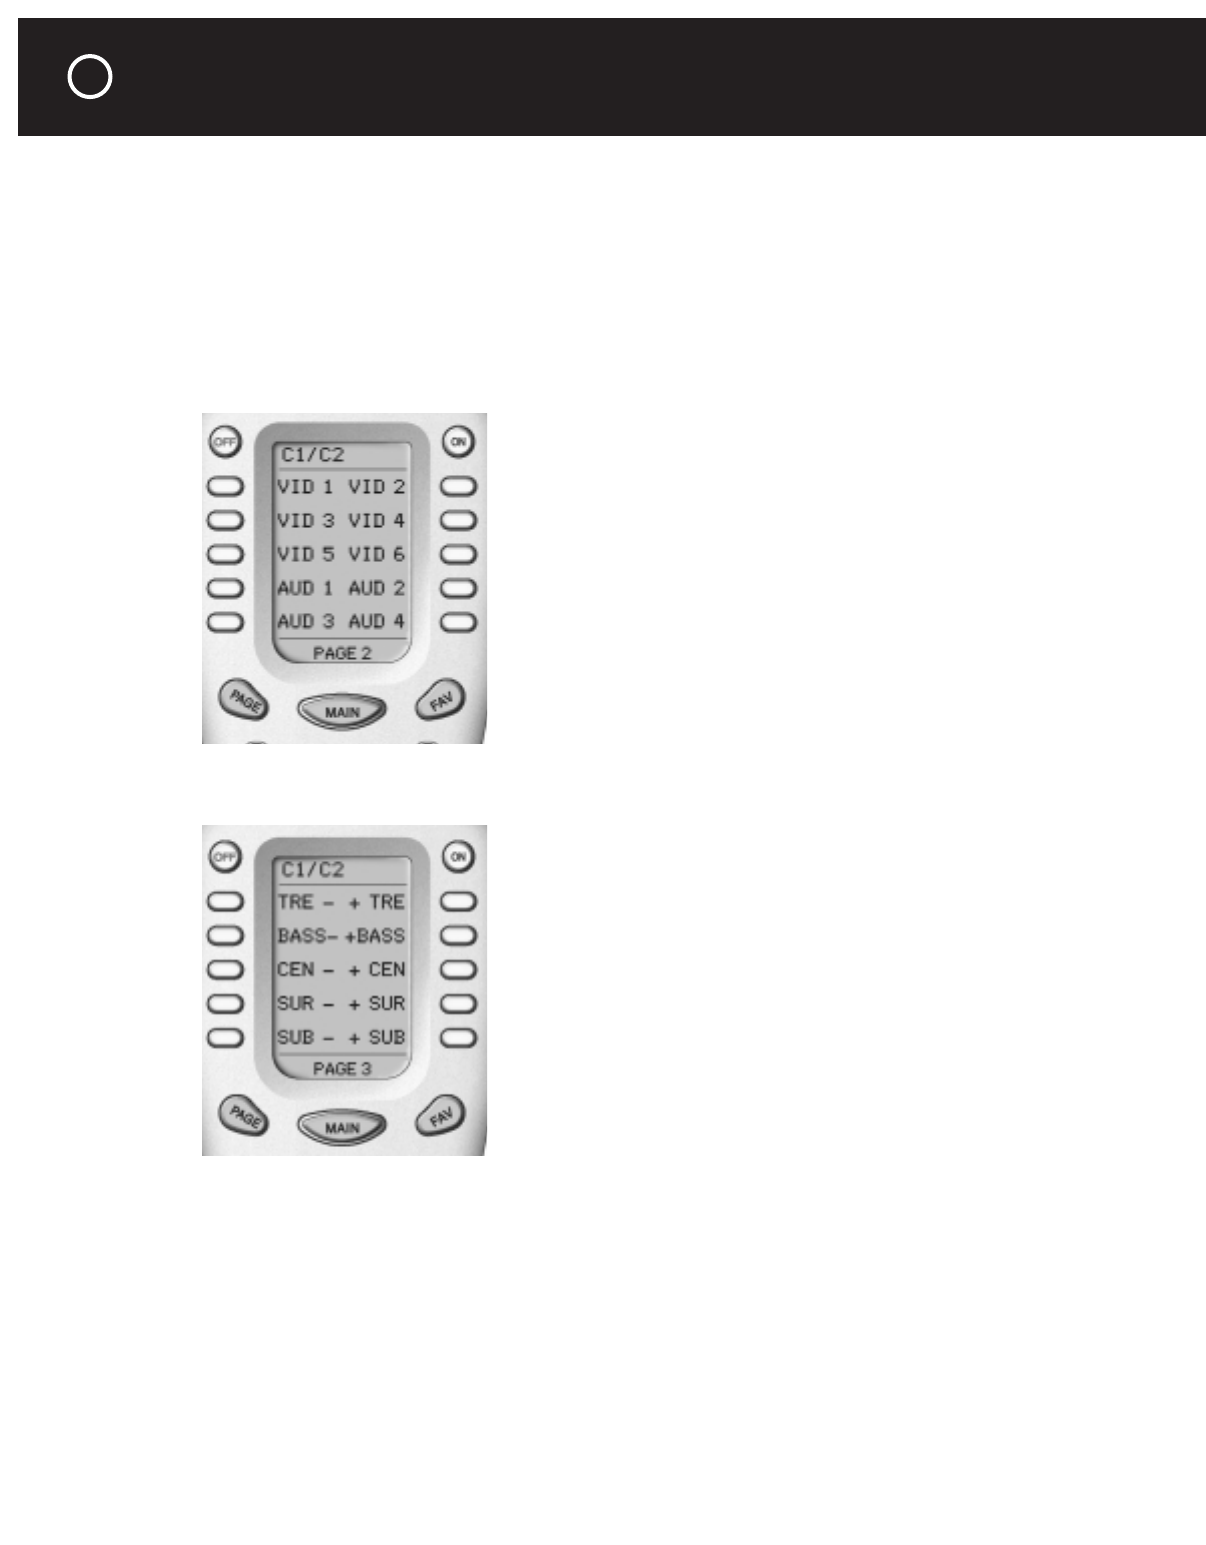
Page 2 of the C1/C2 Menu
The factory-default input titles, shown here, match the factory
defaults of the C 1. The inputs on this list and on the C 1 can
be renamed by your dealer or installer to correspond to the
sources in your system. You can also rename them yourself. To
rename the inputs on the C 1, using the Master remote, see
“Source Setup” in the “Adjustments, Menus, and Setup”
chapter. To rename the input keys on the remote’s Page 2
menu requires the downloadable MX-Editor software; it can
also be used to rearrange the Page 2 menu if you find a differ-
ent order more convenient.
Page 3 of the C1/C2 Menu
The controls on this screen page, which affect the currently
selected source only, offer up to 12 dB of boost or cut of tre-
ble and bass in the front left, center, and right channels, and
up to ±12 dB of level adjustment in the center, surround, and
subwoofer channels.
For inputs you have set to “Flat Trims” in the “Source Setup”
menu (see next chapter), these settings go back to zero
once you switch to a different source; for inputs set to “No
Change,” these settings will remain until you reset them.
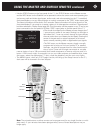
Printed Buttons and the C 1
As mentioned in the previous chapter, several of the printed buttons affect the C 1’s operation:
•
OFF and ON on the Master remote change function to match the current control page. When
the remote’s screen displays any of the C1/C2 control pages, the OFF and ON buttons turn the
C 1 on and off. When a control page for another device is selected and displayed, they turn
power off and on for that device only. These buttons can also be reprogrammed to turn your
entire system on and off when the remote is displaying its Main screen rather than screens for
individual components; unless reprogrammed, they will control power for both the C 1 and the
T 3 tuner when the remote’s Main screen is displayed.
•
The two VOL buttons on either the Main or SideKick remote raise and lower the volume setting
of the C 1, regardless of the current control page.
•
MUTE, on either remote, turns off the C 1 Controller’s audio outputs in the local zone or, if the
C 1 is already muted, unmutes it.
USING THE MASTER AND SIDEKICK REMOTES continued
18