


UNPACKING AND PLACEMENT GUIDELINES FOR THE C 1
Unpacking Your C 1
Carefully unpack your C 1 from the shipping carton and remove all the enclosed accessories:
•
Master and SideKick remote controls, with six AAA batteries
•
Serial cable, D9 female to 3.5-mm male plug, for programming remotes
•
AC cord
•
18 BNC-to-RCA adapters for component-video/RGB jacks
•
1 Omnidirectional electret condenser microphone for autocalibration, with 25-foot cord and 3.5-mm plug
•
1 AA battery for microphone
•
2 trigger-control wires, each with a 2.5-mm sub-mini plug on one end and a 3.5-mm mini plug on the other
While you are unpacking your C 1, inspect it thoroughly for possible shipping damage and tell
your Parasound dealer right away if you find any. If possible, save and store both the inner and
outer cartons and–most especially–the foam packing inserts, so you can use them if you have to
ship the C 1, or to protect it when you move. To save room in storage, you can cut the seams
on the bottom of the cartons and flatten them.
Placement Guidelines
The C 1 will be easiest to use and stay reliable longer if you follow these simple guidelines:
•
Place the C 1 on a shelf that will adequately support its weight.
•
Unless you’ll control the C 1 through remote infrared sensors, pick a shelf placed where you
can aim the remote controls at the C 1 easily. (If you do use remote sensors, be sure the
remotes’ beams can’t reach the remote and front-panel sensors at the same time.)
•
Place the C 1 where its front-panel display will face you directly. (The display is designed to be viewed
no more than 15° to either side of its axis and no more than 30° above or 10° below axis.) If this is not
possible, the display’s contents can also be sent to a remote video display; see page 49 for details.)
•
Keep the C 1 away from heat sources such as air ducts or radiators.
•
Leave at least 1" of space on all sides and the top. This helps facilitate passive heat dissipation.
If you’re installing the C 1 yourself, use cables long enough to leave at least two feet of slack; that
enables you to pull the C 1 out to change connections without inadvertently disconnecting things. If
you’re putting the C 1 in a cabinet, make sure there’s grab space on each side; with a space that’s at
least 22 inches wide, you’ll be able to turn the unit around for easy access to its rear connections.
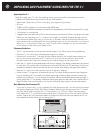
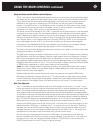
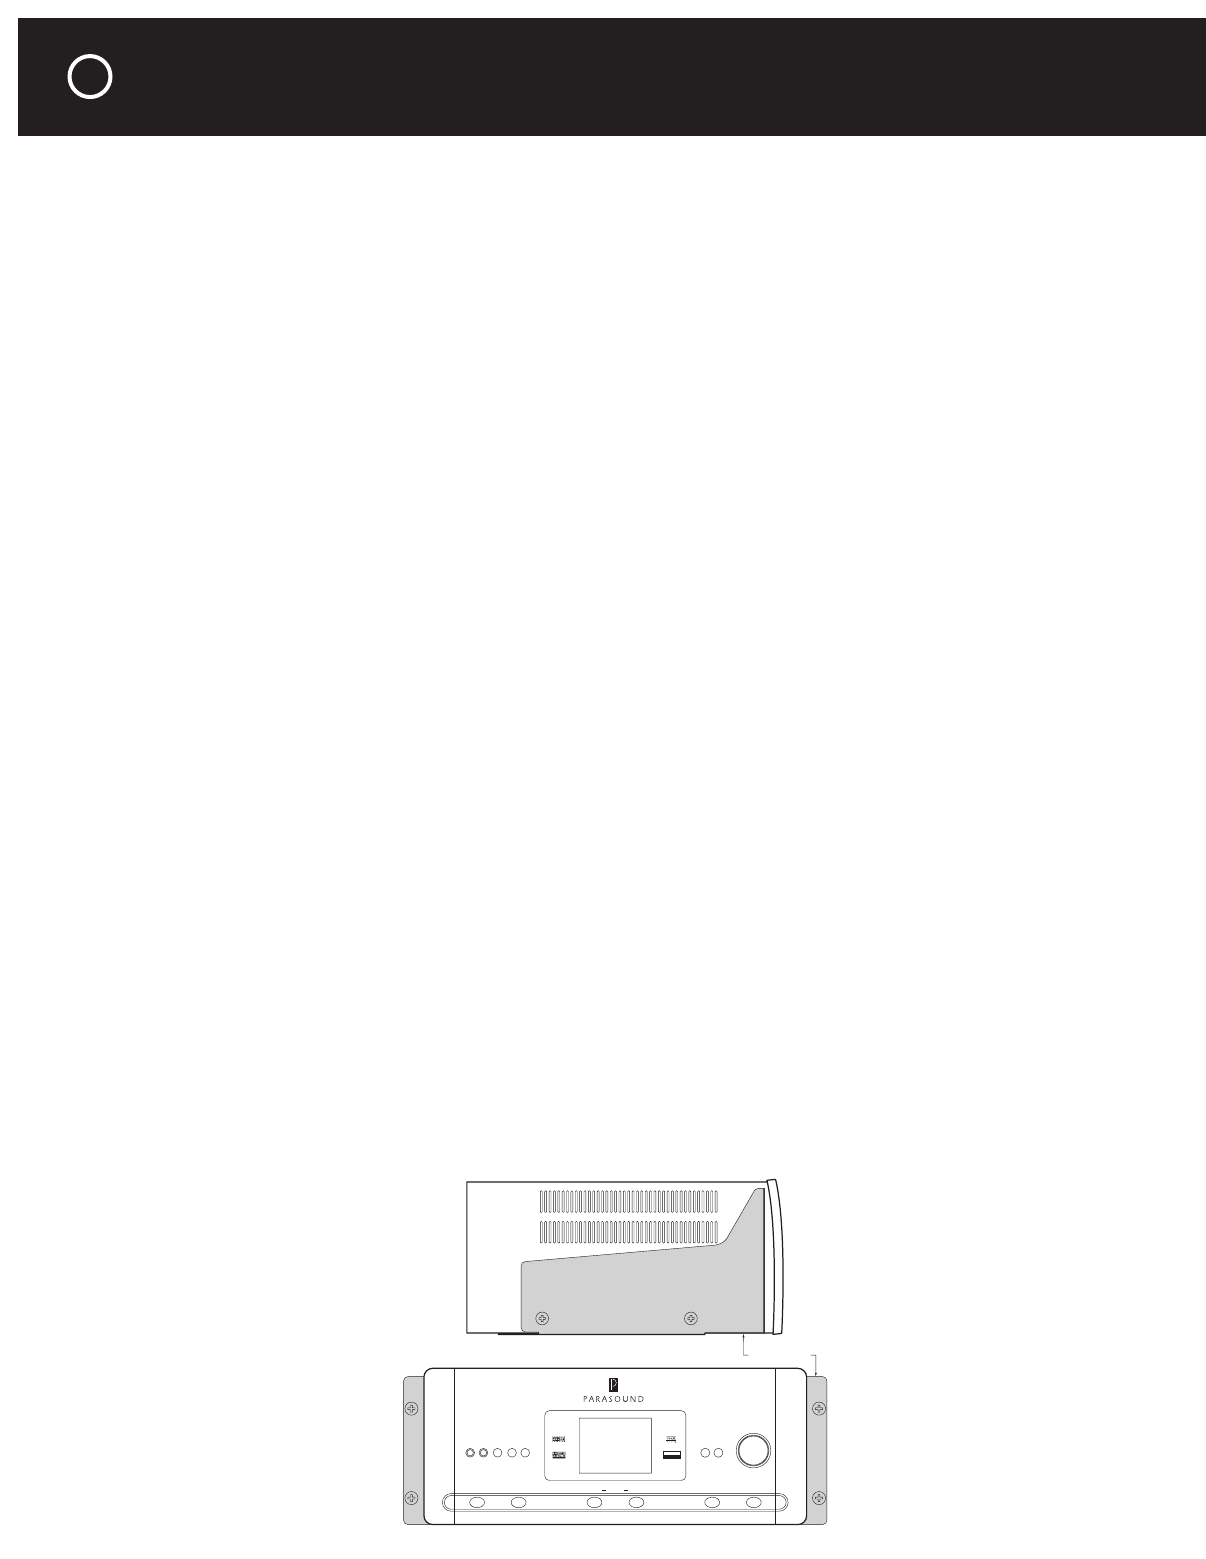
Rack Mounting Your Parasound C 1
If you plan to mount the C 1 into a standard 19"-wide equipment rack, you will need to purchase
the optional Parasound HRA 4 Rack Mount Adapter. With its four feet removed, the C 1 chassis
and front panel height occupies four 1
3
⁄4" rack spaces (7" or 178 mm). When mounting equip-
ment below the C 1, you will also need to allow about
1
⁄8" below the unit for the bottom chassis
screws. Please call your Parasound dealer or Parasound’s Technical Services department if you
need additional advice about rack mounting the C 1.
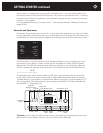
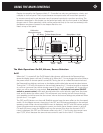
Controller
C1
On-Off Zone Zone Display Main Source
Status Menu
Mute DimPhones Cal Mic
Surround
HRA 4 Rack Bracket
LULUCA S F ILMLM
THX SURROUND EX
7.5 CHANNEL
ENHANCED
SURROUND
4