Installing Mirrored Systems CentreVu CMS Release 3 Version 8 Disk-Mirrored Systems
How to upgrade an Enterprise platform to disk mirroring 11
2
Installing Mirrored Systems 2
This chapter contains procedures for upgrading existing
computer
systems to use disk mirroring and for installing a
mirrored system under factory conditions.
How to upgrade an
Enterprise
platform to disk mirroring 2
This section tells how to upgrade
CentreVu
Call Management System
(CMS) on a
Sun Enterprise
3000 or 3500 computer from a nonmirrored
system to a mirrored system.
Disk drive slots 2
Before you begin, you must understand the drive slot arrangement in
your system.
In an
Enterprise
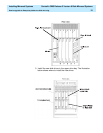
3000 computer, there are 10 slots, allowing up to five
disks for each mirror. Each slot is labeled with a number 0 through 3 or 10
through 15; there are no slots numbered 4 through 9. All the drive slots
are on controller 0.
In an
Enterprise
3500 computer, there are eight disk drive slots, four in
each of two bays. The slots in the lower bay are labeled 0 through 3 and
are on controller 0; the slots in the upper bay are numbered 4 through 7
and are on controller 1. In a mirrored system, slots 0 through 3 are
reserved for the original disks, and slots 4 through 7 are reserved for the
mirror disks.
The slot number is the drive’s target number, which becomes part of the
device name. A drive in slot 1, for example, has the device name
c0t1d0
.
The drive in slot 0 is always the primary boot disk.
In an
Enterprise
3000 mirrored system, mirror disks are normally installed
in target number order, beginning with the first empty slot. That makes it
difficult to predict the mirror layout on an upgraded system. In an
Enterprise
3500 mirrored system, however, mirror disks always go in the
upper bay. If you are mirroring a two-disk system, for example, the two
original disks would already be installed in slots 0 and 1 in the lower bay,
and you would install the two new disks in slots 4 and 5 in the upper bay.


