


Getting Started Setup Playback Remote Control Multi-Zone Information Troubleshooting Specifications
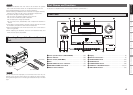
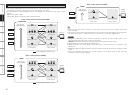
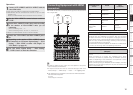
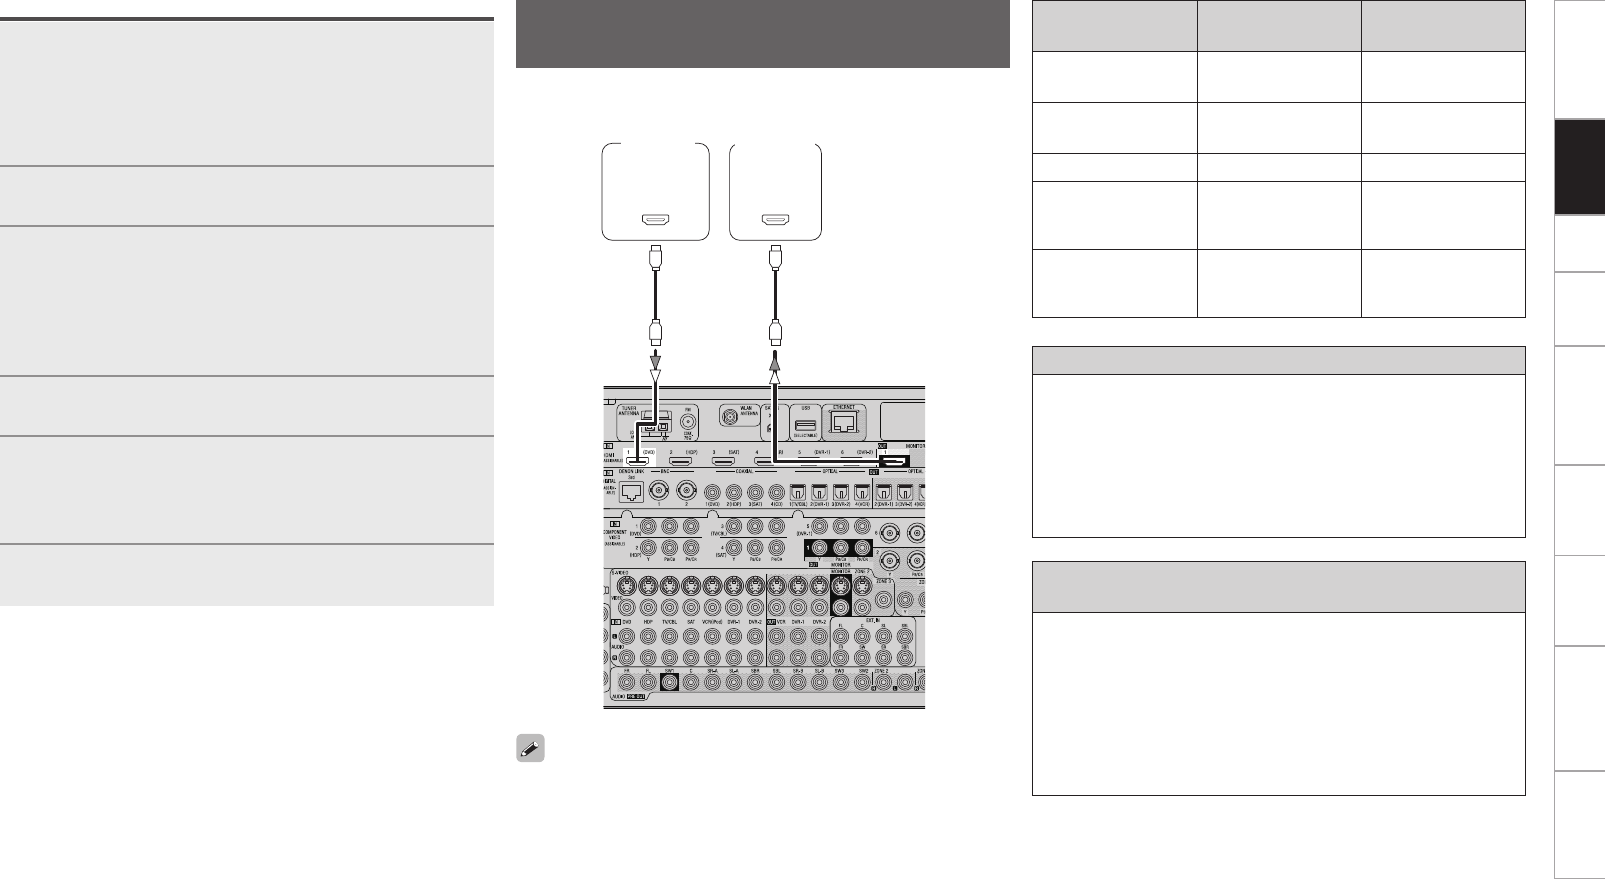
With HDMI connections, the video and audio signals can be transferred
with a single cable.
065
)%.*
*/
)%.*
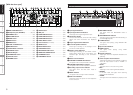
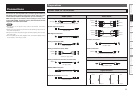
Compatible audio
format
Details
Discs
(examples)
2-channel linear PCM
2ch 32-192 kHz
16/20/24 bits
CD, DVD-Video,
DVD-Audio
Multi-channel linear
PCM
8ch 32-192 kHz
16/20/24 bits
DVD-Audio
Dolby Digital, DTS Bitstream DVD-Video
DSD
2/5.1ch
2.8224 MHz
1 bit
SACD
Dolby Digital Plus,
Dolby TrueHD,
DTS-HD
Bitstream
HD DVD,
Blu-ray Disc
Monitor
DVD
player
b The AVP-A1HDCI is supported to the feature of HDMI listed below.
• 30 and 36 bit Deep Color
• xvYCC
• Auto Lipsync Correction
Copyright protection system (HDCP)
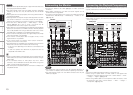
In order to play the digital video and audio signals of a DVD- Video or
DVD-Audio disc using HDMI/DVI connections, both the connected
DVD player and monitor must be equipped for a copyright protection
system called “HDCP” (High-bandwidth Digital Content Protection).
HDCP is a copy protection technology consisting of data encoding
and mutual identification of the devices.
The AVP-A1HDCI is HDCP-compatible. For details on the DVD player
or monitor you are using, refer to its operating instructions.
When connecting with an HDMI/DVI converter cable
(adapter)
• HDMI video signals are theoretically compatible with the DVI
format.
When connecting to a monitor, etc., equipped with a DVI-D
connector, connection is possible using an HDMI/DVI converter
cable, but depending on the combination of components in some
cases the video signals will not be output.
• When connecting using an HDMI/DVI converter adapter, the video
signals may not be output properly due to poor connections with
the connected cable, etc.
• By default, HDMI sound is output from the speaker of the power
amp connected to AVP-A1HDCI.
• To output the sound from the TV, make the settings at GUI menu
“Manual Setup” – “HDMI Setup” – “Audio” – “TV” (vpage 32).
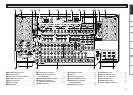
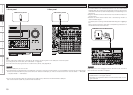
Connecting Equipment with HDMI
connectors
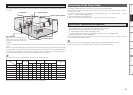
Operations
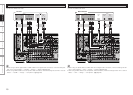
1
Connect AVP-A1HDCI and POA-A1HDCI with the
control link cable.
b The control link cable is included with the POA-A1HDCI.
b AVP-A1HDCI can be connected and control to up to 2 POA-
A1HDCI units.
Refer to the POA-A1HDCI user’s manual for how to connect.
2
Set the POA-A1HDCI’s control selector switch to
“AVP”.
3
Set the POA-A1HDCI’s mode select switch according
to the number of POA-A1HDCI units you are
connecting.
When connecting 1 unit : “1”
When connecting 2 units : 1st unit “1”, 2nd unit “2”
b Refer to the POA-A1HDCI owner’s manual for details.
4
Switch the AVP-A1HDCI and POA-A1HDCI power
on.
5
Depending on the number of POA-A1HDCI units to
be connected, set GUI menu “Option Setup” – “POA
Setting” – “POA LINK” to either “ON (Single)” or
“ON (Dual)” (vpage 41).
6
Use GUI menu “Option Setup” – “POA Setting”
– “LINK Check” to check the connection.
Connections