0
Getting Started Setup Playback Remote Control Multi-Zone Information Troubleshooting Specifications
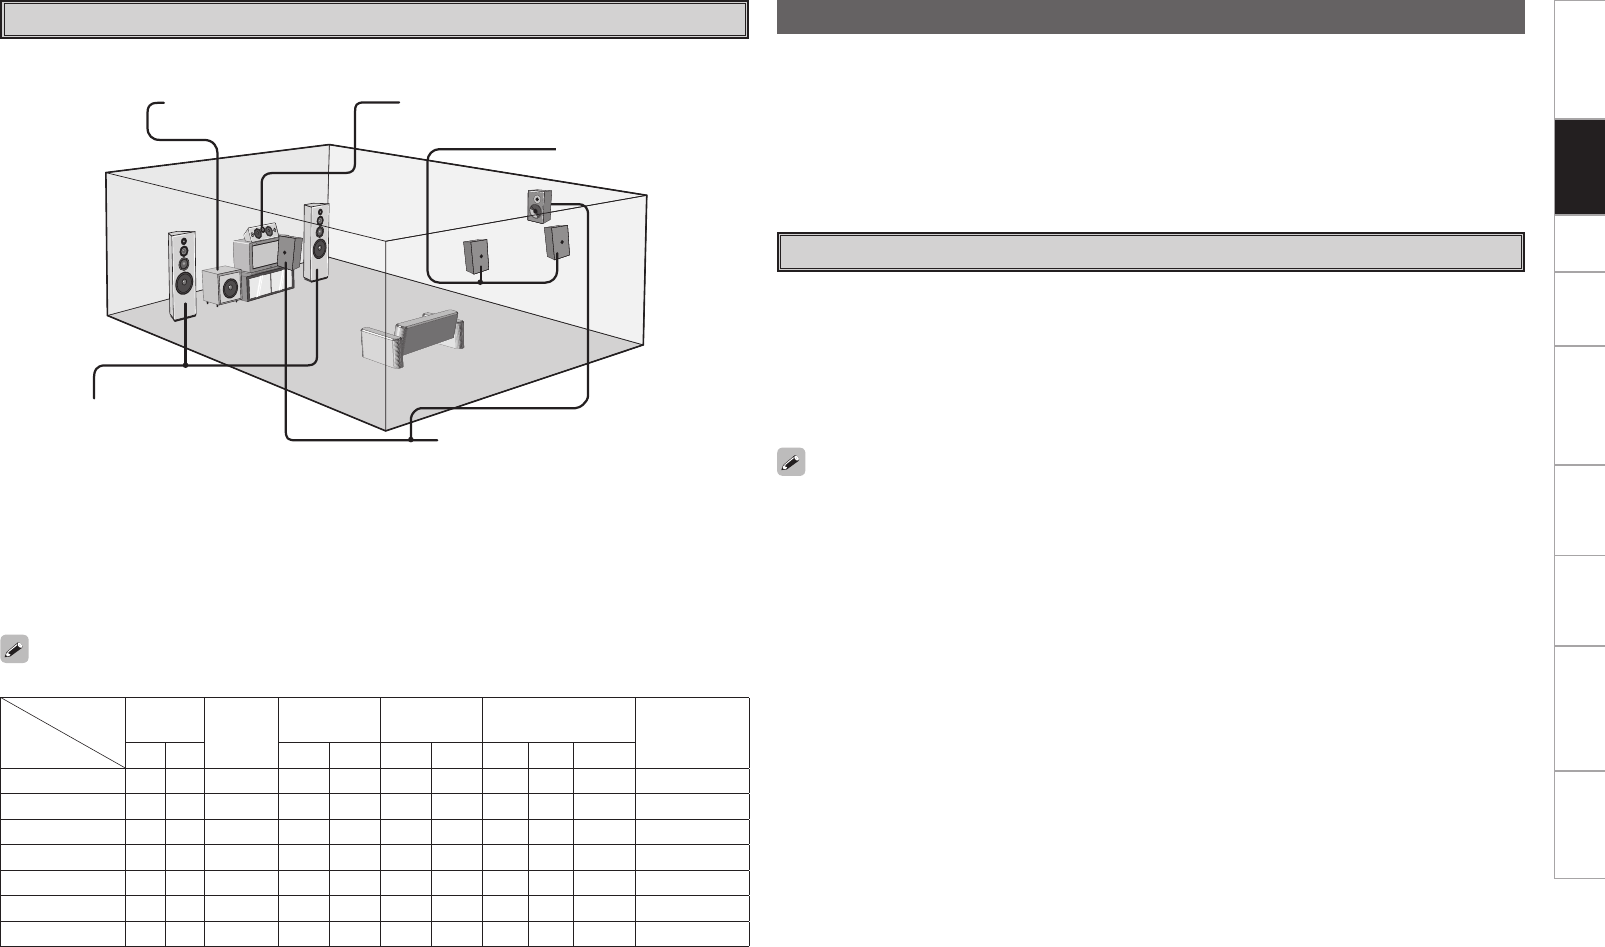
The illustration below shows a basic example of installation of the amplifier combined with 8 speakers and
a monitor.
Speaker Layout
Subwoofer Center speaker
Surround speakers
Front speakers
Place the front speakers to the
sides of the monitor or screen and
as flush with the screen surface as
possible.
Surround back speakers
The table below shows a typical speaker configuration for the AVP-A1HDCI.
FRONT
CENTER
SURROUND
A
SURROUND
B
SURROUND BACK
SUBWOOFER
(b)
L R L R L R L R 1 only
9.1-channels
S S S S S S S S S
–
S
7.1-channels
S S S S S
– –
S S
–
S
6.1-channels
S S S S S
– – – –
S S
5.1-channels
S S S S S
– – – – –
S
3.1-channels
S S S
– – – – – – –
S
2.1-channels
S S
– – – – – – – –
S
2-channels
S S
– – – – – – – – –
Two surround back speakers are required to use the THX Ultra2 Cinema,THX Music mode and THX Games
mode.
Set the surround back speakers so that the distance to the listening position is the same for both the left
and right speakers. It is also recommended that the deviations of the distance from the listening position
to L and R channel speakers (front left (FL) and front right (FR), surround left (SL) and surround right (SR),
surround back left (SBL) and surround back right (SBR)) is less than 2 ft (60 cm).
b The AVP-A1HDCI can be connected to a maximum of 3 subwoofers.
• For instructions for connecting speakers, please refer to the POA-A1HDCI owner’s manual.
• When using just one surround back speaker, connect it to the left channel (SBL).
• Connect the AVP-A1HDCI pre-out terminal to the power amp (sold separately).
• AVP-A1HDCI has a RCA pre-out terminal and XLR pre-out terminal. Connect accordingly with the power
amp you want to use.
• The polarity of the XLR pre-out terminal can be switched using GUI menu “Manual Setup” – “Option
Setup” – “XLR Out Polarity” (vpage 41).
• Connect the speakers to the power amp.
• Refer to the owner’s manual of each piece of equipment when making connections.
POA-A1HDCI Connection and Operation
• When connecting the AVP-A1HDCI to the power amp POA-A1HDCI with a control link cable (included
with the POA-A1HDCI), you can perform the following control operations.
•
POA-A1HDCI channel input selection and power amp settings
•
Link POA-A1HDCI to AVP-A1HDCI On/Standby control
•
Link POA-A1HDCI meter operation to AVP-A1HDCI display on/off control (vpage 43)
•
Updating POA-A1HDCI firmware (vpage 43)
• Up to 2 POA-A1HDCI units can be connected. Refer to the POA-A1HDCI owner's manual for making
connections and POA-A1HDCI settings.
Connecting to the Power Amp
Connections


