


Step 2
Feed Strut
Assembly
Step 1
Step 2
54
Installation Procedures
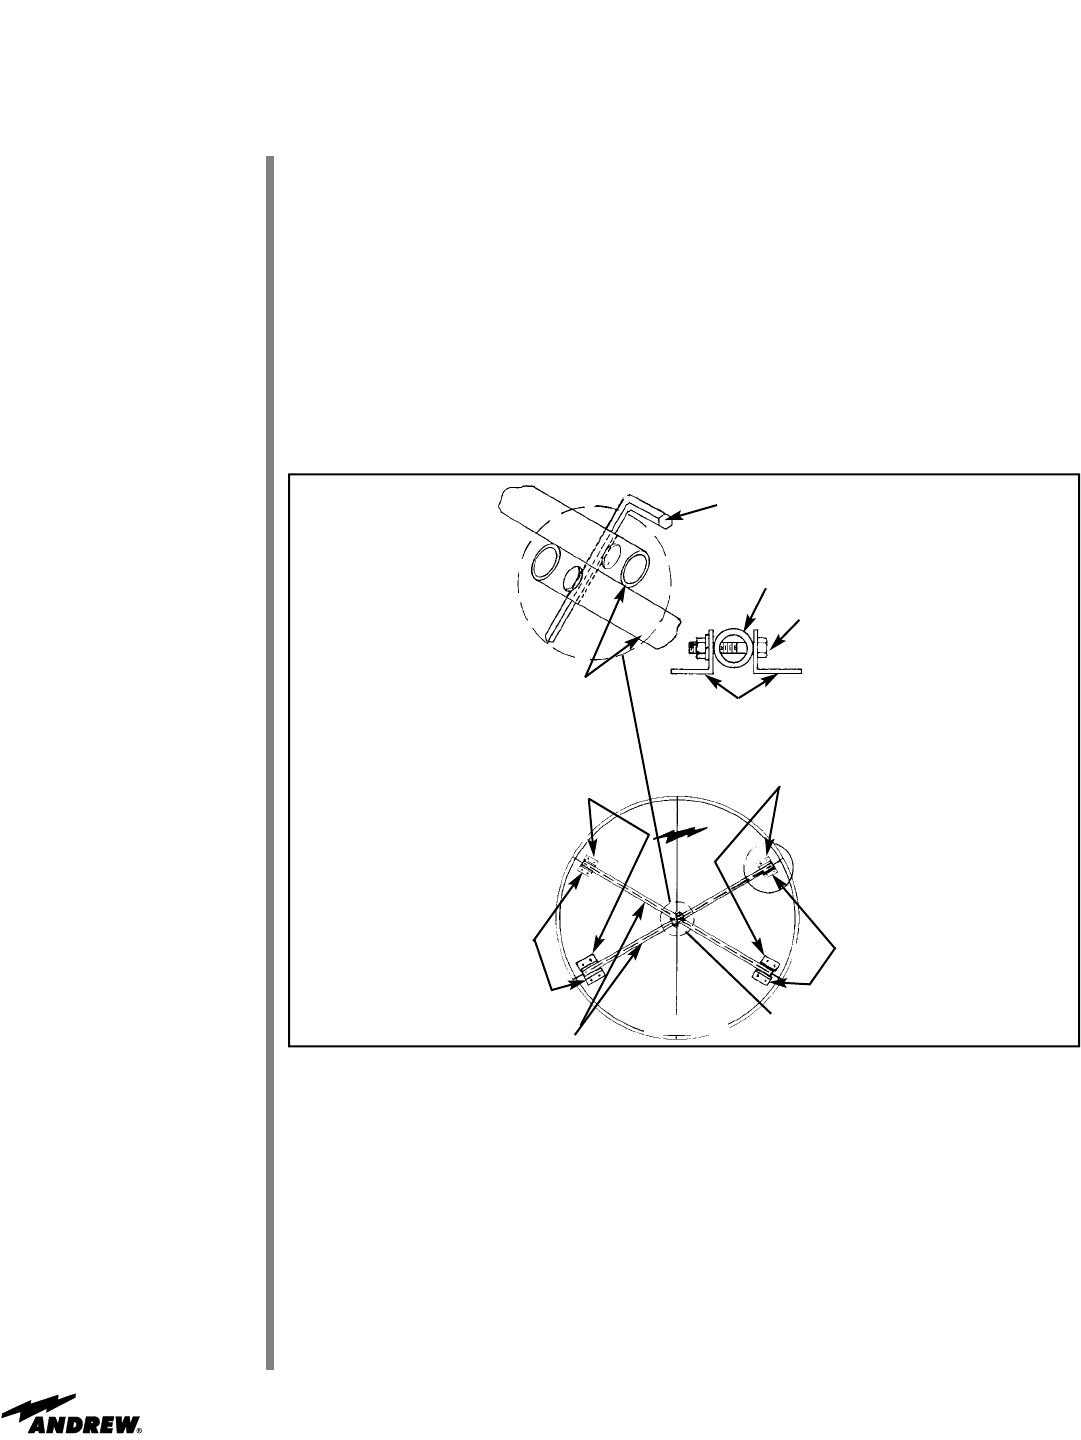
Figure 65
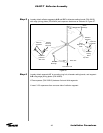
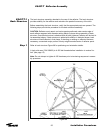
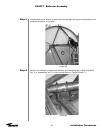
Pass feed struts (P/N 221491-1) to installer underneath for attachment to feed strut
brackets.
• Use 3/8 x 2-¼ in. bolts, lockwashers and nuts
• Secure feed struts together at center after attachment to feed strut brackets
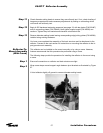
You have now completed the assembly of the ES45T-T-1 reflector. The next step in the
installation is the assembly of the back structure, which begins in the next section.
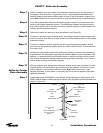
Position white surface of center pad toward feed window and attach pad to center plate
using supplied ¼ x 1-½ in. nylon screw, flatwashers and nuts. Install flatwashers under
both screw head and corresponding nut as shown in Figure 64. Tighten mounting hard-
ware allowing only slight compression (0.060” max.) of center pad material. Use remain-
ing nylon nuts as locknuts and distort excess screw thread to prevent disassembly.
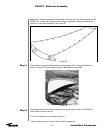
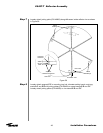
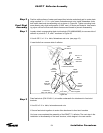
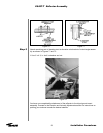
Loosely attach corresponding feed strut brackets (P/N 49694/49695) to concave side of
reflector at points B, C, E, and F as shown in Figure 65.
• Use A-325 ½ x 1-¼ in. bolts, flatwashers and nuts. (see page 12)
• Insert bolts from concave side of reflector
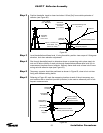
Allen
Wrench
Feed
Strut
3/8 x 2-1/4”
Bolt,
Lockwasher
Side View
Feed
Struts
49694/49695
Feed Strut Brackets
F
E
B
C
49695
Feed Strut
Bracket
49694
Feed Strut
Bracket
49694
Feed Strut
Bracket
49695
Feed Strut
Bracket
Front View
Feed Struts
(align over setting
Secure Feed
Struts Together
ES45T-T Reflector Assembly