


Model MRC88 Page: 45
© 2003 Xantech Corporation
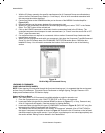
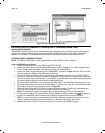
1. Click “LINKS” on the DragMRC menu bar.
2. Click on Remote Central Website. Your browser will open and take you to
http://www.remotecentral.com/
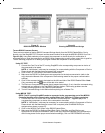
3. Click FILES in Remote Central.
4. Click Philips Pronto & Pronto Pro.
5. Scroll and click on desired brand under "Component Configuration Files" (CCF files).
6. Click on component type (CD players, VCR's, etc.).
7. From the list find a Model Number the same as your model or one similar to it. (Even model
numbers considerably different than yours will usually have commands that work).
8. Click on DOWNLOAD (this may take a few seconds), then select Save it to disk, then OK.
9. In the Windows ‘Save As…’ pop-up, Open the CCF folder within the DragMRC88\CCF folder (if not
already open). Click Save.
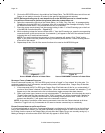
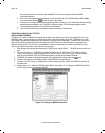
10. In DragMRC, click Import CCF from the File menu.
11. Find the ccf folder in which you saved the file and click on file name.
NOTE: At this point, prior to opening it, you may wish to change the file name (e.g., RCA-DSS,
etc.) for easier recognition later. You may wish to do this in step 13 as well.
12. Click Open. This unzips the file and DRAGMRC88 automatically places it in a folder within the CCF
folder.
13. Click on file name, then on OPEN. At this point, the CCF file is converted to a Dragon format.
14. On pop-up (CCF Importer), type in Brand Name and Component Name (e.g., RCA and DSS).
15. Double click on desired component type on list of converted files on left side of pop-up (e.g.,
DSS.cnv). An asterisk (*) will appear just to the left. Click Import.
16. Click OK for addition to Brand List (if shown) and OK for addition (or merge) to a .bci file.
This completes the file import to the Brand and .bci files in DragMRC.
17. At this point, or at any later date, you can choose additional component types from the CCF file
(e.g., DVD, etc., if listed) by using the CCF Importer again. Simply click Import CCF from the File
menu, double click on desired folder and repeat steps 13 to 16 as necessary.
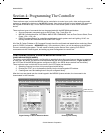
Importing Discrete IR Hex Codes
Remote Central has a database of discrete power on/off, input codes, sound and picture modes plus
others. You must already be in the Palette Editor window to import these codes.
1. Click “LINKS” on the DragMRC menu bar.
2. Click on Remote Central Website. Your browser will open and take you to
http://www.remotecentral.com/
3. Click FILES in Remote Central.
4. Click Philips Pronto & Pronto Pro.
5. Scroll down and click on the desired brand under “Discrete Infrared Hex Codes”
6. Click on component type (CD players, VCR's, etc.).
7. From the list find a Model Number the same as your model or one similar to it. (Even model
numbers considerably different than yours will usually have commands that work).
8. Next to the desired command, you should see a box containing the discrete Hex Code. Using your
mouse or keyboard, highlight the entire code for that function and press [CNTRL] + [C] on your
keyboard to copy the selected code to the clipboard.
9. Return to DragMRC software and in the left-hand side of the Palette Editor, right-click on the desired
function you wish to import the discrete code for.
10. Select Import Discrete IR Code from the drop-down menu.
11. With the Cursor in the Paste Discrete IR Code window, press [CNTRL] + [V] on your keyboard to
paste the code under that function and click on IMPORT to save.
12. A RED asterisk will now be displayed to the left of the function indicating the code has been
successfully imported.
13. Repeat steps 8 thru 12 for all commands necessary.