


Model MRC88 Page: 39
© 2003 Xantech Corporation
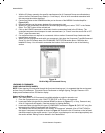
3. A New Hardware window should appear on the PC. Click NEXT to search the drive for an available
driver. For File Location point the system to C:\Program Files\DragMRC\USB folder.
4. Click Next to continue.
The proper drivers should now be installed and Dragon
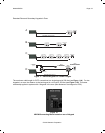
Normally you would use Com Port 1 (USB will usually appear as COM 3 or above), but if it is already in use, it
will be necessary to use a different one (use the DB9-to-DB25 adapter if necessary). Select the Com Port as
follows:
1. Click Preferences from the File menu or simply press F2 on your keyboard
2. Click on an available port, then OK.
.
VERIFYING COM PORT COMMUNICATION
(“Who Am I” Base Unit Version Verification)
Before continuing, it is recommended to verify proper COM PORT communication between the PC and the
MRC88. By checking the units Firmware versions and verifying a response from the MRC88, you will confirm
proper communication and may continue.
1. Power the Unit ON and allow to boot to steady state (all front staus LED’s OFF)
2. Click on the Base Unit Menu and select Who Am I?
3. This will open a window labeled Base Unit Version Query. Click Next to proceed.
4. This should return a listing of the Base Unit Firmware Version as well as the Keypad Firmware
Versions.
5. Click Finish to complete the verification
Note: If a message is returned stating: “Communication error. Not able to establish link with MRC Unit” this
could be due to the following:
1. The Unit is not powered ON. Please check the AC Power Cable and power state of the unit.
2. There is a communication error between the PC and the MRC88 Controller/Amplifier. Please verify the
DB9 or USB cable is properly connected to the unit and there are no Com Port conflicts in your PC.
3. You have selected the wrong Com Port. Select the proper setting in the Preference Menu.
STARTING A PROJECT
With the DragMRC software open and the COM PORT communication verified proceed as follows:
1. Under the User Settings Menu, select whether this project will be created in BASIC or ADVANCED
mode. Refer to the BASIC and ADVANCED descriptions listed under the
Section 3 title heading.
NOTE: Projects created in BASIC mode may be changed from BASIC to ADVANCED at any time
during editing retaining all current settings, BUT a project created in ADVANCED mode cannot be
changed to BASIC mode.
NOTE: For EXPANDED systems, select ADVANCED mode under the User Settings menu.
2. From the File menu choose “NEW PROJECT” (CTL+N) or choose “OPEN PROJECT” (CTL+O) to
modify an existing project file.
3. In the New Project window, type a file name such as “joneshome” and click “SAVE”. The proper file
extension is added automatically.
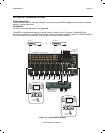
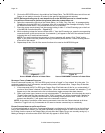
4. Under the Base Unit menu, select MRC88 (Setup Environment)
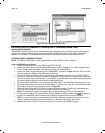
5. The MRC88 System Window will appear. Depending upon which mode was selected in step 1, (BASIC
or ADVANCED), the System Window will offer different TAB’s for system configuration. See Figure 14
& 15 below.