


Model MRC88 Page: 23
© 2003 Xantech Corporation
b. Using a level, make proper horizontal and vertical marks on surface to be cut, to properly orient
template.
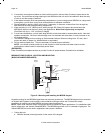
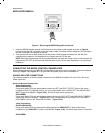
Figure 7 – MRC88 Keypad mounting template
c. Locate the provided template so that the mark is in the center of the hole, which is in the center of the
template.
d. Rotate the template around the center until the template is level.
e. Press or hammer the template in place so that the holding tabs pierce the wall and hold the template in
place.
f. Mark or scribe the outline of the template on the wall.
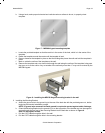
g. Remove the template and cut a clean hole through the wall along the outline of the template, being sure
that your cut is on the outline. Any cut outside of the outline by more than ¼” may not be covered by the
MRC88 Keypad.
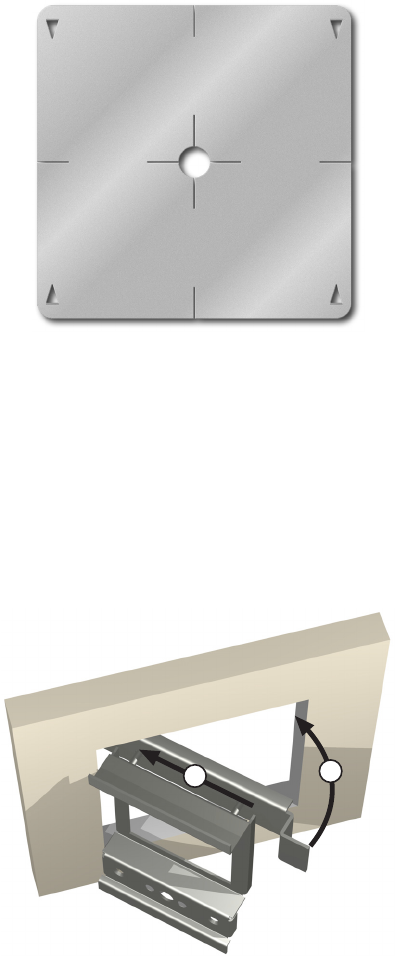
1
2
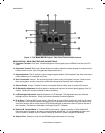
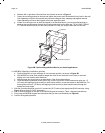
Figure 8 – Installing the MRC88 Keypad mounting bracket in the wall
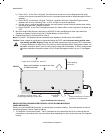
2. Installing the Mounting Bracket
a. Attach the ground wire to the ground lug to the rear of the back-bar with the provided green nut, before
beginning the bracket installation process.
NOTE: A ground wire connected to Earth ground is required to protect against static discharge.
b. Orient the Mounting Bracket so the ground lug is on the top portion of the bracket and run the supplied
screws through the top front of the mounting bracket into the back-bar as shown in Figure 6.
Note: Do not tighten screws.
c. Pull the CAT5 cable through the hole in the wall.
d. Pull the CAT5 cable through the hole in the mounting bracket.