


66
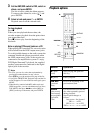
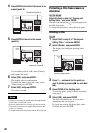
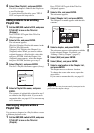
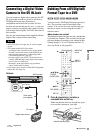
4 Press ENTER at the start of the scene to be
erased (point A).
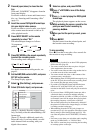
5 Press ENTER at the end of the scene
(point B).
To reset either point A or B, select [Cancel]
and repeat from step 3.
6 Select [OK], and press ENTER.
The display asks for confirmation.
If you do not want to erase the scene, select
[Cancel] and press ENTER.
7 Select [OK], and press ENTER.
The scene is erased.
Notes
• Images or sound may be momentarily interrupted at the
point where you erase the scene.
• Sections shorter than five seconds may not be erased.
• The erased section may be slightly different from the
points you selected.
• A chapter mark will not be made at the A–B erase point.
Protecting a title from erasure or
alteration
Select [Protect] in step 3 of “Erasing and
Editing Titles,” and press ENTER.
The title is protected and [ ] (locked) appears in
the Title List menu.
To cancel the protection, select [Protect] again.
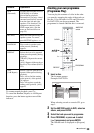
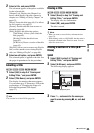
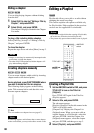
Dividing a title
1 Select [Edit] in step 3 of “Erasing and
Editing Titles,” and press ENTER.
2 Select [Divide], and press ENTER.
The display for setting the dividing point
appears.
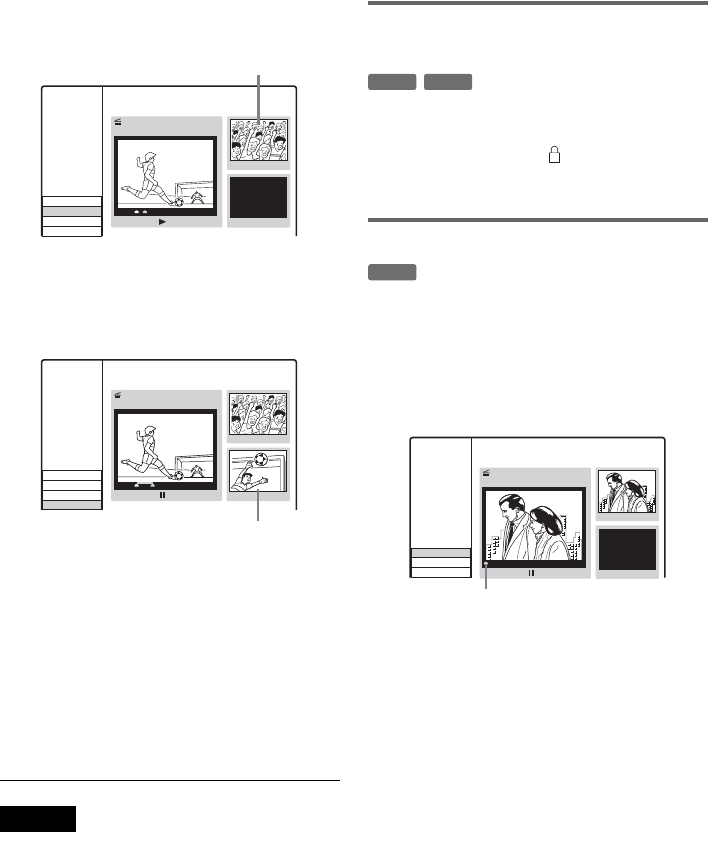
3 Press H, and search for the point you
want to divide by pressing x,
X, and m/
M.
4 Press ENTER at the dividing point.
To reset the point, select [Cancel] and repeat
from step 3.
5 Select [OK], and press ENTER.
The title is divided in two. If you want to
rename the title, see page 65.
If you do not want to divide the title, select
[Cancel] and press ENTER.
Thumbnail of point A
Title 1
07/12 0:45:00
00:15:00
00:15:00Point A
Set Point B
Set Point A
Cancel
OK
Title Edit
A-B Erase
Thumbnail of point B
Title 1
07/12 0:45:00
00:15:20
00:15:00
Point A
Set Point B
Set Point A
Cancel
OK
00:15:20Point B
Title Edit
A-B Erase
+
RW
+
R
+
RW
Title 2
07/12 0:45:00
00:00:00
Divide
Cancel
OK
00:00:04#01
Title Edit
Divide
Current playback point