28
Step 8: Initial Setup
Use the Setup Displays and AMP menu to make
the initial settings for using the system. Complete
the initial setup in the following order.
Follow the steps from “1. Tuner and channel
setup” to “5. Basic speaker setup” below.
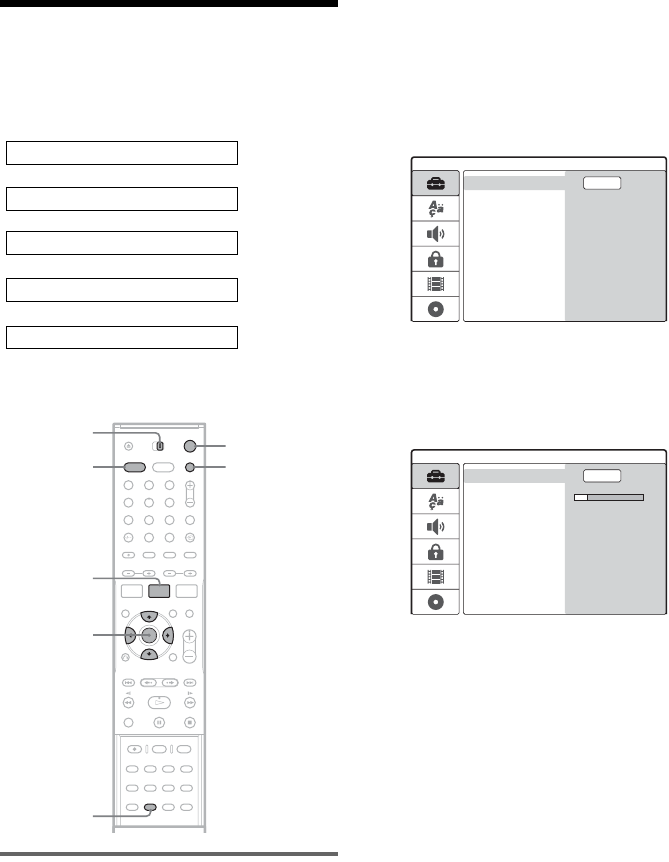
1. Tuner and channel setup
1 Turn on the TV.
2 Press DVD [/1 to turn on the recorder.
3 Switch the input selector on your TV so that
the signal from the recorder appears on
your TV screen.
4 While the recorder is in stop mode, set the
AMP/DVD switch to DVD, and press SET
UP.
The Setup Display appears, which allows you
to make adjustments to the recorder. For
details about the Setup Display, see page 74.
5 Press ENTER while [Start] is selected.
The recorder automatically starts searching
for all the receivable channels and presets
them.
To manually set, disable, or fine-tune the
channels, see “[Channel Settings]” in
[Settings] Setup (page 75).
6 Press < to return to the Setup Display,
and follow the steps of “2. OSD language
setup” (see below).
If you do not want to change the on-screen
display language, go to “3. Clock setup”
(page 29).
m
m
m
2. OSD language setup
1. Tuner and channel setup
3. Clock setup
4. TV type setup
m
5. Basic speaker setup
1 2 3
4 6
7 8 9
0
5
DVD "/1
</M/m/,,
ENTER
SET UP
AMP/DVD
switch
DVD
AMP MENU
AMP "/1
Settings
Channel Settings
Clock
TV Aspect
Display Mode
Line1 Decoder
Progressive Mode
PBC
Factory Setup
Start
Auto Preset
Settings
Channel Settings
Clock
TV Aspect
Display Mode
Line1 Decoder
Progressive Mode
PBC
Factory Setup
Stop
Searching 11%
Auto Preset


