


101
Advanced Setup—Continued
Notes:
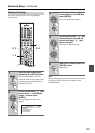
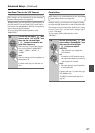
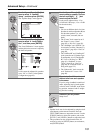
• Speaker levels can also be adjusted by using the dedi-
cated buttons on the remote controller. Press the
[TEST TONE] button to output the test tone. Use the
[CH SEL] button to select each speaker, and use the
[LEVEL–] and [LEVEL+] buttons to adjust the level.
• This procedure can also be performed on the AV
receiver by using its [SETUP] button, arrow buttons,
and [ENTER] button.
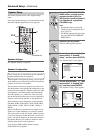
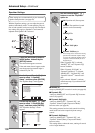
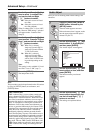
3
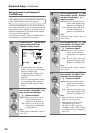
Use the Up and Down [ ]/[ ] but-
tons to select “2. Speaker
Setup”, and then press [ENTER].
The “Speaker Setup” menu appears.
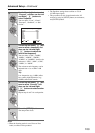
4
Use the Up and Down [ ]/[ ] but-
tons to select “4. Level Calibra-
tion”, and then press [ENTER].
The “Level Calibration” screen appears
and the pink noise test tone is output by
the front left speaker.
Note:
Levels cannot be adjusted for speakers
set to “No” or “None” in the Speaker
Configuration (page 95).
2. Speaker Setup
1. Speaker Settings
2. Speaker Config
3. Speaker Distance
4. Level Calibration
5. Equalizer Settings
6. THX Audio Setup
MOVE ENTER RETURN
ENTER
RETURN
EXIT
SETUP
RETURN
RETURN
EXIT
SETUP
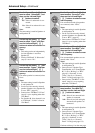
MOVE VALU E
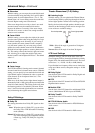
2–4. Level Calibration
Left
Center
Right
SurrRight
SurrBack R
SurrBack L
SurrLeft
Subwoofer
-12.0dB
-12.0dB
-12.0dB
-12.0dB
-12.0dB
-12.0dB
-12.0dB
-15.0dB
Speaker A
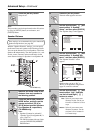
5
Use the Up and Down [ ]/[ ] but-
tons to select a speaker, and use
the Left and Right [ ]/[ ] but-
tons to adjust the level.
Levels can be adjusted from –12 to
+12 dB in 0.5 dB steps (–15 to +12 dB
for the subwoofer).
Notes:
• You can set different levels for front
Speakers A and front Speakers B, but
not the other speakers (i.e., sub-
woofer, center, surround, and surr
back).
• The “Center” level cannot be set if
the “Center” is set to “None”
(page 95) or “Not Use” (page 98).
• The “SurrRight” and “SurrLeft” lev-
els cannot be set if the “Surround” is
set to “None” (page 95) or “Not Use”
(page 98).
• The “SurrBack R” and “SurrBack L”
levels cannot be set if “Speaker Type:
Front(Speaker A) or Front(Speaker
B)” is set to “Bi-Amp” or “BTL”
(page 61), “SurrBack” is set to
“None” (page 95) or “Not Use”
(page 98), or “Powered Zone2” is
being used (page 132).
• The “Subwoofer” levels cannot be
set if “Subwoofer” is set to “No”
(page 96).
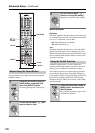
6
Repeat step 5 until the volume of
the test tone from each speaker
is the same.
If you’re using a handheld sound level
meter, adjust the level of each speaker
so that it reads 75 dB SPL at the listen-
ing position, measured with C-weight-
ing and slow reading.
7
Press the [SETUP] button.
Setup closes.