


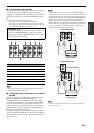

Optimizing the speaker setting for your listening room (YPAO)
43 En
Preparation
Use this feature to optimize the sound of this unit to the listening
room quickly.
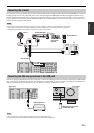
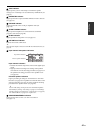
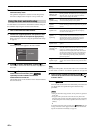
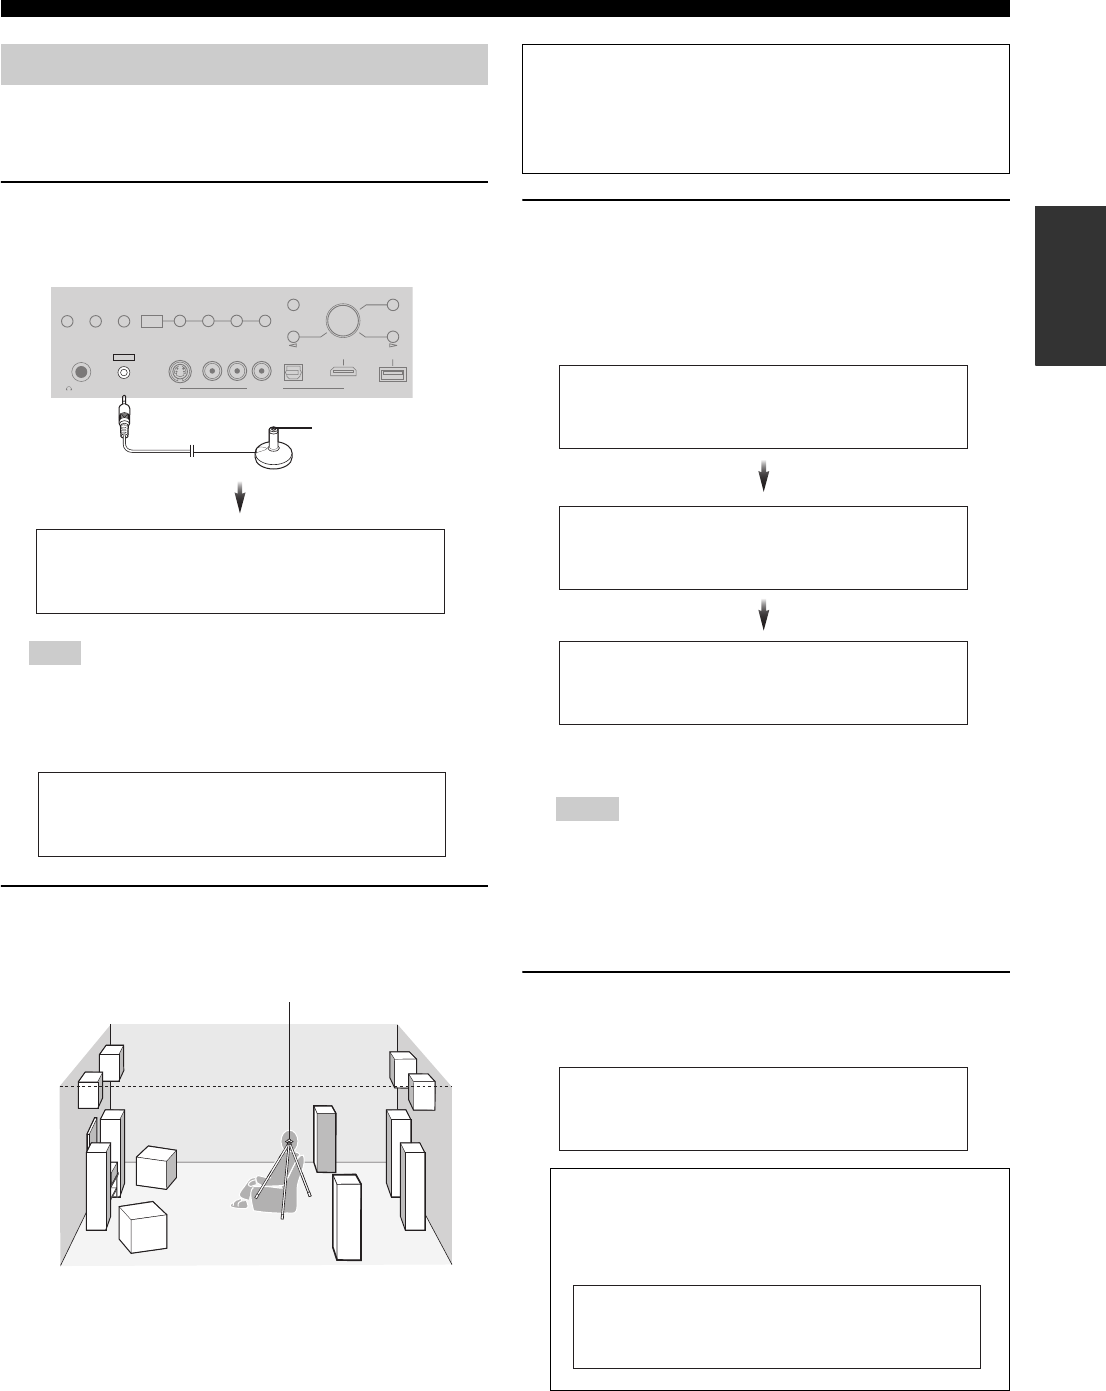
1 Connect the supplied optimizer microphone to the
OPTIMIZER MIC jack on the front panel.
“MIC ON” appears in the front panel display.
If “GUI” appears in the front panel display as follows, the menu screen
(GUI) is displayed in the video monitor and you cannot proceed the
quick automatic setup. In such a case, press
J
MENU to turn off the
GUI or use the basic automatic setup procedure (see page 44).
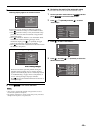
2 Place the optimizer microphone at your normal
listening position on a flat level surface with the
omni-directional microphone heading upward.
y
It is recommended that you use a tripod (etc.) to affix the optimizer
microphone at the same height as your ears would be when you are
seated in your listening position. You can use the attached screw of a
tripod (etc.) to fix the optimizer microphone to the tripod (etc.).
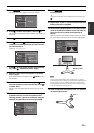
3 Press
I
PROGRAM on the front panel to start the
measurements.
This unit starts the measurements immediately. Loud test tones
are output from each speaker during the automatic setup
procedure. During the setup procedure, following messages
appear in the front panel display.
y
To cancel the automatic setup procedure, rotate EVOLUME.
• During the automatic setup procedure, do not perform any operation
on this unit.
• Keep quiet when you leave the room. The necessary time for the
automatic setup procedure may differ depending on the environment
of the listening room and connected speakers (from 30 seconds to 5
minutes).
4 Once this unit completes all measurements and
adjustments successfully, following message
appears in the front panel display.
y
You can check the detailed results of the measurements by using the
video monitor. See page 45 for details.
Using the quick automatic setup
Note
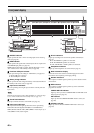
MIC
OPTIMIZER
AUDIO
SELECT
SPEAKERS
AB
YPAO
SILENT CINEMA
PHONES
MULTI
ZONE
ZONE ON/OFF
MENU
TONE CONTROL
ZONE
CONTROLS
REC OUT/
ZONE 2
STRAIGHT
EFFECT
PUSH ENTER
PROGRAM
R
L
OPTICAL
HDMI IN USB
AUDI O
VIDEO AUX
S VIDEO
VIDEO
ZONE 3 ZONE 4
ZONE 2
Omni-directional
microphone
AUTO SETUP
ENTER TO START
GUI
DSP-Z11
Optimizer microphone
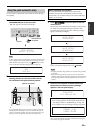
Before proceeding next operation
Once you perform the next operation, this unit starts the
automatic setup procedure immediately. For more accurate
measurements, we recommend that you move to the wall where
speakers are not around.
Notes
If error or warning message appears...
Error message appears in the front panel display. See the
“Auto Setup” section in “Troubleshooting” on page 126
for a complete list of error messages and proper remedies.
AUTO SETUP
ANALIZING
AUTO SETUP
MEASURING
AUTO SETUP
PREPARING
COMPLETED
PLS UNPLUG MIC
ERROR: E-01
PRESS ENTER