


20
DAB1 DISTRIBUTED AUDIO SYSTEM
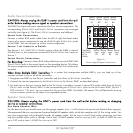
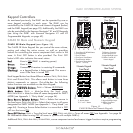
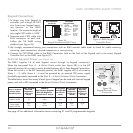
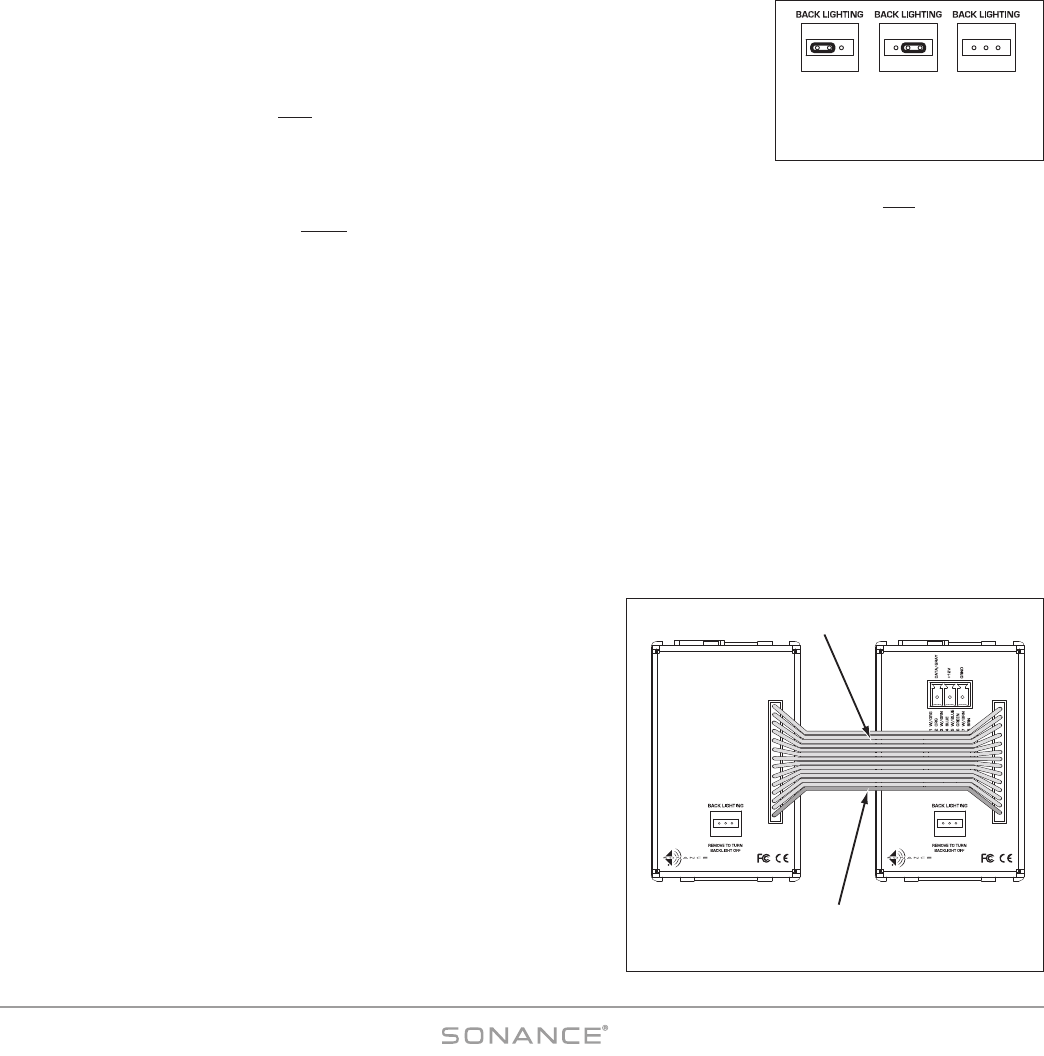
C4630 SE Keypad Backlighting Jumper
The C4630 SE Main and Numeric Keypads have rear-panel Backlight Jumpers
(
Figure 18
) that allow you to adjust the amount of keypad backlighting to suit room
lighting conditions and user preference. Position 1 = DIM; Position 2 = BRIGHT; remove
the jumper to turn the backlight OFF
.
Using needle-nose pliers, tweezers or a similar tool, carefully insert the jumper in the
desired position (see
Figure 18
). The factory default is BRIGHT.
NOTE: Unless the backlight jumper is removed, the keypad backlighting is always ON
, even if the
local zone and all zones are OFF
.
C4630 SE Keypad Location
The C4630 SE Main and Numeric Keypads can be mounted in standard single or double J-box enclosures or P-rings.
NOTE: Do NOT mount the C4630 SE keypads in the same electrical box with AC house wiring,
light switches, or any other high-voltage device or control. The keypads can share gang boxes with
each other, or with other controls such as A/B speaker switches, infrared receivers and volume controls,
if these other devices are rated as Class 2 devices according to the National Electrical Code.
The C4630 SE keypads should typically be located near the entrance to a room, similar in height and location to a light
switch (see NOTE, above). If an optional IR receiver is installed in the Main Keypad (see page 19), care should be taken
to avoid placing the keypad near windows or areas that get direct sunlight that could interfere with IR receiver operation.
If this is not possible, you should locate the IR receiver away from the keypad.
Avoid mounting keypads in locations that will be exposed to moisture, such as near sinks, showers or bathtubs. If you want
to install keypads outdoors, only install them in a covered area with an appropriate weather-proof box.
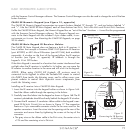
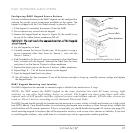
Mounting the C4630 SE Keypads
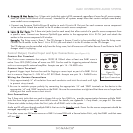
1. If you are using both a Main and Numeric Keypad, connect the
Numeric Keypad’s 14-pin ribbon cable between both keypads.
• Connect the ribbon cable so that the wire with the red stripe
connects to Pin 1 on both keypads (see
Figure 19
).
2. Mount the keypad(s) in an appropriate J-box or P-ring as described
in
Keypad Location
, above.
• The ribbon cable is long enough to allow a Main and Numeric
Keypad to be mounted side-by-side in a double J-box. Either
keypad can be mounted left or right.
NOTE: If the ribbon cable is connected incorrectly the
Numeric Keypad (including its backlighting) will not
function.
Figure 18: C4630 SE Keypad
Backlight Jumper
1 2 1 2 1 2
DIM OFFBRIGHT
C4630
MAIN
KEYPAD
RESERVED FOR NUMBERIC KEYPAD
PIN 14
PIN 1
•
1 2
C4630
NUMERIC
KEYPAD
CONNECTION TO MAIN KEYPAD
PIN 14
PIN 1
•
1 2
Red Stripe to Pin 1
Ribbon Cable
Numeric Keypad Main Keypad
Figure 19: Keypad Ribbon Cable