148
Editing a Sample
Here’s how an audio file (WAV/AIFF) can be loaded into memory
as a sample.
Place the audio files in the “TMP/AUDIO_IMPORT” folder on
the user memory or memory card. For details on how you can
use your computer to copy a file into the user area or memory
card, refer to p. 218.
1.
From the Sample List screen or Sample Edit screen (p. 148),
press [MENU] to select “Import Audio,” and then press
[ENTER].
* You can obtain the same result by pressing [SAVE/LOAD] and then
pressing [F8 (Import Audio)] instead of performing step 1.
2.
Press [F1 (User)] or [F2 (Card)] to select the import-source
area.
User: Select a file from the user area.
Card: Select a file from the memory card.
3.
Use [CURSOR] to move the cursor to the “TMP/
AUDIO_IMPORT.”
4.
Press or , then select the file that you want to
import.
If you want to select two or more samples, press [F5 (Mark Set)]
to add a check mark (
✔
) to the files that you want to select. To
remove the check mark, press [F4 (Mark Clear)].
If you hold down [SHIFT] and press [F5 (Mark Set All)], a check
mark will be added to all files of the selected folder. If you hold
down [SHIFT] and press [F4 (Mark Clr All)], check marks will
be removed from all selected files.
5.
Press [F8 (Import Audio)].
A message will ask you for confirmation.
* To cancel, press [F7 (Cancel)].
6.
Press [F8 (Exec)].
The file will be imported, and the Sample List screen will
appear.
* To cancel, press [F7 (Cancel)].
The imported file will be added to the sample list as a sample.
This sample is temporary, and will be lost when you turn off the
power. If you want to keep it, press [WRITE] to save the data.
1.
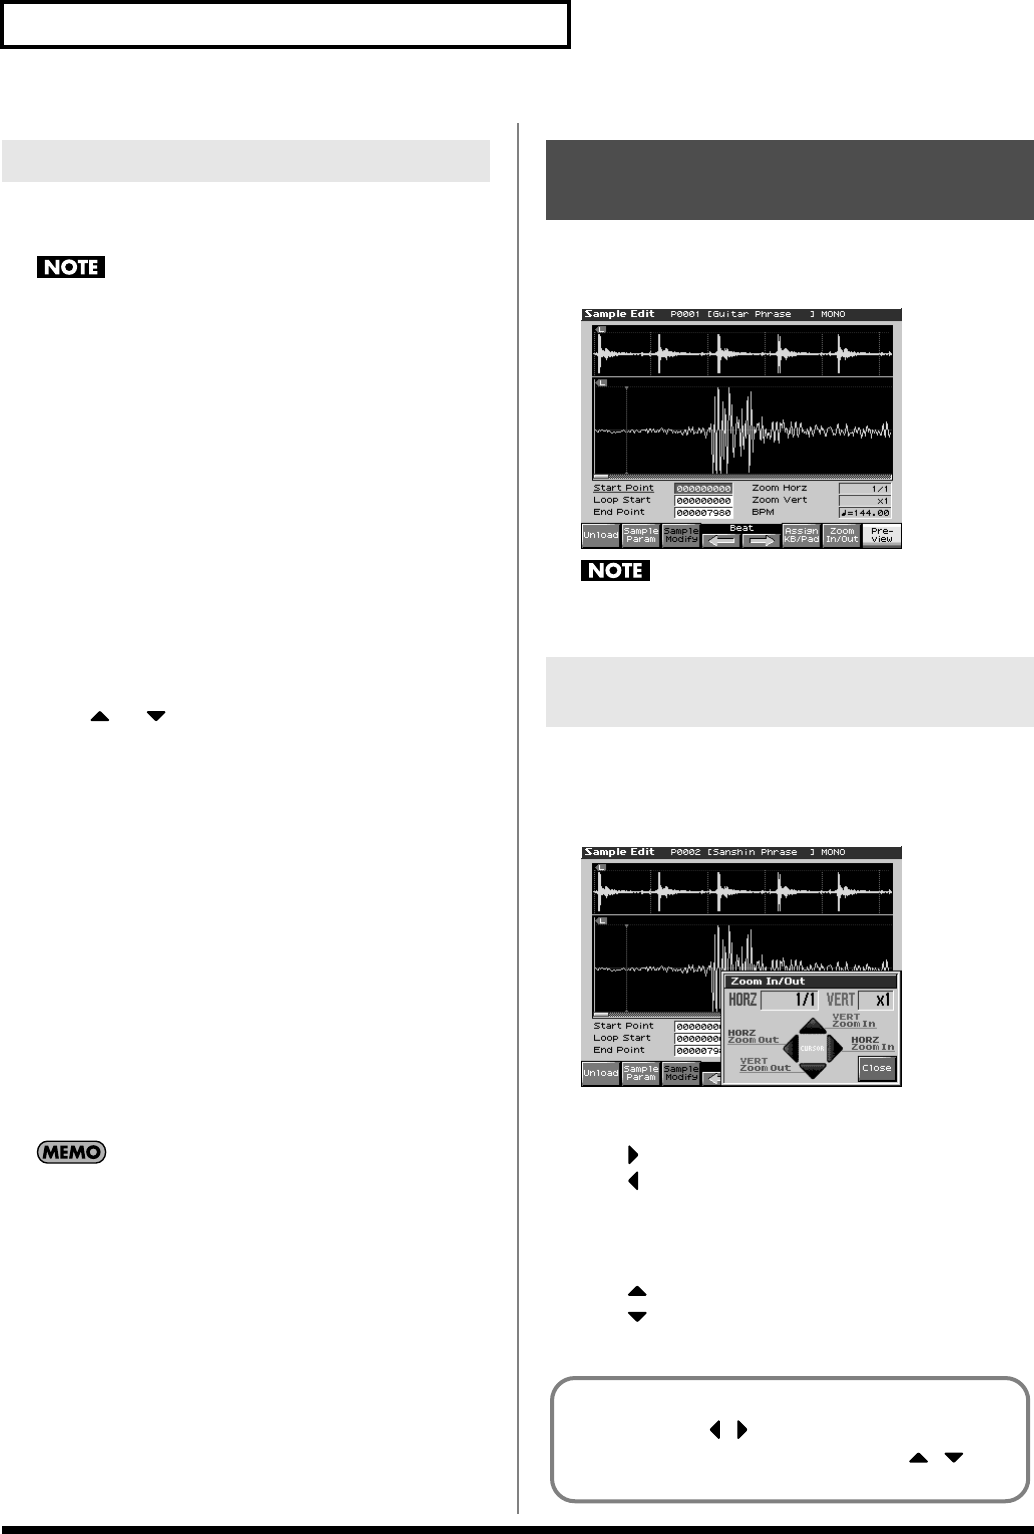
When you press [SAMPLE EDIT] in the sampling section.
The Sample Edit screen will appear.
fig.14-007_50
Samples that you edit will be lost when you turn off the power.
If you want to keep them, you must Save them (p. 159).
Here’s how to change the magnification of the sample display.
1.
In the Sample Edit screen, press [F7 (Zoom In/Out)].
The Zoom In/Out sub-window will appear.
fig.15-002_50
2.
Use [CURSOR] to change the magnification of the display.
• Horizontal axis (time axis): 1/1–1/65536
Press to increase the display magnification.
Press to decrease the display magnification.
* Either turn the VALUE dial or use [INC], [DEC] to adjust this
setting.
• Vertical axis (waveform amplitude axis): x1–x128
Press to increase the display magnification.
Press to decrease the display magnification.
3.
Press [F8 (Close)] to close the sub-window.
Importing an Audio File
Displaying Sample Edit
Screen
Magnifying/Shrinking the
Waveform Display (Zoom In/Out)
Even without displaying the Zoom In/Out sub-window, you
can press CURSOR to expand/shrink the horizontal
axis, or hold down [SHIFT] and press CURSOR to
expand/shrink the vertical axis.
Fantom-X678_r_e.book 148 ページ 2005年5月12日 木曜日 午後4時40分
