8
GB
Getting Started
Once you set the MD deck’s internal clock, the MD deck
will automatically record the date and time of all
recordings. When playing a track, you can display the
date and time the track was recorded (see page 16).
A
AMS
MENU/NO
AMS YES
m/M
>.X
H
X
` / 1
Z
x
z.
>
mM
./>
m/M
DATE
PRESENT
YESMENU/NO
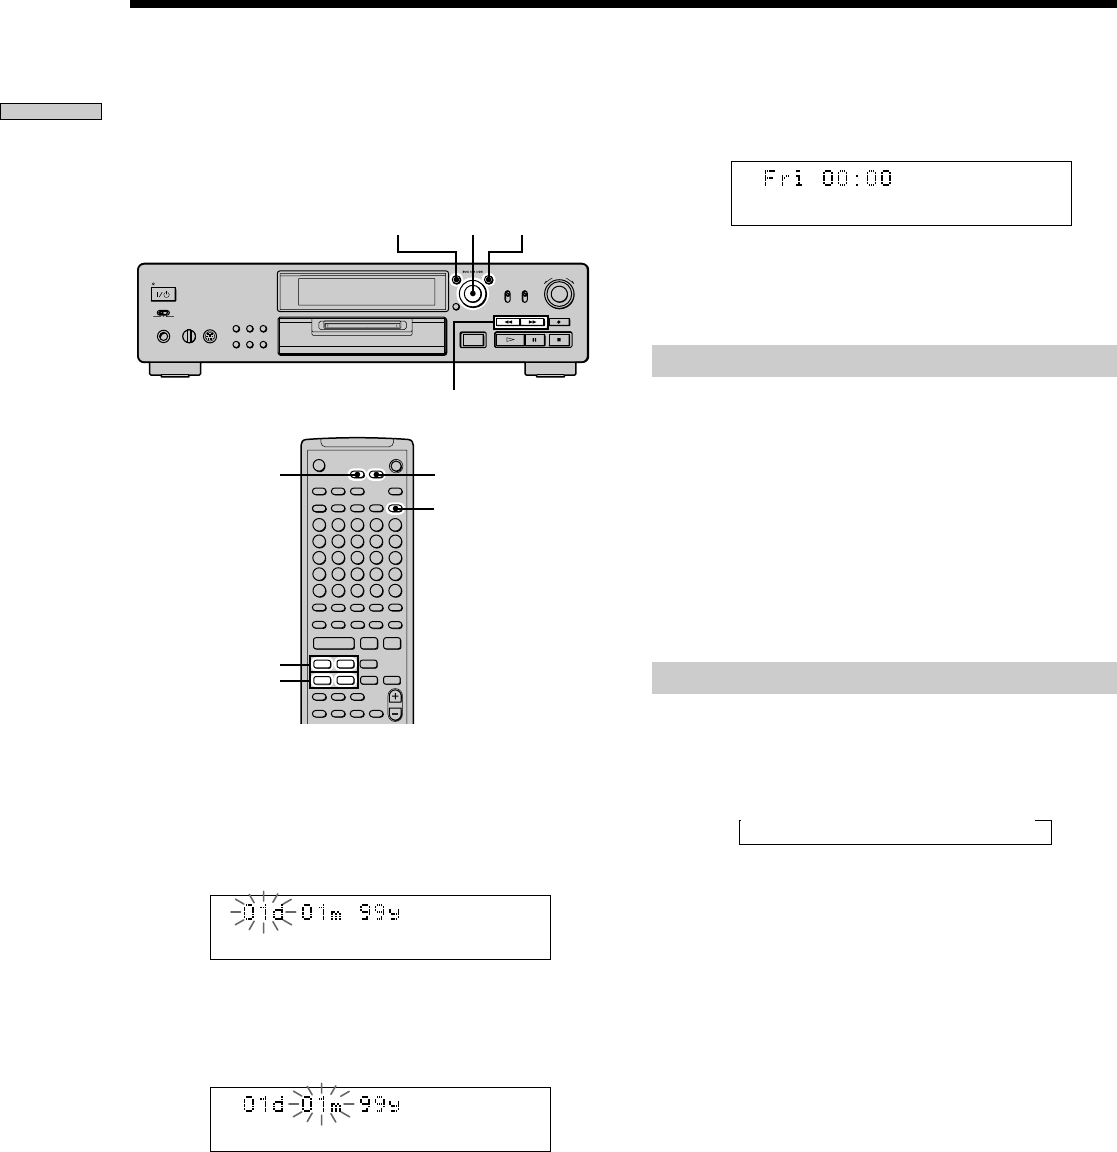
1 While the deck is stopped, press MENU/NO twice.
“Setup Menu” appears in the display.
2 Turn AMS (or press ./> repeatedly) until
“Clock Set ?” appears, then press AMS.
The day indication starts flashing.
3 Turn AMS (or press ./> repeatedly) to enter
the current day, then press AMS.
The day indication stops flashing, and the month
indication starts flashing.
Setting the Clock
4 Repeat step 3 to enter the month, year, hour, and
minute.
When you enter the minute, the set date and time
appear again followed by “Complete!!”, and the clock
settings are completed.
Changing the clock setting(s)
1 Do steps 1 and 2 above.
2 Press AMS or m/M repeatedly until the setting
you want to change flashes.
3 Turn AMS (or press ./> repeatedly) to change
the setting, then press AMS.
4 To complete the setting, press AMS or m/M
repeatedly until the minute indication flashes, then
press AMS or YES.
Displaying the current date and time Z
You can display the current date and time any time while
the power is on.
Press DATE PRESENT.
Each press of the button changes the display as follows:
t Current display t Date t Time
z
For precise date and time stamping of recordings
Reset the time at least once a week.
Note
If the mains lead is disconnected for a long time, the memorized
clock settings will disappear and “Initialize” will flash in the
display the next time you plug in and turn on the deck. If this
happens, reset the clock.
