Editing Recorded MDs
34
GB
About indication which appears while
editing
When “Protected” appears in the display
The recor d-protect slot is open. T o edit the MD, slide the
tab to close the slot. For details, see “T o prevent
accidental erasur e of the r ecorded material” on page 19.
About indications which appear after
editing
When “TOC” lights up in the display
Editing has finished but the TOC (T able of Contents) on
the MD has not been updated to r eflect the editing r esults.
The editing will be lost if you disconnect the mains lead
while the indication is on. The TOC will be updated only
when you eject the MD or tur n off the MD deck.
When “TOC Writing” flashes in the display
The deck is updating the TOC. Do not disconnect the
mains lead or move the deck while the indication flashes.
Erasing Tracks
You can erase a track or par t of a track simply by
specifying the number of the track or the portion within a
track to be erased. Y ou can also erase all the tracks on an
MD at one time.
Erasing a track
Specify the number of the track you want to erase.
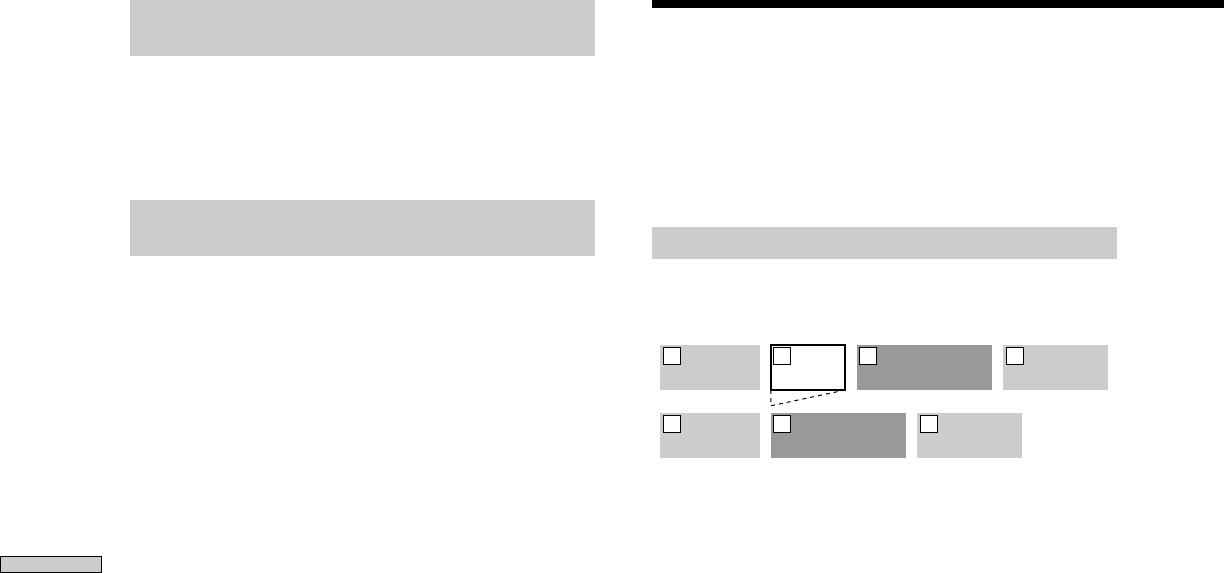
Example: Erasing the second track
AAA BBB CCC DDD
1 2 3 4
AAA CCC DDD
1 2 3
When you erase a track, all the tracks after the one erased
are automatically r enumber ed. For example, if you erase
track number 2, the pr evious track number 3 becomes
track number 2 and the pr evious track number 4 becomes
track number 3, and so on.
1 While the deck is stopped, playing, or paused,
press MENU/NO.
“Edit Menu” appears in the display .
2 Turn AMS (or press ./> repeatedly) until “Tr
Erase ?” appears, then press AMS or YES.
The deck starts to play the track indicated by the
number in the display .
3 Turn AMS (or press ./> repeatedly) until the
track number you want to erase appears.
4 Press AMS or YES.
“Complete!!” appears for a few seconds and the track
is erased. The track following the erased track starts
to play. If the erased track is the last one on the MD,
the track pr eceding the erased track star ts to play .
To cancel the operation
Press MENU/NO or x.


