RQT8926
37
Recording radio broadcasts
You can record radio broadcasts to the HDD. After recording
starts, track data will be recorded and divided using the time
settings selected before the recording starts. Therefore the
recording (from start to finish) will be made and divided into
multiple tracks.
Preparation
1 To display the picture turn on the television and select the
appropriate video input to suit the connections to this unit.
2Press [Í].
3 Press [TUNER/BAND] and select “FM” or “AM”.
Order: FM ➜ AM ➜ XM ➜ (Return to FM)
≥XM broadcasts cannot be recorded.
1 Tune in to the radio station that you want to record
(➜ page 62).
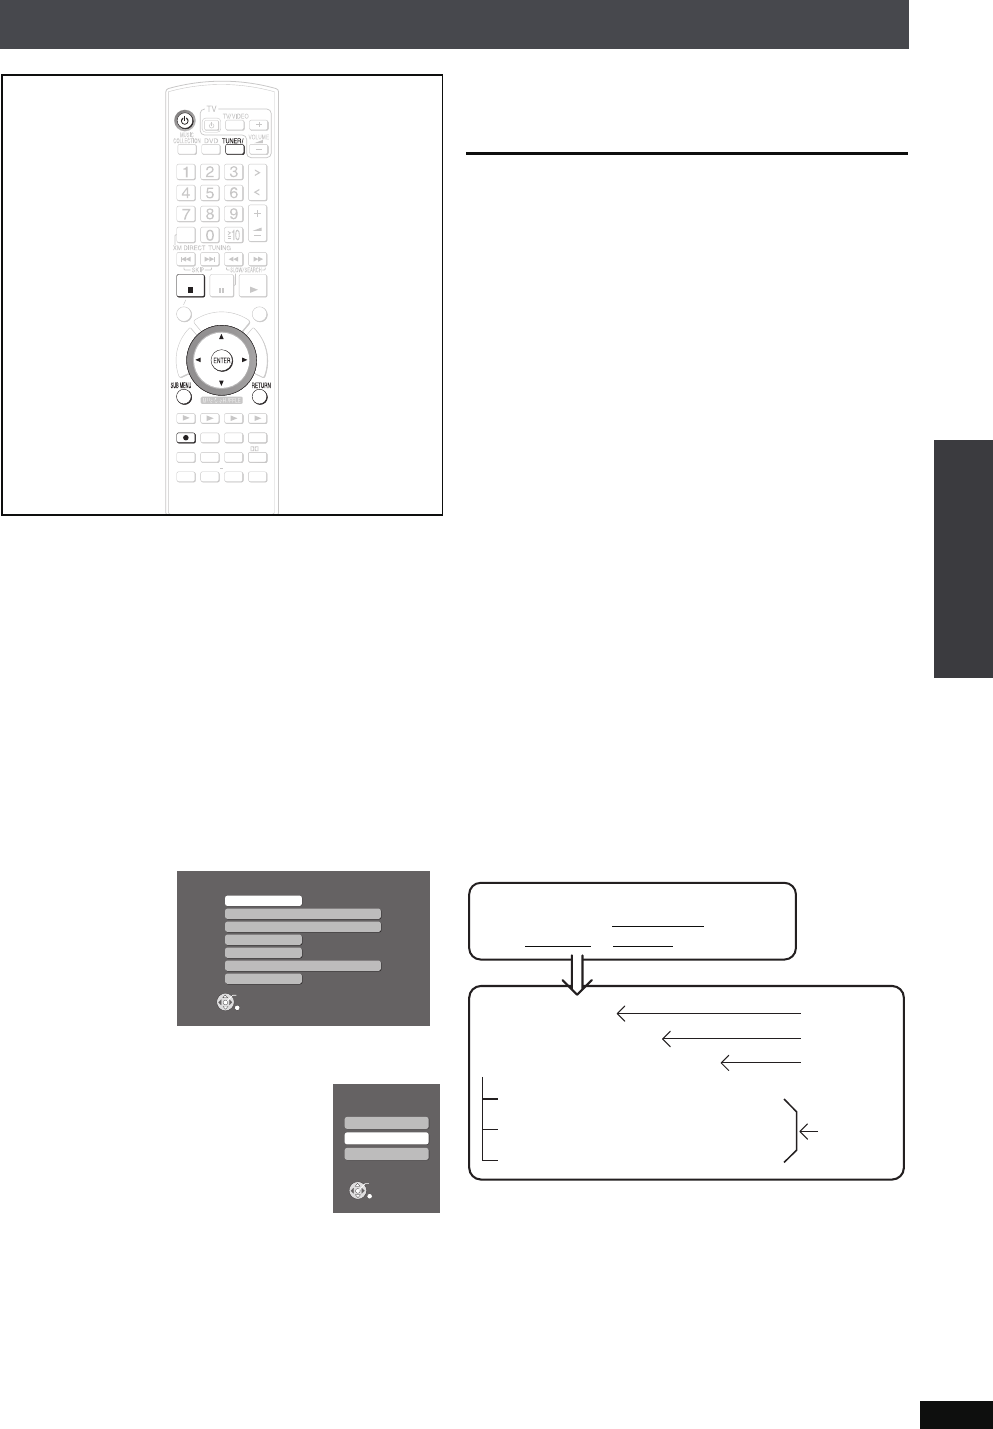
2 Press [SUB MENU]
.
3 Press [34]
to
select “Auto Track Divide”
and press
[ENTER].
4 Press [34] to select the method of division and
press
[ENTER]
.
Auto 5 Minutes:
Tracks are divided into 5-minute
recordings.
Auto 10 Minutes:Tracks are divided into 10-minute
recordings.
Manual: Divide tracks at the point you like. (For
division methods, see right.)
5 Press [RETURN].
6 Press [¥ HDD REC].
Recording starts.
Titles are automatically added (➜ below).
To change the recording mode before recording
Follow steps 1 to 3 of “Setting the recording mode/recording
method” on page 34. (The recording method cannot be
selected.)
To stop recording
Press [∫].
To pause recording
Press [¥ HDD REC].
≥To continue recording, press [¥ HDD REC] once more
(The track is divided).
To manually divide tracks
While recording, press [ENTER] at the point where you want to
divide the track.
≥When dividing tracks, create at least a 2-second space
between two tracks. (Tracks divided with less than 2-second
of space cannot be divided.)
≥Tracks recorded in “Manual” mode that exceed 60 minutes
will automatically be divided.
To return to the previous screen
Press [RETURN].
[Note]
≥Radio broadcasts cannot be recorded by pressing
[¥ CD 1HDD] on the main unit. Use [¥ HDD REC] on the
remote control.
≥The audio may sound broken up in the space between tracks
recorded to the HDD.
[Tips]
About titles for recordings from the radio
All tracks created from the start to the end of the recording are
treated as a single playlist (recorded data). Each track
recorded from the radio is given title as shown below.
How titles are added (example)
≥When audio is recorded with the scheduled timer function
(➜ page 84), recording will start slightly earlier than the set
time to prevent cutting off the beginning of the
recording.Therefore, the playlist will be given a name that is
one minute earlier than the set recording time.
≥After recording is complete, you can manually change the
title or you can search and obtain title information from the
Gracenote database (➜ page 72).
ޓ
D
I
R
E
C
T
N
A
V
I
G
A
T
O
R
O
N
E
T
O
U
C
H
P
L
A
Y
S
T
A
R
T
ޓ
ޓ
ޓ
T
O
P
M
E
N
U
HDD
BAND
FUNCTIONS
MENU PLAYLIST
SELECT
VOLUME
FAVORITE
PLAYMODE
HDDREC
ENERGETIC RELAXINGMELLOW
MUTINGSETUP
SELECT
SOUND
SLEEP
FL DISPLAY
VS
2
ND
EMOTIONAL
REG
SELECT
PLAYPAU SESTOP
CH SELECT
CANCEL
BAND
HDDREC
STOP
CH SELECT
CANCEL
Audio Mode
Set Preset Channel
Erase Preset Channel
Recording Mode
Auto Track Divide
Auto Memory
Select Frequency Step
Auto(Stereo)
LPCM
100kHz
Auto 10 Minutes
FM Sub Menu
ENTER
RETURN
Auto 5 Minutes
Auto 10 Minutes
Manual
Auto Track Divide
ENTER
Cancel
“*FM87.9(THU)PM09:30_00001_0001”
“*FM87.9(THU)PM09:30_00001_0002”
“*FM87.9(THU)PM09:30_00001_0003”
“*FM Recording”
“FM87.9(THU)PM09:30”
“*FM87.9(THU)PM09:30_00001”
Artist name
Album name
Playlist name
Track
Recording
Radio program
broadcasted in FM87.9 MHz
on Thursday at PM 9:30
name
Recording to HDD
Basic Operations
PTX79P.book Page 37 Monday, April 9, 2007 9:24 AM


