


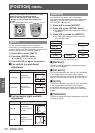
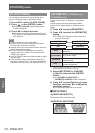

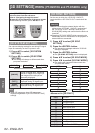

[ADVANCED MENU]
78 - ENGLISH
Settings
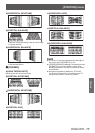
[INPUT RESOLUTION]
You can adjust to achieve an optimal image when
there is a ickering image or smeared outlines.
1) Press
to select [INPUT
RESOLUTION].
2) Press the <ENTER> button.
z
The [INPUT RESOLUTION] screen is
displayed.
3) Press
to select [TOTAL DOTS],
[DISPLAY DOTS], [TOTAL LINES], or
[DISPLAY LINES], and press
to
adjust it.
z
Values corresponding to the input signal are
displayed automatically for each item. Change
the displayed values and adjust to the optimal
point viewing the screen when there is a vertical
banding or missing in the screen.
Note
z
Previously mentioned vertical banding will not occur
with all white signal input.
z
The image may be disrupted while performing the
adjustment, but it is not a malfunction.
z
[INPUT RESOLUTION] can be adjusted only when
a signal is input to the <RGB 1 IN> terminal or the
<RGB 2 IN> terminal.
z
Certain signals may not be adjustable.
[CLAMP POSITION]
You can adjust the optimal point when the black part
of the image is blunt or it has turned green.
1) Press
to select [CLAMP
POSITION].
2) Press
to adjust the level.
z
Adjust the level to a value from [1] to [255].
z
Optimal value of clamp position adjustment
When the black part is blunt:
The point where bluntness of the black part
improves the most is the optimal value.
When the black part is green:
The point where the green part becomes black,
and the bluntness has improved is the optimal
value.
Note
z
[CLAMP POSITION] can be adjusted only when a
signal is input to the <RGB 1 IN> terminal or the
<RGB 2 IN> terminal.
z
Certain signals may not be adjustable.
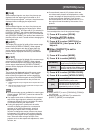
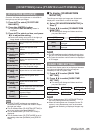
[EDGE BLENDING]
The edge blending function allows multiple projector
images to be seamlessly overlapped by using the
inclination of the brightness at the overlapped area.
1) Press
to select [EDGE
BLENDING].
2) Press
to switch [EDGE
BLENDING].
z
The setting will change as follows each time
you press the button.
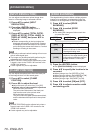
[OFF] [ON] [USER]
[OFF]
Sets the edge blending function to
off.
[ON]
Use the setting value of the internal
distortion of the set for the inclination
of the edge blending area.
[USER]
Use the user-setting value for the
inclination of the edge blending area.
(Conguration/registration requires
separate software. Consult your
dealer.)
3) Press the <ENTER> button.
z
The [EDGE BLENDING] screen is displayed.
4) Press
to specify the location to be
corrected.
z
When joining at top: Set [UPPER] to [ON].
z
When joining at bottom: Set [LOWER] to [ON].
z
When joining at left: Set [LEFT] to [ON].
z
When joining at right: Set [RIGHT] to [ON].
5) Press
to switch [ON]and [OFF].
6) Press
to adjust correction width
and starting point.