[ADVANCED MENU]
ENGLISH - 77
Settings
Select [ADVANCED MENU] from the main
menu, and select the item from the sub-menu.
Refer to “Navigating through the menu”
(
page 61) for the operation of the menu
screen.
z
After selecting the item, press
to set.
[DIGITAL CINEMA REALITY]
You can increase the vertical resolution and enhance
the picture quality by performing the cinema
processing when the PAL (or the SECAM) 576i signal,
the NTSC 480i, 1080/50i, and 1080/60i signals are
input.
1) Press
to select [DIGITAL CINEMA
REALITY].
2) Press
to switch [DIGITAL CINEMA
REALITY].
z
The setting will change as follows each time
you press the button.
[AUTO] [OFF]
[25p FIXED] (when a 576i or 1080/50i signal is input)
[30p FIXED] (when a 480i or 1080/60i signal is input)
[AUTO]
Performs automatic detection and
cinema processing.
(Factory default)
[OFF] Unforced cinema processing.
[25p FIXED]
Forced cinema processing (2:2
pulldown) is performed when a 576i
or 1080/50i signal is input.
[30p FIXED]
Forced cinema processing (2:2
pulldown) is performed when a 480i
or 1080/60i signal is input.
Note
z
In [DIGITAL CINEMA REALITY] mode, the picture
quality will degrade when a signal other than the
2:2 pulldown is set as [25p FIXED] or [30p FIXED].
(Vertical resolution will degrade.)
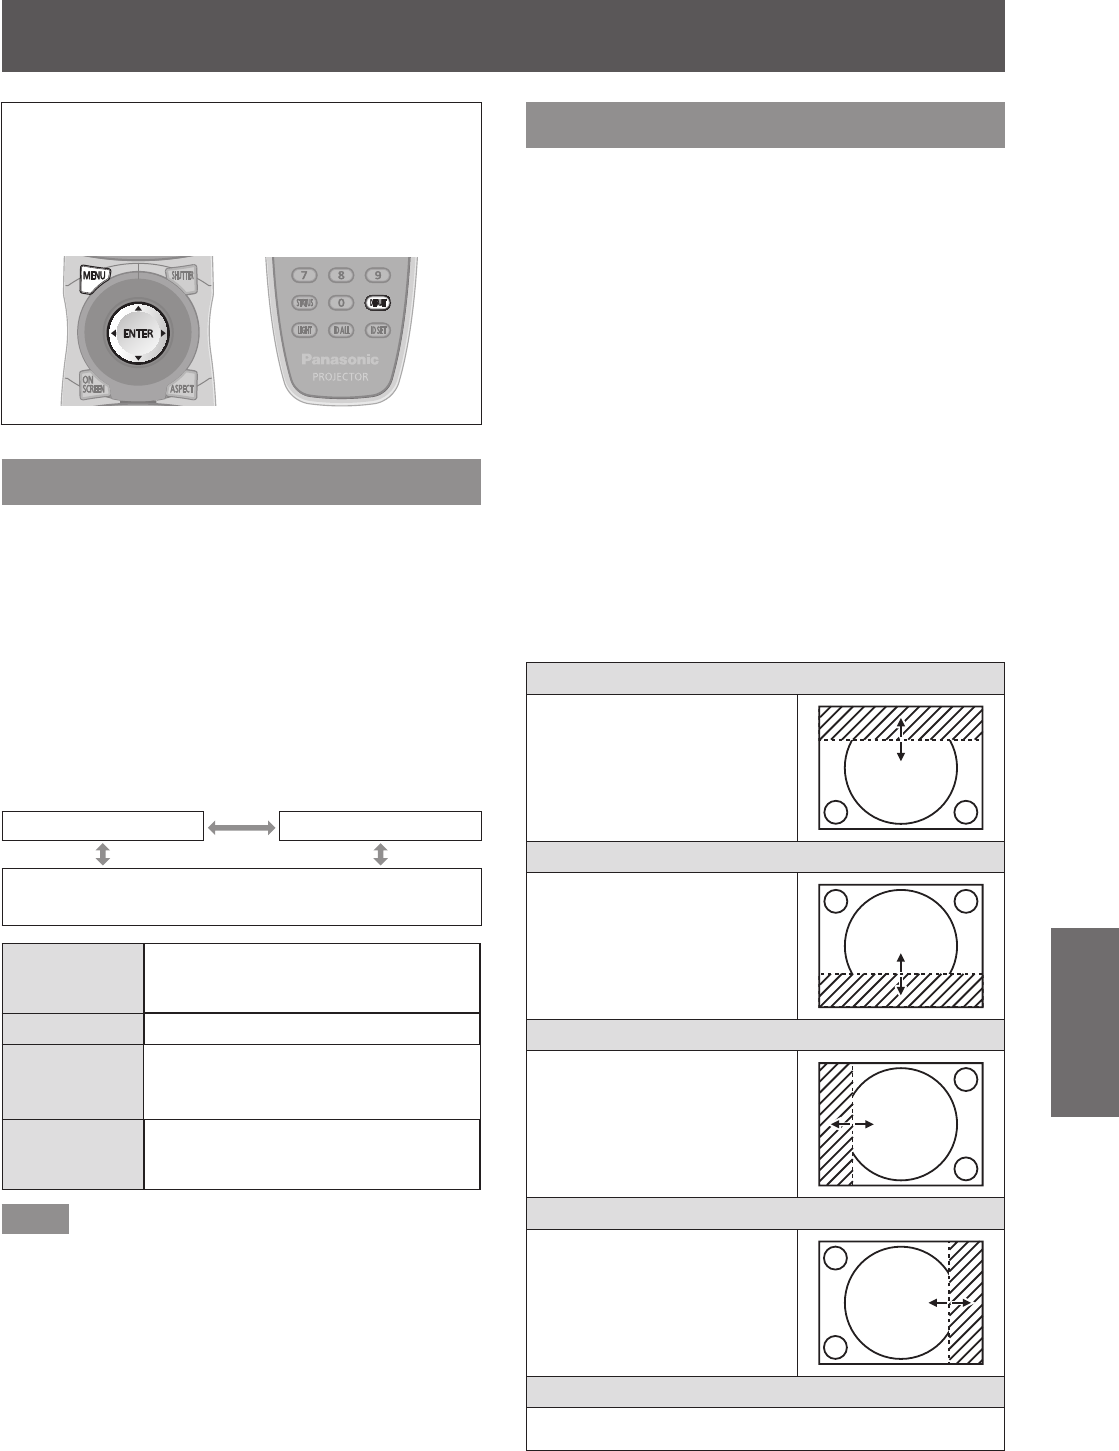
[BLANKING]
The blanking width is adjusted when there are noise
at the edge of the screen or the image is slightly
running out from the screen when an image from the
VCR or other devices are projected.
1) Press
to select [BLANKING].
2) Press the <ENTER> button.
z
The [BLANKING] adjustment screen is
displayed.
3) Press
to select the adjustment
item.
4) Press
to adjust the blanking.
z
Changes within the following range.
For PT-DZ21KU
Left to right: 0 to 959, Top to bottom: 0 to 599
For PT-DS20KU
Left to right: 0 to 699, Top to bottom: 0 to 524
For PT-DW17KU
Left to right: 0 to 682, Top to bottom: 0 to 383
When correcting blanking at the top of the screen [UPPER]
Press
to move the
blanking zone upward.
Press
to move the
blanking zone downward.
When correcting blanking at the bottom of the screen [LOWER]
Press
to move the
blanking zone upward.
Press
to move the
blanking zone downward.
When correcting blanking at the left of the screen [LEFT]
Press
to move the
blanking zone to the right.
Press
to move the
blanking zone to the left.
When correcting blanking at the right of the screen [RIGHT]
Press
to move the
blanking zone to the right.
Press
to move the
blanking zone to the left.
For [CUSTOM MASKING]
*1
Set from a PC to perform blanking in any shape.
*1: To use the [CUSTOM MASKING] function, an optional
upgrade kit (Model No.: ET-UK20) is required. To purchase
the product, consult your dealer.
[ADVANCED MENU]


