


60
With the bass level manager, you are given an opportunity to establish a maxi-
mum volume beyond which you do not want your subwoofers to go. If you are
reasonably judicious with your main volume control during listening, you do not
have to perform this adjustment at all. It is provided to give you the option of
imposing an artificially low upper limit on bass transients (explosions, etc.), with-
out affecting the perceived balance of bass at normal volumes.
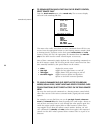
1 ENTER THE BASS LEVEL MANAGER MENU AND CHOOSE
TEST SIGNAL: ON
You have the option of setting the bass level manager volume level arbi-
trarily, without the benefit of listening to a test signal; or by listening to a
low-frequency (bandwidth-limited) pink noise signal through the
subwoofer(s). After experimenting with the bass level manager, you might
want to reset it to its maximum setting (effectively disabling it). This would
be best done without having to endure an extremely loud test signal (e.g.,
test signal: off).
When you choose to use the test signal by changing test signal: from off to
on, the low frequency test signal will be sent to your subwoofer(s) at a
modest volume. Regardless of the previous setting, the initial setting of the
bass level manager when you enter its menu is a low value of 30. This is
done to avoid a sudden, potentially speaker-endangering level of the test
signal being sent to your subwoofer(s).
2 RAISE THE VOLUME OF THIS TEST SIGNAL TO THE LOUDEST LEVEL YOU
ARE LIKELY TO WANT TO HEAR FROM YOUR SUBWOOFERS, BEING
CAREFUL NOT TO OVERDRIVE THEM; SAVE THIS SETTING
This is a potentially tricky area, since you don’t want to limit the perfor-
mance of your subwoofers unnecessarily. At the same time, neither do you
want to overdrive them during the calibration of the system! (One way out:
have your dealer do the calibration, since he or she is more familiar with
the capabilities of the speakers you purchased.) Save the setting by pressing
enter, which also turns off the test signal and resets its next turn-on level to
30. (This last step on the AVP’s part ensures that the test signal always starts
out at a modest volume.)
surround mode defaults The AVP2 also allows you to customize its default configuration for each surround
mode. Although the most accurate reproduction will be achieved by leaving these
adjustments disabled, their inclusion does allow you the option of tailoring the
sound of various surround modes to suit your individual taste. For example, if
you find yourself turning up the rear speakers whenever you watch a movie, and
then turning them back down to their normal, calibrated setting for music, you
may want to set the defaults for Dolby Digital (e.g. AC-3) and stereo surround ac-
cordingly, to automate those changes.
before you use
surround mode defaults
We recommend living with the AVP2 and using it in its calibrated
settings for a while before changing these defaults. There is an ad-
justment period people go through when their system is upgraded,
during which it is difficult to make an accurate decision about
sound quality. The best-known example of this is when someone
first owns a high quality subwoofer: the tendency is to turn it up
too loud initially (so one can “hear it”); as time goes by, most