


49
(S/PDIF) digital, and a pair of analog outputs for the occasional old disc that has
only analog soundtracks. (This would be a pretty old disc, but they do exist.…) In
this extreme case, you would need three sets of connections. We’ll come back to
laserdisc later—for now, let’s stick with your CD transport, with its single connec-
tion.
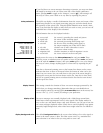
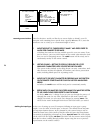
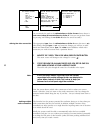
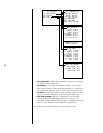
1 MOVE TO THE “AUDIO CONNECTORS:” ITEM IN THE MENU, PRESS THE
ENTER BUTTON, AND USE THE VOLUME ± BUTTONS TO INFORM THE
SYSTEM HOW MANY CONNECTIONS ARE NEEDED; PRESS ENTER AGAIN
TO SAVE THE CHANGE
As you work with the menu system a bit, the habit of pressing
enter to
work with an item and then pressing it again to save your work becomes
second nature.
defining input connectors Once the AVP2 knows how many connections you need for this particular com-
ponent, it updates its menu to provide for defining those connections. With only
a single digital connection (for your CD transport), this is pretty simple. Just tell
the system which digital input connector you used when you hooked up the CD
transport.
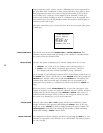
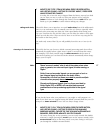
1 MOVE TO THE “1:” ITEM IN THE MENU, PRESS THE ENTER BUTTON
Since there are actually two things the system needs to know, and they
would not have fit on a single line without confusion, you will be taken to
the next-lower screen, which shows two items: audio and conn (short for
“connector”).
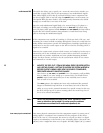
CD-AUDIO INPUT 1
AUDIO: DIGITAL
CONN: DIGITAL 1
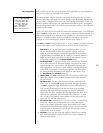
2 PRESS ENTER AGAIN TO WORK WITH “AUDIO:” AND CYCLE THROUGH
YOUR OPTIONS WITH THE VOLUME BUTTONS; CHOOSE DIGITAL AND
PRESS ENTER TO SAVE
Once again, this is the factory default setting. Were you setting up a CD
player that had only analog outputs, though, you would want to change this
to analog and use a set of analog connectors on the AVP2 instead.
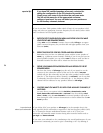
3 MOVE TO “CONN:” WITH THE VOLUME BUTTONS, PRESS ENTER TO WORK
WITH IT, AND CYCLE THROUGH THE LIST OF CONNECTORS UNTIL YOU
SEE THE ONE YOU USED; PRESS ENTER TO SAVE THIS SETTING, AND
MENU TO RETURN TO THE PREVIOUS/HIGHER MENU
As mentioned during the Quick Start for CD, you can connect any source
component to any appropriate connector, and then simply tell the system
what you have done. It is helpful to have written down what components
are connected where during initial hookup, so you don’t have to try to peer
around the back of the system with a flashlight later. A form for this pur-
pose is included at the back of this manual. (Use a pencil, in case some-
thing changes in the future.)
example: setting up
a laserdisc player
As mentioned earlier, a laserdisc player has several more connections that must
be accommodated than does a simple CD transport. We will run through these
additional settings next, without repeating the sections that remain the same.